What is kusudama and how to make magic balls?

Many people remember the story of a Japanese girl and thousands of origami cranes. But not everyone knows that in Japan, along with the art of origami, there is also the art of creating volumetric modules - kusudama balls.
What it is?
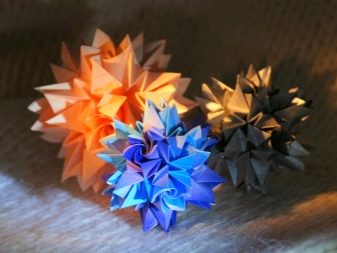
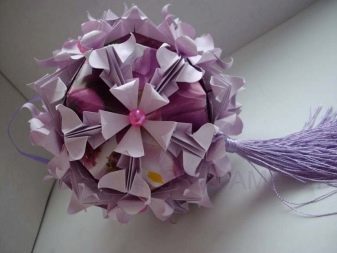
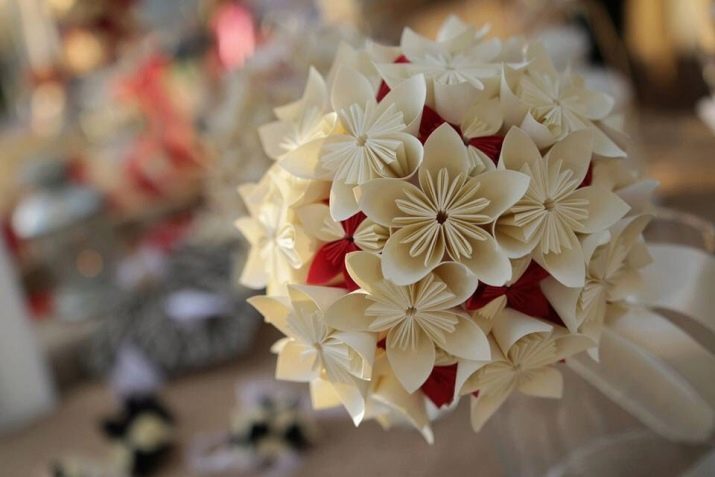
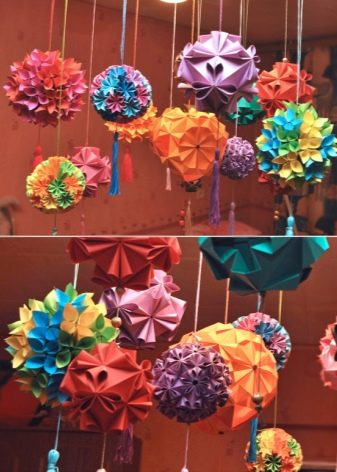
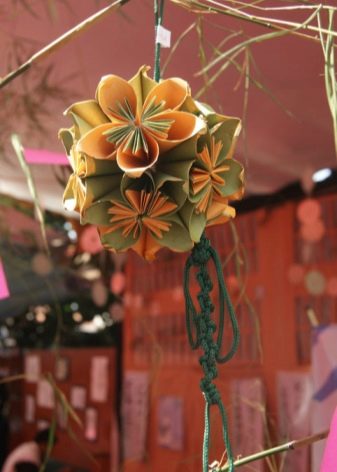
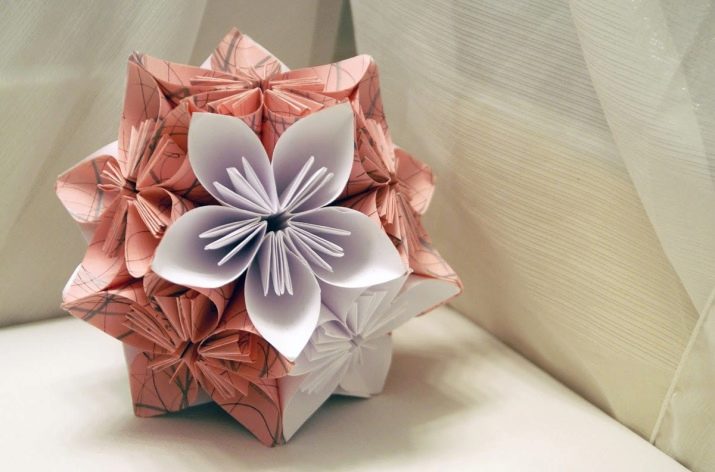
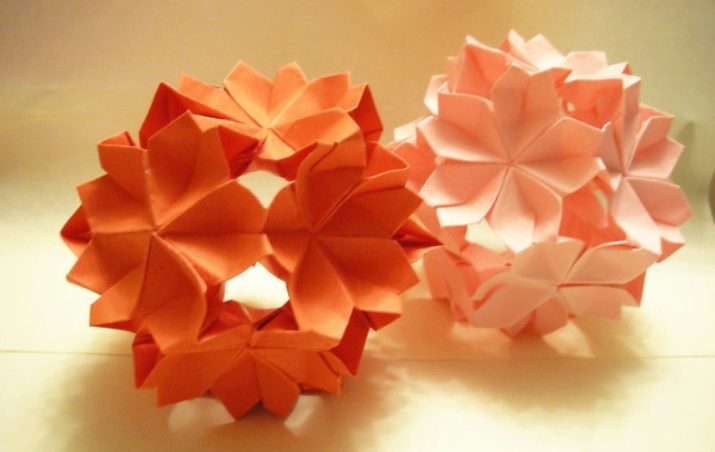
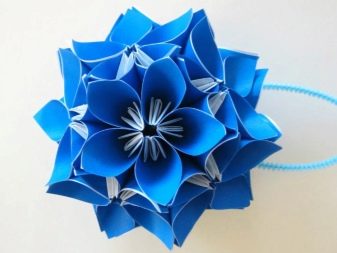
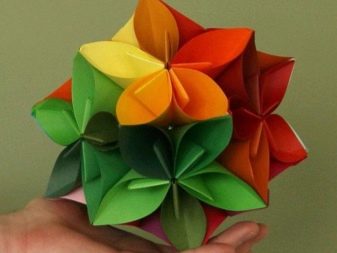
Kusudama is a paper model. It is a spherical volumetric model assembled from numerous identical modules. Each module is a volumetric paper craft made using origami technique. Most often, these modules are made in the form of any flowers and put together in a special way, they look like a large, beautiful and original flower ball.

Regular and irregular polyhedra are the basis of this product.
An example of the simplest regular polyhedron is a cube. In the technique of volumetric modeling, modules are assembled together by embedding elements into each other, but usually, when making kusudam, modules are glued together or stitched together.
This origami technique is not very difficult, therefore it is accessible and interesting for both children and adults. For adults, especially in old age, this art grants fine motor training, prevention of arthritis and arthrosis, and for children whose fine motor skills of the hands have not yet been formed, such work with paper is useful in that it trains naughty children's fingers, forms new motor skills and abilities, and develops small muscles of the hands. It also develops such qualities in a child as perseverance, accuracy, diligence and aesthetics.

To create this type of crafts, you will need sheets of paper, best of all colored double-sided, glue, a ruler, paper clips, scissors. For decoration you need threads, beads, cords, braid.
History
The very meaning of the word "kusudama" in Japanese comes from the merger of two words - "kusuri" (medicine) and "tama" (ball) and means "medicine ball". This art came from ancient times, when such balls not only decorated homes, but also filled them with positive energy and pleasant smells., since such balls were stuffed with dried medicinal herbs, incense and dried flower petals.
Paper was brought to Japan from China in the 7th century AD. e., and since it was a very expensive material, it was used in religious services. At first, small boxes were made from it and filled with pieces of fish and vegetables. These boxes - sanbo - were used for sacrifice during rituals.
During Shinto religious rituals, the worship of the sun took place, and the kusudams symbolized our luminary. To do this, they were collected in huge balls of red paper carnations, filled with incense, dried herbs and flower petals and placed in the four corners of the temple premises.
Subsequently, kusudams became a decoration of premises, decoration for festive events and a beautiful exquisite gift made by hand.
Initially, the parts of the kusudama were not glued, but sewn together. These methods of joining parts were not recognized by origami, where figures are created without the use of glue, thread and scissors. But gradually kusudama began to be considered a special section of modular origami, and with the development of glueless technology, it became such.
Overview of the main types
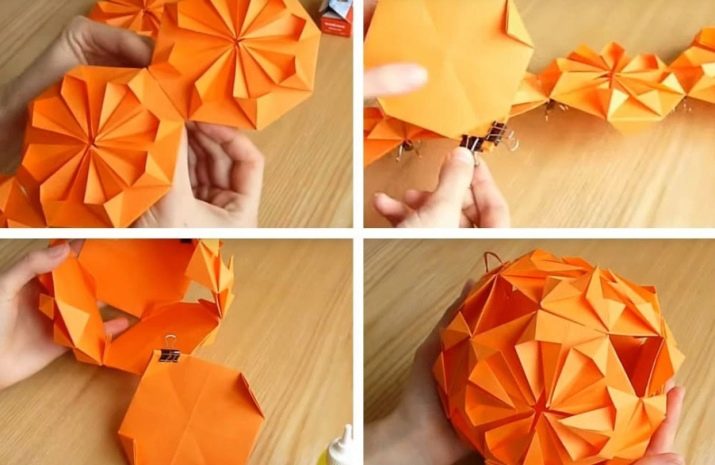
The process of making any kind of kusudam can be roughly divided into 3 stages.
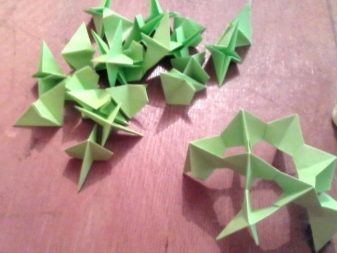
- Neatly folding a sheet of paper into the design of a flower or figurine-module. Preparation of the required number of modules.
- Assembly - gluing or stitching modules in a specific sequence.
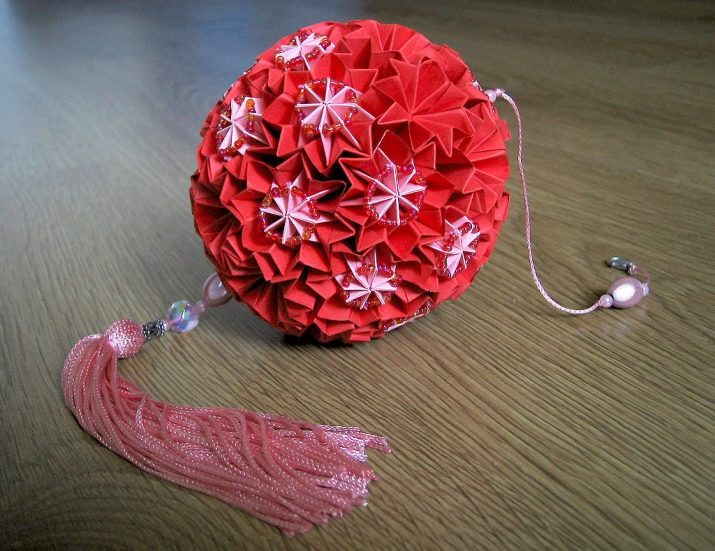
- Decoration of the finished ball. A tassel or a chain of beads is attached below. On top you can add a loop of braid or cord for hanging crafts.
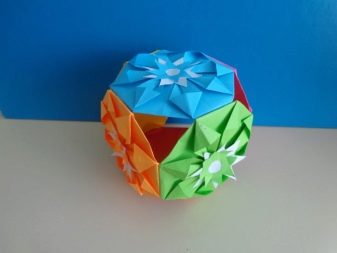
According to the type of modules used - parts of the craft - these balls can be divided into several subspecies.
Classic
This is the first type of kusudam, and in the beginning they were made in the form of a box, not a ball.
It was convenient to put medicinal plants and flower petals in these boxes.
To make them, you need 6 square sheets of paper: four sides of the cube are made of four, and the other two go to the bottom and lid. The modules of this stylized ball are not glued on all sides and form triangular holes on all sides., which helps the smell of herbs and flowers to penetrate the room without hindrance. The bottom is flat and rather large, it is easy to pour petals and herbs on it.
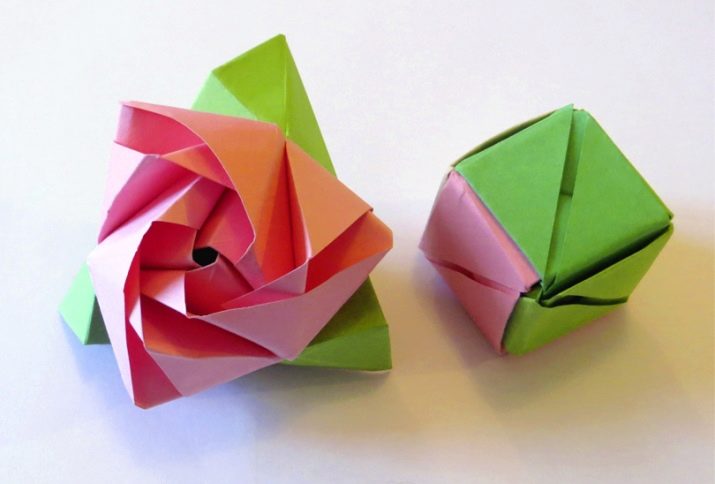
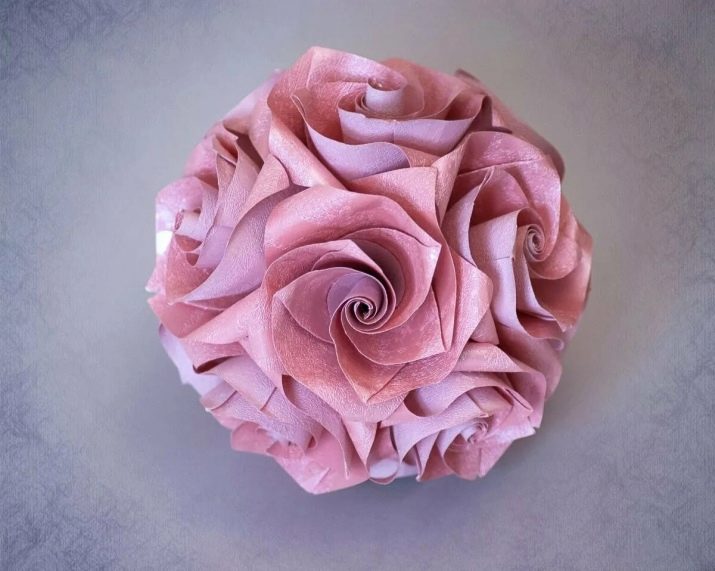
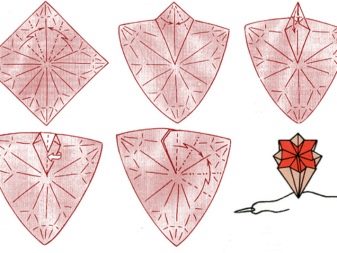
Roses
The basis of this composition is made up of modules made in the form of roses. They are simple - rose modules, stylized and modified squares of the classic kusudama - and more complex: from a large number of elements, made according to complex multi-pass patterns and similar to bouquets of roses.
Carnation
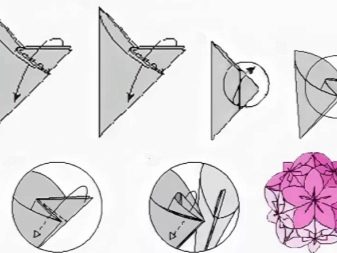
The kusudama-carnation is also called the kusudama-superball. It is made of 30-40 color modules, stitching them together to form a three-dimensional figure. Each flower is folded from a square sheet of paper.
- First, fold lines are made, along which they will then collect the flower. To do this, a sheet of paper is bent in different directions: the square is folded in half, vertically and horizontally, then the folds are made diagonally.
- The square is folded in half, bending it diagonally. The resulting right-angled triangle is folded in half again, joining the sharp corners together. You should end up with an isosceles right-angled triangle with a 90-degree apex and two other angles at the base, each with a 45-degree acute angle.
- A rhombus is formed from the triangles, the corners of which are bent from bottom to top.When all the edges and corners of the layout have been worked out, the workpiece is unrolled, turned over and they begin to collect the flower from the other side, carefully wrapping the edges and corners inward.
- A carnation can be made using sheets of the same color, or you can collect a multi-colored flower. All parts are sewn together and secured with thread.
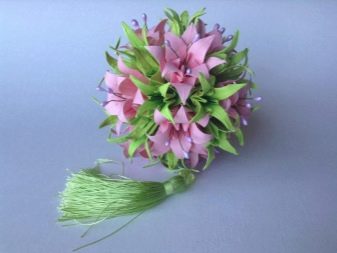
Lilies
This type of kusudama is sometimes called iris. Such a ball consists of lily flowers. For their manufacture, square pieces of paper 8 by 8 cm are suitable. You can use vouchers for notes. Each flower is collected from 3 elements. There are 36 elements in total: 3 for each flower.
- The petals are made according to the same scheme, and the third element - the sepal - is folded at the beginning in the same way, but at the end of the process one more step is added, which gives the figure a more open appearance. We wind the petals to shape the lily on a pencil.
- Collect the flower by folding each of the 3 parts into each other so that the petals are staggered and do not overlap.
- The resulting flowers can be supplemented with stamens, decorate the middle and collect with a bead. Such a ball is glued together, placing flowers in a circle of 6 pieces, sewn in the same way, or simply beautifully assembled on a string.
As in nature there is a wide variety of shapes and colors of lilies, so in the origami technique, three variations of this wonderful flower are known.
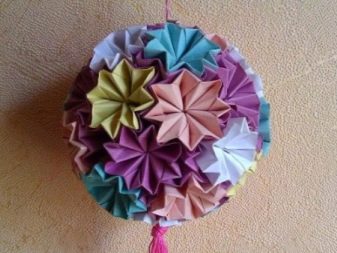
Simple flowers
A simple flower using the kusudama technique is also not so simple. Although it looks like a complete figure, however, it consists of six elements - petals. But making them is quite simple, even a child can cope with this on his own. Usually, this manufacturing scheme is used for creativity in kindergarten, in elementary school in labor lessons. Each petal is folded from a square sheet of paper, then a flower is glued from 6 petals, and a ball is assembled from 12 flower modules. It is considered the easiest to perform.
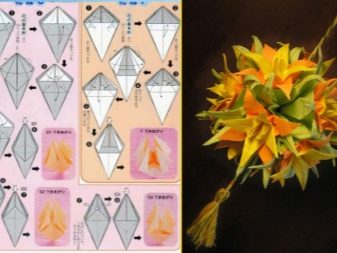
Electra
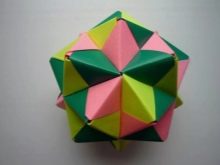
Kusudama Electra can be safely attributed to volumetric modeling products. Its elements are usually assembled by nesting the elements of one module into another. The sharp corner of the first element is inserted into the specially bent insert of the second. Also, its advantage, along with a bizarre look, is that, on its basis, you can model new interesting shapes, slightly changing the angle and shape of folding the sheet.
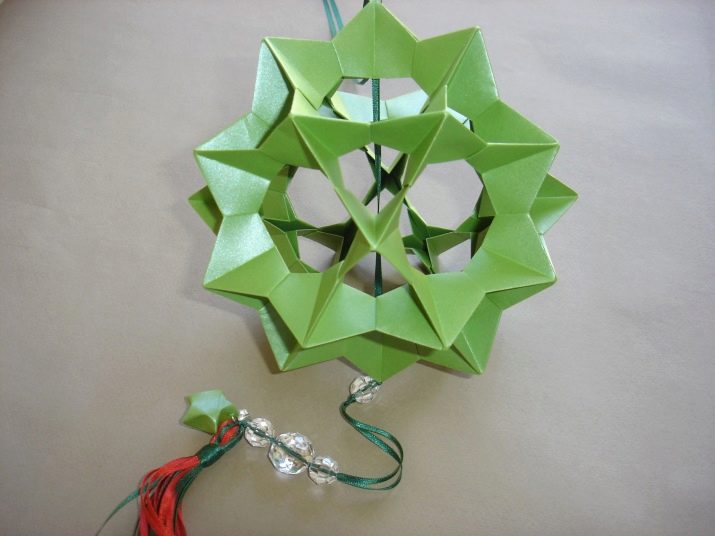
To make it, you need 30 squares measuring 9 by 9 centimeters. You can make a larger ball using larger squares. This craft looks like a Christmas toy due to the fact that its edges look like large openwork stylized flowers.

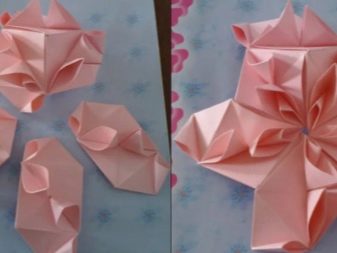
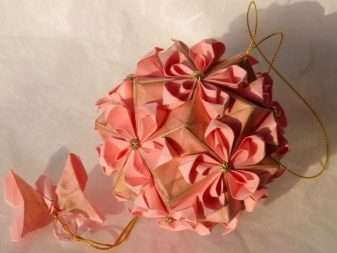
Sakura
Several types of flower balls are hidden under this name. Some of them are assembled from parts of simple colors. Only the flowers are glued together with the tips of the petals, which creates the effect of an openwork ball.
There is a variety of this flower, it is called "Sakura Kiss". This is the author's development of the master from Russia Tatyana Vysochina. This craft is very graceful, airy and attractive. Although it takes a lot of work to get it done, the result is worth the effort. The modules are collected in five-petal inflorescences and three-flower pyramids.
It is better to assemble them right away, since they are easily deployed during the assembly process. But when assembled, the ball is strong enough and does not require additional gluing.
Manufacturing methods
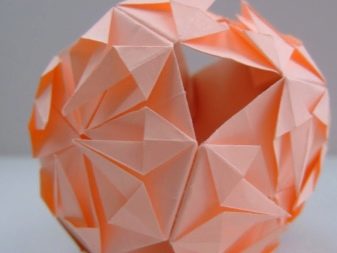
Openwork ball
We suggest you make a magic modular ball from elements of different colors. We present a master class with a description and assembly diagrams step by step.
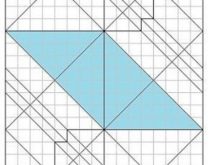
- A strip of the first color measuring 9 by 4.5 centimeters must be bent in half, connecting the short sides of the rectangle. Unbend it.
- Bend the left half up diagonally in the shape of a triangle. Bend the right half down diagonally in the shape of a triangle. We got two right-angled isosceles triangles. The triangle on the left has a right angle at the top, the triangle on the right has a right angle at the bottom.Both triangles are folded at their base.
- At the left triangle, bend the sharp upper left corner. Bend it down to another sharp corner. At the right triangle, raise and bend the lower right acute corner to the other upper acute corner. You should get a rhombus consisting of two isosceles right-angled triangles with one common base going in the middle from top to bottom.
- At the left triangle, you need to bend up the lower corner in the middle of the triangle. At the right triangle, lower the upper corner down in the middle of the triangle.
- The rhombus must be bent in half along a horizontal line to form an isosceles right-angled triangle with apex - a right angle at the top. Expand the workpiece.
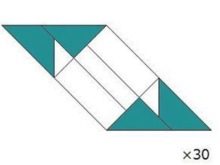
- For the second blank, you need to take a strip of a different color. Bend it in half. Move it from the edge by 7 mm and bend it in half again. Fold one side to the middle with an accordion. Fold the other side with an accordion in the other direction.
- The last folds on the accordion on both sides do not need to be done, there should remain projections directed by the open side to both sides. Fold the lower left corner on the left ledge to the very fold. Fold the upper right corner down on the right ledge, also in the shape of a triangle.
- Turn the accordion over and place it on the first piece. It is necessary to reassemble the first workpiece according to the scheme and the intended folds. Fold the first workpiece - a rhombus - into a triangle inward so that the second workpiece-accordion is inside, and glue them in the middle. Prepare 30 of the same modules.
- Glue the two modules together by gluing them near the accordion. From 5 modules, assemble one of the star-shaped faces in the same way. Collect and glue the rest of the faces in stages to make an openwork star ball. Decorate it with a paintbrush and glue the hanger.
This craft can be used as a handmade Christmas toy, to decorate a Christmas tree or a gift to friends.
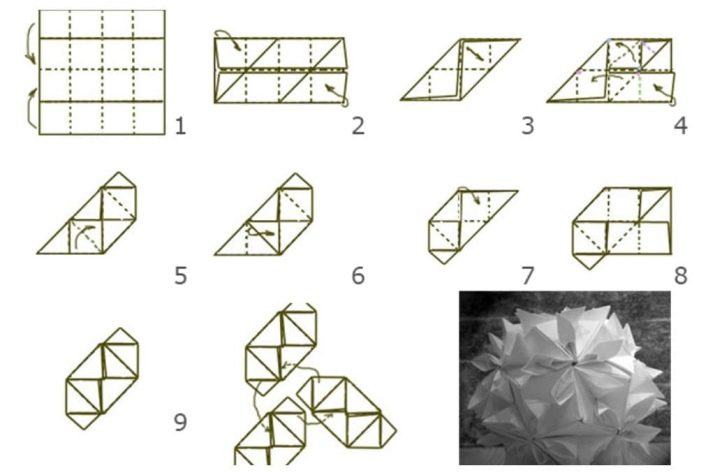
Sonobe
This kusudama rather resembles a cube made of many polyhedrons, similar to pyramids. It is based on 30 simple elements that even a beginner can do. Squares of colored paper with edges from 8 to 10 cm are taken.
Several different colors can be used.
We fold each square into a shape. We make a pyramid of three figures, putting the corner of one figure into the “pocket” of another figure, obtained by folding the part. The five pyramids form the sonobe side. With proper assembly, a neat asterisk should form at the junctions of the pyramids. If the craft is done carefully, then you don't need to glue it - just the last two or three modules must be connected so carefully so that the craft does not crumble.
"Bells"
This is a floral arrangement of ingredients that, at first glance, are difficult to make. In fact, it is not difficult to do it if you follow the instructions clearly and step by step. Each bell flower consists of five modules. In total, you need to make 60 of these petals.
To collect the flower, you may need paper clips to fix it while gluing the petals with PVA glue.
Bell flowers are also glued together for each petal and fixed with paper clips until completely dry. After all the parts are firmly glued together, you can decorate the ball with a brush or a string with beads, simply by pulling it through any holes in the "bell".
Bright kusudama flower
This craft is more likely not like a ball, but like a single opening flower. To make it, you will need scissors, circle templates, glue.
- On colored paper, draw six circles of the same size according to a template. Cut them out carefully.
- To make one flower petal, fold the circle in half, unfold and fold one of the halves in the middle.
- Each quarter of the circle from the inside is coated with glue on one side and glued so that two soft folds are inside the petal.
- All flower petals are made in the same way.
- Collect the flower, step by step gluing together all the petals in the center of the fold.
As a result, you should get a craft that looks like a star and a flower that opens up, which easily lies on the surface, is stable due to the "star" edges and can serve as the basis for more complex crafts using the kusudama technique.
In the next video, you will learn how to create a simple Laconical kusudama ball.


