Newspaper tube tray: manufacturing methods
If a lot of old newspapers have accumulated at home, there is no need to rush to throw them away. Paper can be used to make decorative items or any other practical household items. A tray of newspaper tubes will combine two qualities at once: benefit and decorativeness. We will consider the methods of its manufacture in more detail in this article.
Features of working with tubes
The use of newspaper tubes to make wickerwork is gaining more and more popularity. First of all, this is due to the convenience of working with the material and the minimum investment of time and money. Harvesting wood branches requires certain skills.
The convenience of working with it will depend on the quality of the wood and the correctness of its processing. In addition, the house will require a lot of free space to harvest the required number of branches and prepare them correctly.
Newspaper sheets do not require a lot of time and any special skills - it is quite easy to twist tubes out of them.
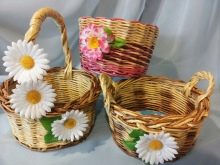
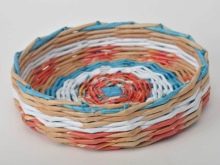
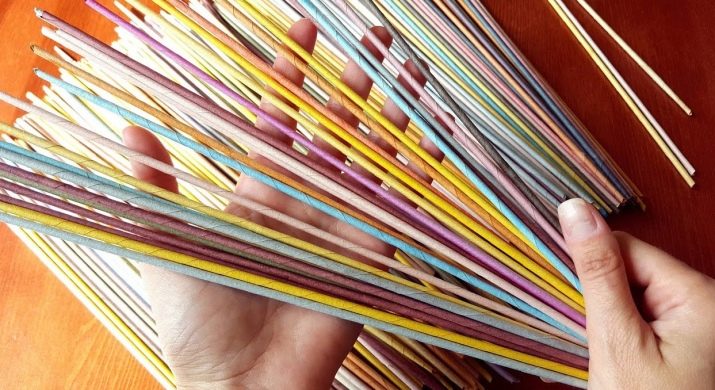
Such material is very convenient for beginner weaving masters. Also, paper gives a wide scope for the implementation of interesting ideas. The tubes can be dyed in different colors.
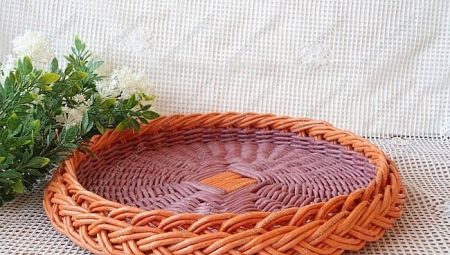
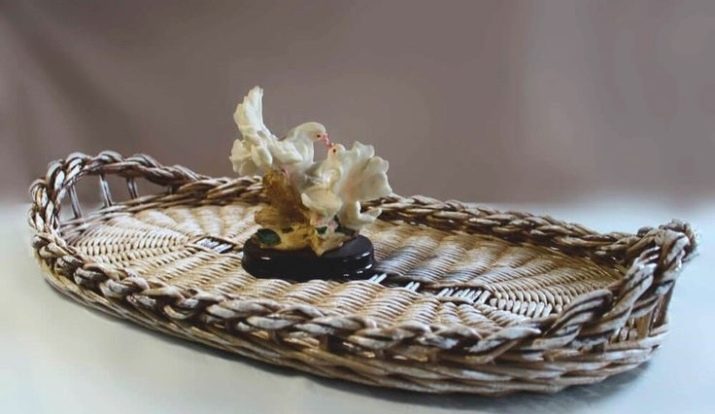
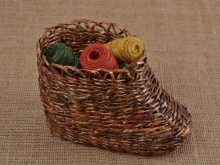
The paper bends easily and therefore it is possible to weave trays of a wide variety of shapes from it: round, oval, openwork and rectangular. Tubes, if necessary, can be extended, making them quite long. Thus, they can be used to make objects of various sizes, be it a large tray or small handles for it.
The main disadvantage of using newspaper tubes is poor strength and water resistance.This minus can be partially corrected by additional processing of the tubes and the finished product with special compounds.
Required tools and materials
Before starting the main work, you need to prepare the workplace and all the necessary materials and tools. First of all, you need a stack of newspapers, while they should not be too old and already yellowed, as well as crumpled and torn. In addition to newspaper sheets, you will need the following:
- stationery knife and scissors;
- plywood or several sheets of thick cardboard for making the bottom;
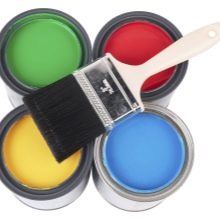
- paints and varnishes;
- adhesives;
- ruler and pencil;
- brushes for coloring rods and applying glue;
- clothespins for fixing the paper vine during weaving;
- large knitting needle with a diameter of 1 to 1.5 mm.
It is best to use PVA construction glue as an adhesive. For the manufacture of newspaper tubes, a universal adhesive is usually used for any type of construction work, for example, Titan glue.
Preparing newspapers
The next step in making a tray will be the preparation of newspaper tubes. Newspaper sheets must be cut into strips. Their length and width will depend on the size of the future tray. You can also divide the newspaper both lengthwise and across. Let's consider one of the examples of making tubes step by step.
- The large sheet is cut along the fold.
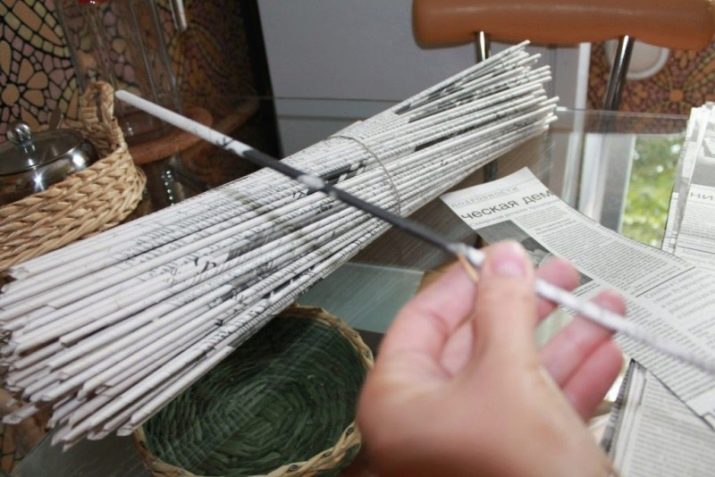
- The resulting paper canvases are cut along the narrow side into equal parts, a little more than 5 cm wide. The required number of strips will also depend on the size of the tray that will be made. It may take about 90 tubes, but it is better to prepare the rods with a margin. In addition, the tubes will be required to make the frame.
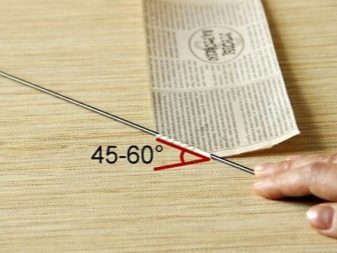
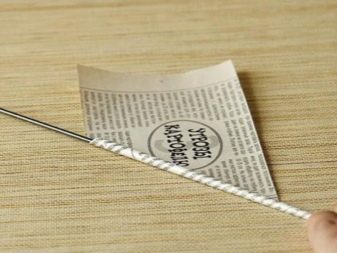
- The edge of one of the long sides of the cut piece of newspaper is coated with adhesive. The needle is placed on the lower corner of the side on which no glue was applied, at a slight angle of 30 degrees, and the newspaper begins to slowly fold.
- A knitting needle is carefully pulled out of the resulting tube. You can once again glue the protruding corner with glue and press it well against the resulting twig.
The same manipulations must be done with other strips of the newspaper. If you need to lengthen the rods, then for this one tube is inserted 1.5 cm into the other from the side where the hole has the largest diameter.
Next, you need to paint the rods and let them dry.
You can use wood stain or acrylic paint as a dye.
Manufacturing workshop
The tray can be weaved only after the base and frame have been prepared. The base can be plywood or cardboard. A piece of the desired shape and size is cut from the material. If cardboard is used as the base, then two identical pieces are required.
On the cut sheet along the perimeter, marks are put with a simple pencil every centimeter. Next, small rods are glued to the marked places, which will serve as a frame. For better adhesion of materials after gluing the tube, it is recommended additionally fix it with clothespins.
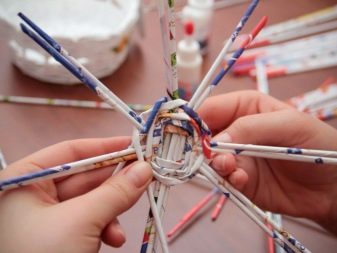
Instead of clothespins, you can use any heavy flat objects as a press. Another option for fixing is to make holes in the base along the edges, thread tubes through them and also attach them to glue. When using a square or rectangular base, remember to attach the tubes to all four corners.
If cardboard was used for the base, then a second piece of the base is glued to the side to which the rods are attached. After the product dries well, the tubes are bent upward and you can start weaving the tray itself. The easiest way is to weave it with a figure eight.
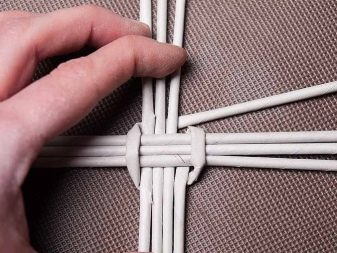
In the process of weaving, you can build up the tubes by threading one into the other. It is best to coat the junction with glue. It is also recommended to use the glue mixture for better fixation of the tubes in the place where each row ends.If you wish, you can combine several weaving techniques at once and use rods of different colors.
The height of the tray walls can also be selected individually, based on considerations of aesthetics of the product's appearance and ease of use. When all the rows are woven, the protruding pieces of the frame must be cut off with scissors, leaving at least 1 cm each, which must be bent and glued to the walls of the tray. It is also recommended to pinch the places of gluing with clothespins for better fixation of materials. Further, it remains only to decorate the finished product and give it strength.
For information on how to make a tray of newspapers, see below.
Registration
The finished product must be given an aesthetic appearance and strength. Although the newspaper tubes were pre-painted, the tray will need to be primed. As a base for the primer mixture, you can use PVA glue or acrylic-based varnish. Both varnish and glue are mixed with ordinary water in equal amounts.
It is more practical to make a primer from varnish, since the PVA-based composition over time begins to turn yellow on the product. The primer mix is applied to the surface of the tray from the inside and outside. Next, the primer must dry, after which the product is varnished. The coating can be either glossy or matte, depending on the selected composition.
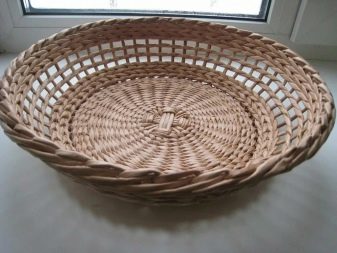

For the topcoat, an acrylic-based composition is suitable, which is applied in two layers. When choosing a product, it is best to start from how the finished product will be used in the end. Coffee and tea trays will be constantly spilled on them.
If it is necessary to give the tray good water-repellent properties, then it is best to apply a varnish for parquet or baths on it.