How to make a beautiful delicate manicure?
Delicate manicure will give the owner elegance, femininity and sophistication. In the article, we will consider how to perform it, what techniques are used for this. And also beautiful ideas for your inspiration will be presented.
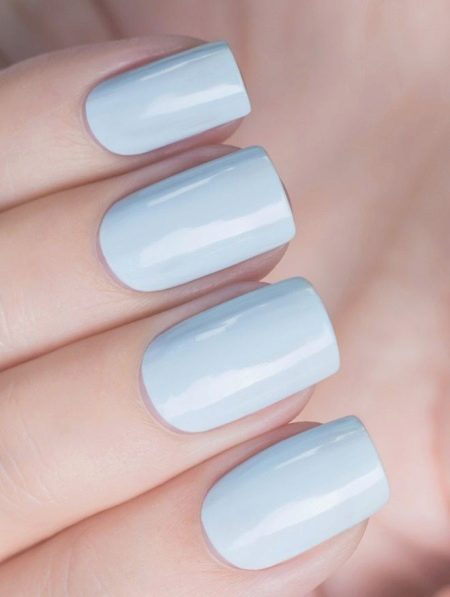
What should be the tone?
A light-colored manicure involves a choice of pastel shades. The most popular delicate nail shades today are:
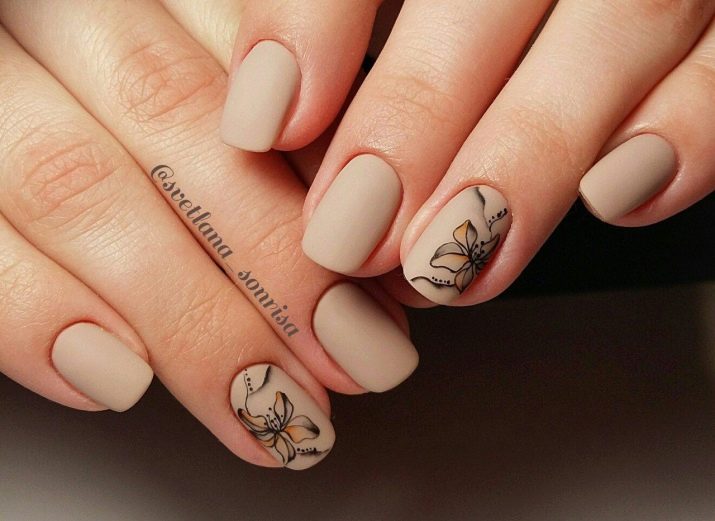
- coffee;
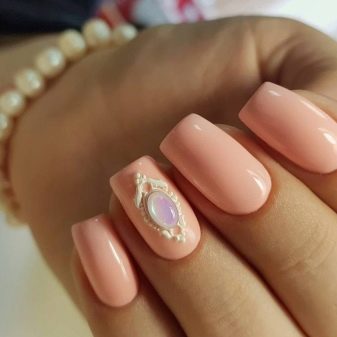
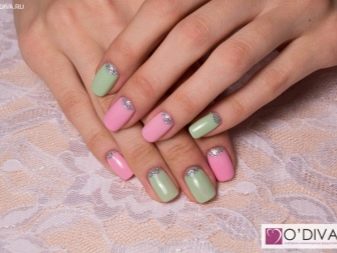
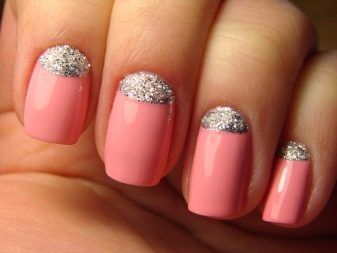
- peach;
- cream;
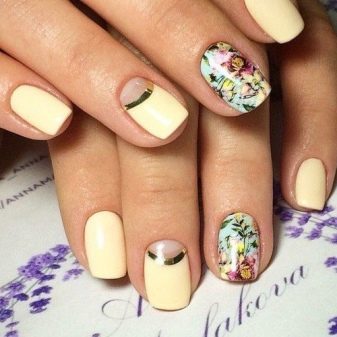
- pale yellow;
- lilac;
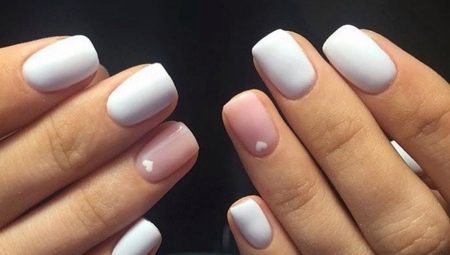
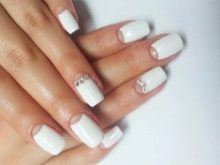
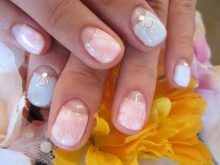
- White;
- light green;
- violet;
- soft blue.
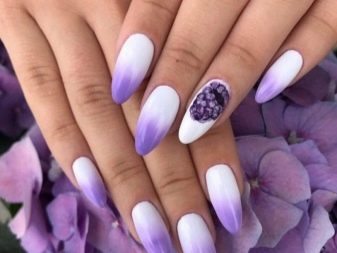
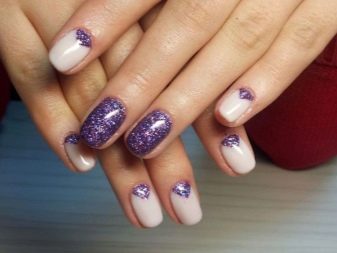
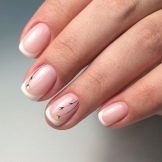
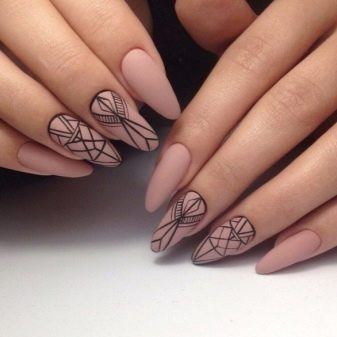
Floral motifs, simple geometric patterns (dots, stripes, cells) are suitable as patterns for such coatings. Delicate nail design is selected taking into account the individual preferences of the girl and the characteristics of her nails.
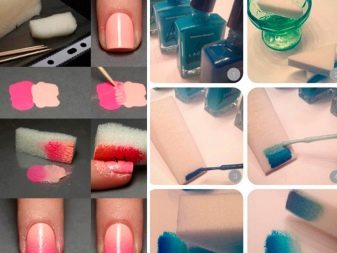
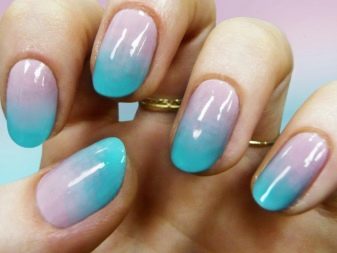
Simple Gradient Technique
Gradient manicure can be done in two ways: with a sponge and a brush. Let's take a closer look at both options.
First, you need to prepare multi-colored varnishes of your favorite colors and a sponge. The latter must be clean and dry. You can use the one that is intended for household needs (washing dishes, wet cleaning, and others). Before starting to create a manicure, the sponge needs to be cut into small pieces. So that the varnish does not paint over the surface of the skin around the nail, more precisely, the cuticle, before starting the process, it is recommended to lubricate the skin in the nail growth zone with PVA glue or seal it with tape. When the manicure is finished, both the tape and the glue can be easily removed.
First, the nail is covered with a base and dried under a UV lamp.2-3 drops of varnish are poured onto the foil and mixed with a toothpick to get a new color. Saturate the sponge with the resulting shade. To avoid bubbles on the nails, it is recommended to make the first prints directly on the foil.
With springy movements, you need to apply the sponge to the surface of the nail. The more times you apply the sponge, the more saturated the color will become. After reaching the required color scheme, the nails are covered with a top and dried in a UV lamp.
There is another way to implement gradient manicure using a sponge.
- A base is applied to the nail plate and thoroughly dried under a UV lamp.
- Apply varnish of two shades to the nail quite thickly and so that the borders of the coatings touch.
- Using a sponge, lightly pressing on it, blot the nail. When the coating becomes more or less evenly distributed over the entire nail, the pressure on the sponge should be reduced. This will prevent the bubbles from puffing up.
- After the previous procedure, you need to wait a little so that the varnish is evenly distributed over the entire nail plate. If bubbles appear, they are pierced with a toothpick.
- Another layer is applied in a similar way. The number of layers directly depends on the quality of the materials used and the desired color scheme.
- At the end of the manicure, the nails are covered with a top and thoroughly dried under a lamp. If it was not possible to create a smooth transition between varnishes of different shades, this place can be decorated with glitter.
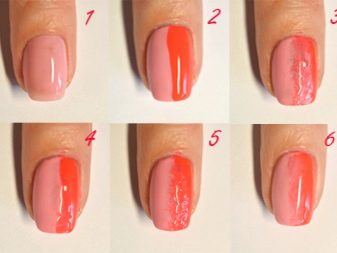

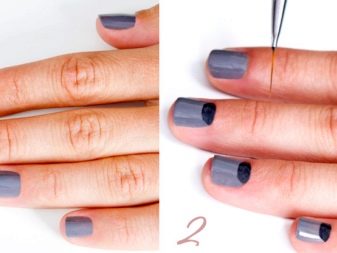
For another version of the gradient, you will need a brush with a rounded or straight end (you can use the tool with which the base is applied.
Two shades of varnish are chosen and applied to the nail in equal proportions in a thin layer so that they are easy to blend. Moisten the brush thoroughly in a degreaser. Make a light stroke from the cuticle to the edge of the nail. The tool should be held almost parallel to the nail. By following this rule, the brush will smooth the surface without damaging the original design. When the intersection of the flowers becomes soft, the marigolds can be dried.
All subsequent layers are applied in the same way (there can be two or three). Use a top as a topcoat. Then dry the coating in the lamp. A more original design can be created using a fan brush.
First, the base is applied to the nails. The lightest of the selected varnish tones should be applied to the nail. You can make one layer or a couple. Dry the cover under the lamp. On a piece of foil, mix several tones of varnish to create a new shade. It will need to be applied to the nail at the transition between varnishes of different colors. The darkest tone of the presented is applied to the tip of the nail. Moisten the brush and move it to the right and left, barely reaching the surface of the nail plate. Repeat the movements from side to side as many times as necessary until the desired effect is achieved.
Dry the nails. Make another layer in exactly the same way. Dry again under the lamp.

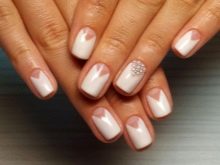
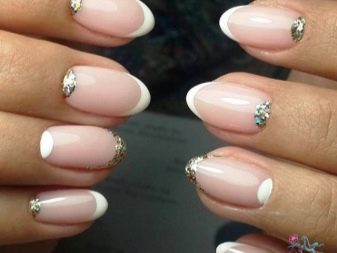
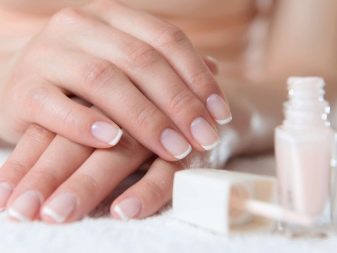
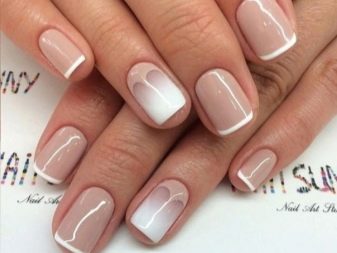
We do lunar and French manicure
Decorating nails using the technique of moon manicure allows you to show the maximum of your creative imagination. To make such a design is within the power of any representative of the fair sex at home.
First you need to remove the previous paintwork from your nails. Carefully use a file to give the nails an oval shape. Degrease the nail plates, apply a base. Dry your nails under the lamp for no more than 45 seconds. Then apply a layer of decorative varnish. It is recommended to apply at least two coats, but before applying the next one, the previous one must be thoroughly dried.
With a brush soaked in varnish of a different tone, it is necessary to paint over the hole in the nail growth zone. Dry well again under the lamp. A fixing agent is applied over the decorative coating and dried. After that, the nail plates are wiped with napkins with alcohol to remove the sticky layer.
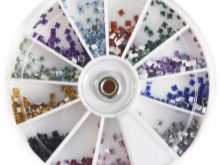
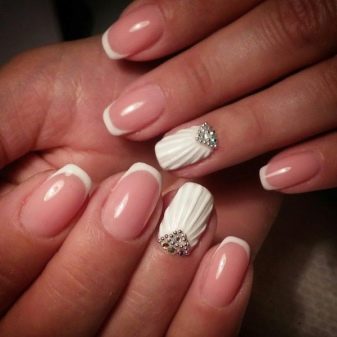
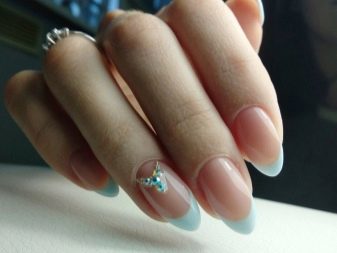
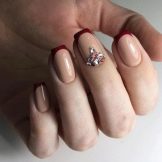
Moon manicure can be decorated with rhinestones. This will be especially true for festive events (for example, for a wedding or for the New Year). Of course, you should not overload the nails with additional elements, so it is enough to decorate one or two nails with pebbles. But if you want to shine, then rhinestones can be placed on each finger. The most successful area is the border of the hole in the nail growth zone. You can also decorate only one nail, then the manicure will look more restrained.
Rhinestones can be placed in a chaotic manner or according to a conceived pattern, you can also vary the size of the stones.
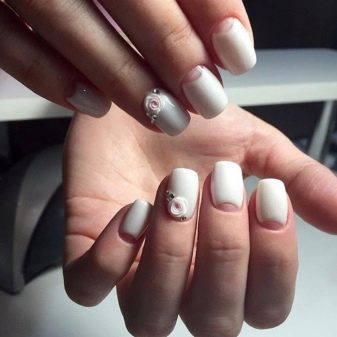
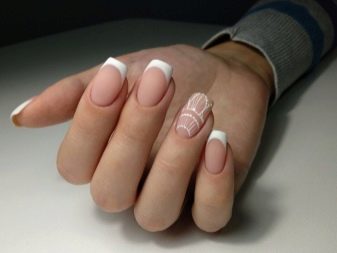
Delicate moon manicure can be decorated with voluminous patterns. This design will look best on long nails, and it will visually reduce short ones even more. If you want to add brightness to a delicate manicure, this can be done with varnishes of saturated colors in the form of small color spots.
Beautiful designs on the nails are also obtained through special stencils, while the design does not require a lot of time.
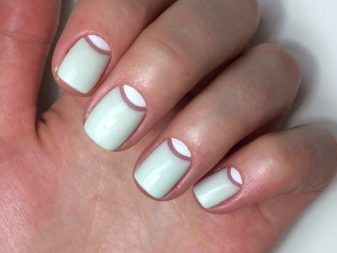
If you want the hole to be colorless, you can not paint over it at all or cover it with transparent varnish. It is recommended to use stencils to create a flat hole.

Lunar manicure in combination with sparkles looks very impressive. It is important to remember that this decor makes the marigolds visually smaller. Based on this, with an average length of nails, it is recommended to make the hole small.
For bold and dynamic women, a moon manicure with a triangle smile is suitable. Such a design can emphasize the uniqueness and self-sufficiency of the hostess.
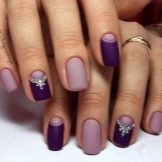
Lunar manicure can be matte. This design will fit very well into everyday life due to its elegance and rigor. You can combine matte and glossy varnishes. To do this, the main part of the nail is made matte, and the hole is shiny.
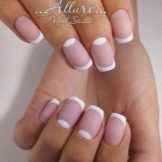
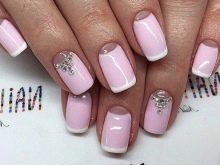
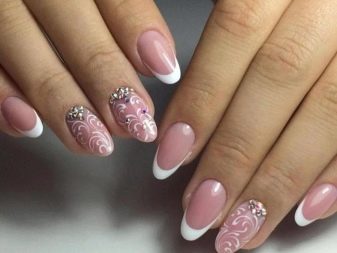
French manicure, just like the moon manicure, can be done at home. To do this, it is important to follow some recommendations:
- the design of the tip of the marigold depends on the central axis of the nail plate;
- the edges of a smile must be identified and marked in advance;
- the width of the edge should not be wide, maximum - 1/3 of the surface of the nail;
- the jacket is done on prepared nails (after a hygienic manicure).
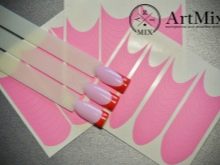
There are several ways to create a French manicure.
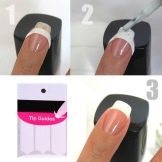
The stencil method has a number of advantages: evenness of a smile, simple technique of execution, small financial costs. The disadvantages of stencils include their material - paper. If the varnish leaks under the stencil (due to insufficiently firm pressing of the paper), the design will be damaged.
Stencils can be one-time and reusable. Their difference lies in the materials: for the former, paper and vinyl are used, for the latter, plastic and metal.
For the embodiment of French manicure at home, paper and vinyl stencils are used. The latter are distinguished by a better degree of clamping. You can make stencil blanks with your own hands using electrical tape.
For a jacket you will need:
- top;
- files with different surfaces;
- stencils;
- orange stick;
- base;
- means for softening and removing cuticles;
- varnishes of several shades.

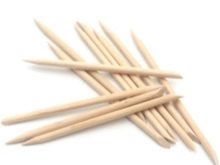
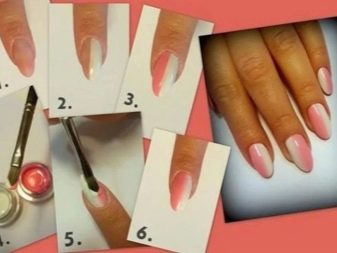
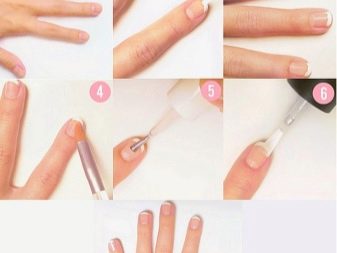
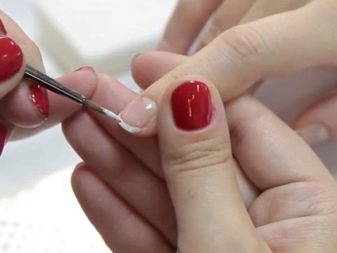
First, you need to file the marigolds so that they all become the same shape and length. Then remove the old decorative coating (if any). Lubricate the cuticle with a softening agent and push back with a stick. Wash your hands, dry thoroughly. After applying the base, the edge of the nail must be sealed, then the varnish will last much longer, and the decorative surface will be perfectly flat. Then a pale pink or almost colorless varnish is applied. Allow nails to dry well.
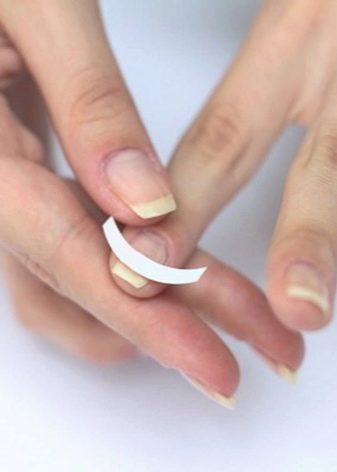
Glue the stencils from the base with tweezers, transfer to the nails, stepping back 2-3 millimeters from the edge, press firmly with a stick so that bubbles do not swell and the stencil does not come off.Most attention should be paid to the lateral bevels of the nails, where varnish leakage is possible. The tip of the nail is covered with a white tone twice, then dried. The stencil is removed, a top is applied to the decorative coating. Then the nails are thoroughly dried.
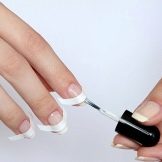
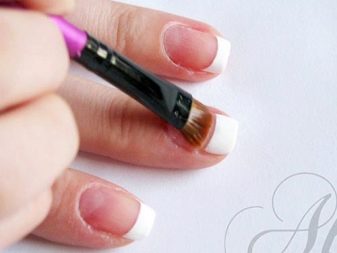
Another way to create a French manicure is by using a paintbrush. The bristles of the toolkit can be nylon, sable, or columnar. The best brushes are considered to be flat, natural, with zero thickness and medium bristles. Such a tool will allow you to make extremely clear lines on the nails. You can replace a flat brush with a semicircular one.
The cuticle must be removed, the nails must be shaped to the desired shape, a base coat must be applied, and then decorative in pastel colors. In order for the smile to turn out to be even, the work with the brush should be carried out intermittently, instantly capturing the change in inclination. Each next stroke overlaps slightly with the previous one. After completing the painting work, a colorless varnish is applied. This technique takes a lot of practice.
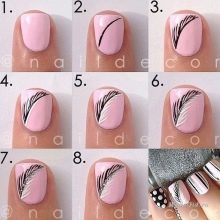
Step-by-step description of the coating with a picture
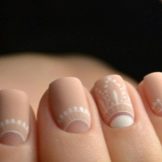
In order to make a delicate manicure with a pattern, you must follow the same steps as in the previous techniques: hygienic manicure, applying a base, drying, applying a decorative coating (the tone is chosen based on individual preferences), and again drying under a UV lamp.
A few drops of varnish are applied to a piece of foil, which is several tones lighter than the main coating. Soak a flat brush in varnish and paint 6 stripes at equal intervals. This decor belongs to the thumb. Then go to the index finger and draw 6 stripes diagonally with the same paint.
Decorate the middle finger entirely with dots. Decorate the little finger with a checkered pattern (first, 3 vertical stripes are applied, and then 5 horizontal ones). On the ring finger, the color creates a rather wide smile at the edge of the nail, then 2 wide vertical stripes are drawn from the cuticle to the smile.
A few drops of a different color are applied to the foil. They form stripes on the ring finger and the edge of the nail. Ears and eyes are drawn with black varnish on the ring finger. This is done closer to the edge of the nail. Then all the marigolds are covered with a finish. After completing the manicure, the nails are wiped with an alcohol solution. This is necessary to remove the remaining varnish from the skin around the marigolds.
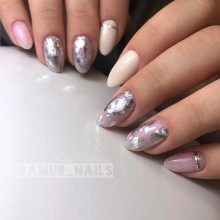
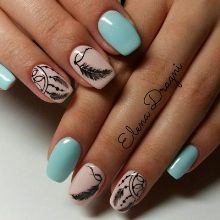
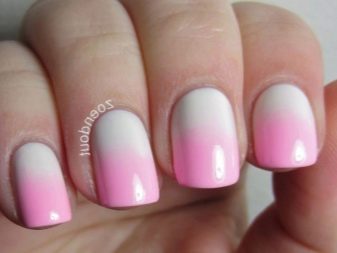
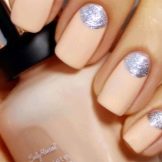
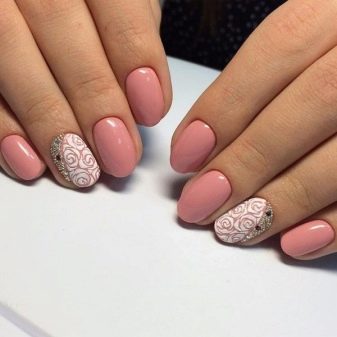
Beautiful ideas for inspiration
A gentle manicure works best on short, almond-shaped nails. For owners of long nails, pastel shades will help emphasize the beauty and grace of the hands.
A glossy monochromatic manicure in Prussian blue looks very noble, especially on fair skin. This design is considered universal, as it will look equally good with evening wear and jeans.
The varnish of this shade attracts the eyes of others very much, therefore, before applying a decorative coating, it is necessary to carefully prepare the marigolds.
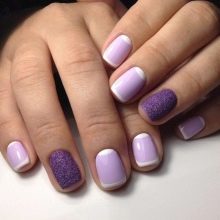
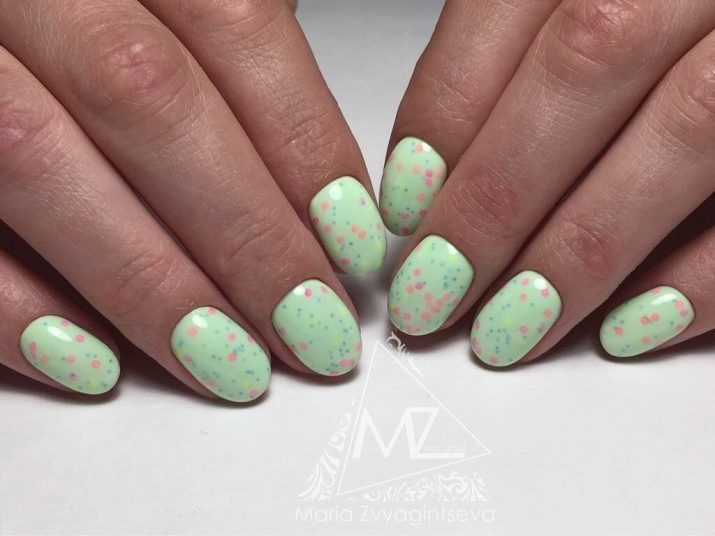
Recently, yoghurt manicure has been gaining popularity. Its distinctive characteristics:
- rounded marigolds;
- pastel colors such as light pink, caramel, sandy, peach;
- solid color or ombre design;
- modest decor with glitter or powder.
It is the dressing, consisting of numerous round grains, that resembles yogurt. The dusting has 4 basic tones: violet, lilac, terracotta, pink. The dominant tone depends on the number of particles of a particular color.
It is easy to create a unique fashionable design with the help of sprinkles. It can be applied to the tip of the nail, decorated using the French technique, or to decorate the entire nail plate. The yoghurt design can be applied all year round.
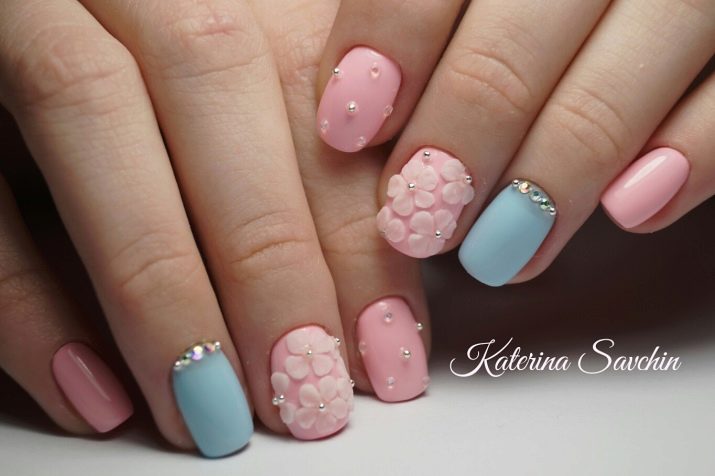
Manicure in pink and blue tones looks very beautiful and festive. Moreover, a blue matte coating is applied only to the ring fingers, the hole of which is decorated with rhinestones of varying size.The rest of the nails are decorated with glossy pink lacquer decorated with metal and transparent beads (index fingers) and molded flowers (middle fingers).
See below for more details.


