Foil manicure: interesting design ideas and technique
Today, girls and women prefer not only to have beautiful and well-groomed nails, but also to use extraordinary manicure solutions to create an original image. Thanks to the development of technologies and the emergence of new materials, nail art surprises with various manicure interpretations, one of which is a design using foil.
Foil types
Foil manicure designs are striking in their variety. Depending on the skill of the stylist, you can get unique images without spending a lot of effort. Manufacturers today offer a large number of materials, including special manicure foil. You should not think that you can use ordinary food, no, it is too thick for these purposes.


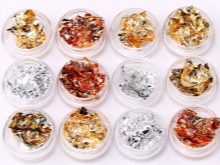
There are several types of foil that differ in their texture.
- Sheet - has a smooth surface, of all the types presented, it is average in thickness. This variety, in turn, is also divided into tear-off and non-tear-off, translatable and non-translatable. As a rule, sheet foil is produced in the form of small rolls or leaves. Manufacturers offer a wide range of colors and variations. Craftsmen often use sheet foil to obtain a cast effect.
- Tear-off. The roll has tear lines for small parts, which saves material by tearing off small pieces. Very handy for mosaic reproduction.
- Inseparable. There are no separation lines. The design is obtained by preliminary cutting of individual elements from foil along the proposed contour or taking into account the shape of the nail plate.
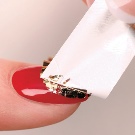
- Translated. In this case, the foil is evenly applied to the nail plate, covered with base varnish and glue, carefully ironed in the place where you want to get the pattern. Next, the base film, on which the thinnest foil layer was applied, is carefully removed. Suitable for beginner craftsmen.
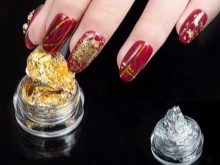
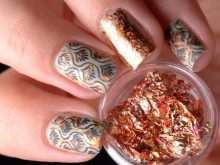
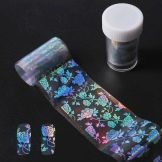
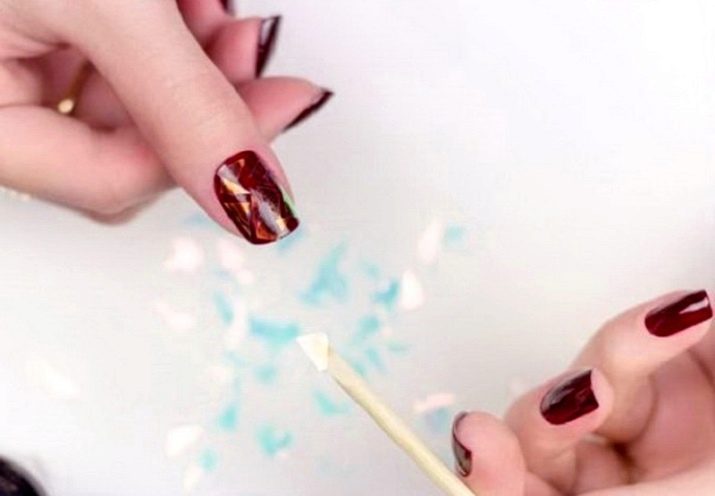
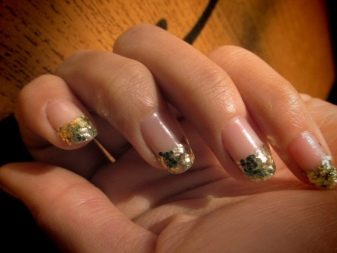
- The crumpled foil is very thin and weightless. It is released in jars in the form of small pieces. The structure is similar to gold leaf. The elements are gently applied with tweezers to the surface of the nail, covered with a special gel or glue according to the picture. This look helps create amazing futuristic patterns with highlights.
- Embossed foil has a textured surface, which distinguishes it from other types. As a rule, manufacturers release it in sheet form or as stickers. Craftsmen use a similar look to design individual marigolds.
- Thermofoil it is unique in that special adhesives are not needed to apply it, it is enough to heat the decor over a lamp or hairdryer and put it in the intended place. Its peculiarity is that when working with it you need skill and experience.

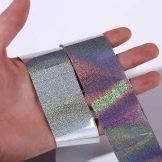
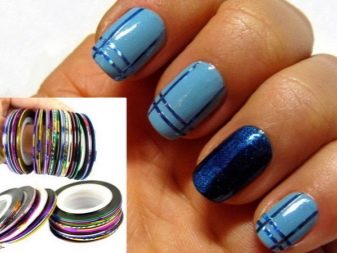
- Stripes. Foil tapes with a width of 2 to 3 mm are produced in rolls. They are also called manicure tape. This decor allows not only to decorate a manicure, but also serves as a stencil in the case of creating a geometric design.
- Charmicons are stickers that are beginner-friendly. Remove the last one and attach the charmikon to the nail - that's all the actions that need to be done for the decor.
As for the decorative features, then the following types of foil can be distinguished, which are available in the assortment of nail shops:
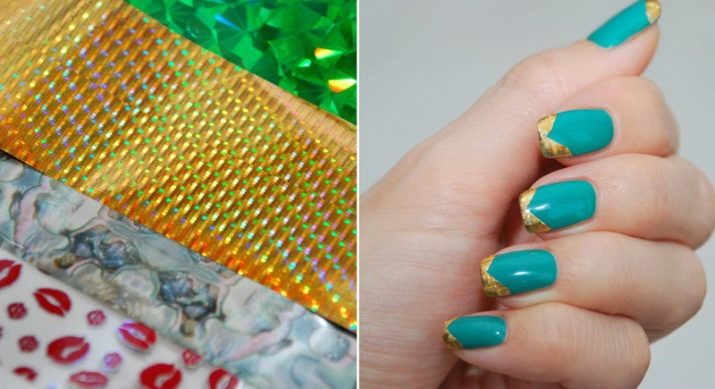
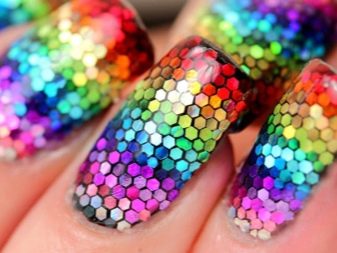
- holographic - shimmers with all the colors of the rainbow;
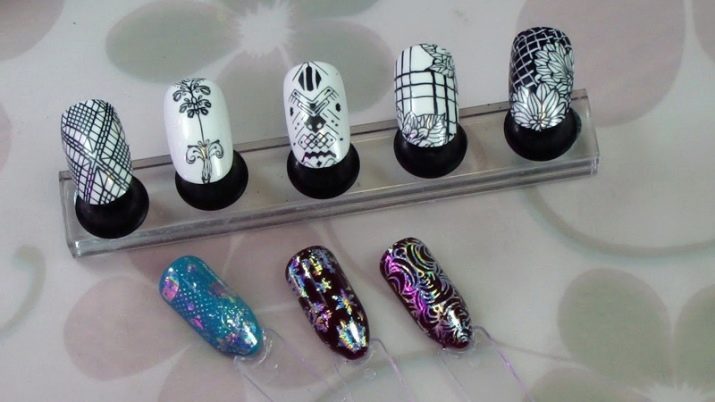
- stencil - useful to facilitate the work of creating a pattern on the nail;
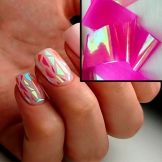
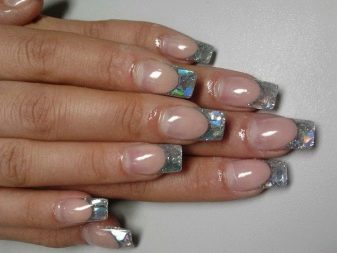
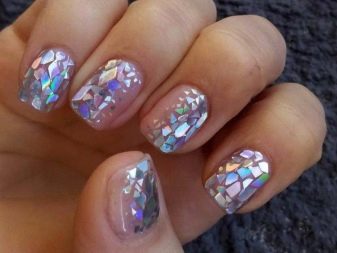
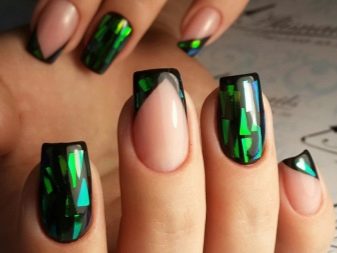
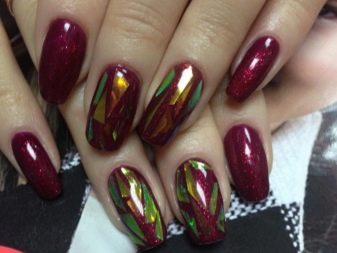
- "Broken glass" is one of the most popular types of decor in recent years;
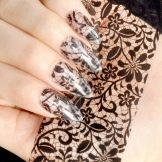
- lace - a transfer type of foil with a lace print.
Peculiarities
The uniqueness of manicure with foil is that it looks great on any length and shape of the nail plate. In addition, a spectacular look that seems complex is actually simple to make and available to play on your own. A wide variety of materials for such a design allows you to experiment and perform inimitable unique manicure options.
The main feature of working with foil is the accuracy and precision of application. Carelessness when working with it will ruin the manicure. Foil is used either to completely cover the nail plate, or as decorative design elements.
To get a rich shade, you need to apply two layers of top coat to the manicure. A special tool is used to fix the foil parts, but it is not required for thermofilm.
The material is characterized by a fairly low cost, which makes it affordable. In addition, it is easy to apply, therefore it is convenient to do it yourself at home.
Among the positive features are the following:
- ease of application;
- a huge range of products on the shelves of specialized stores;
- low cost;
- even if you make any mistakes, they will not be obvious, and the manicure will be unique.
The following points can be pointed out as negative features.
- It takes patience to work with foil. The first time you need to adapt to it, learn how to properly cut and put on the nail. For beginners, you can use ready-made stickers.
- In small settlements, the assortment may not be so wide, but online stores will help correct this deficiency.
Fashion trends
Nail design has been improving in recent years. The emergence of new materials gives rise to new techniques for creating a manicure. Metallized paper has long and firmly taken its place among fashion trends.With its help, both classic and shocking options are obtained.
Here are some of the most popular classic design ideas.
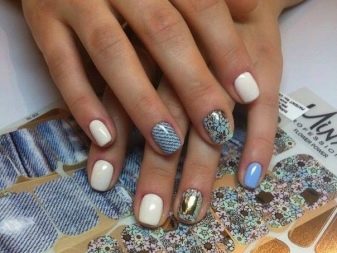
- Minx manicure - a trend loved by young people for its uniqueness and abstractness. In this case, the craftsmen use film foil, which is a reflective background. Various decorative details are applied over it: lace, geometric and abstract designs.
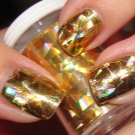
- Holography. The legs are completely covered with a foil cover that glitters in the sun in different shades, creating the magic of color.
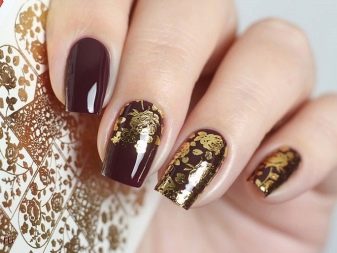
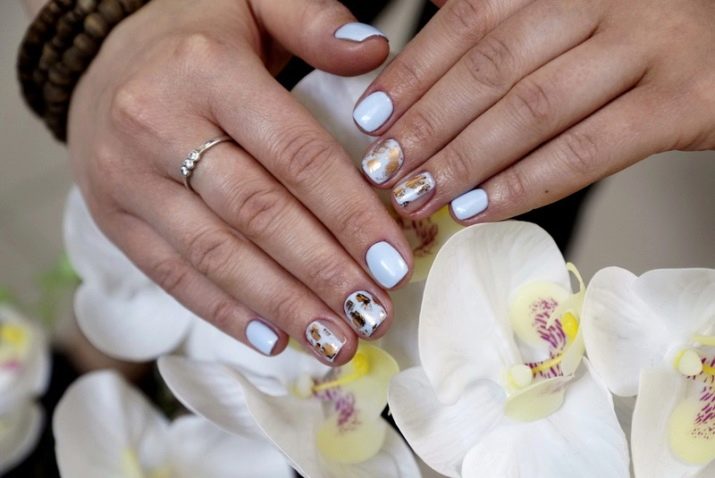
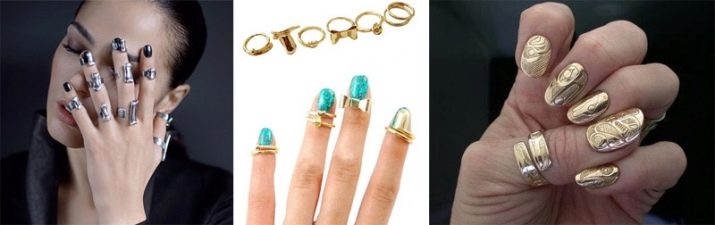
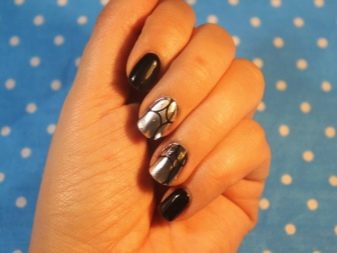
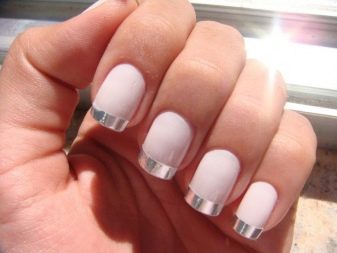
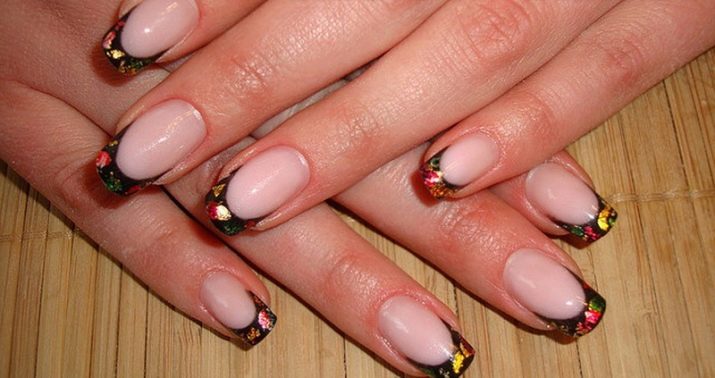
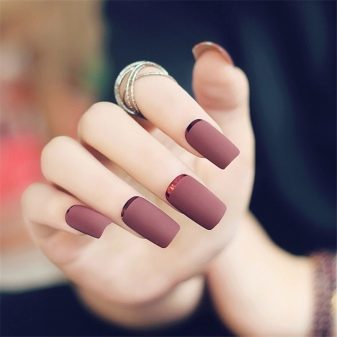
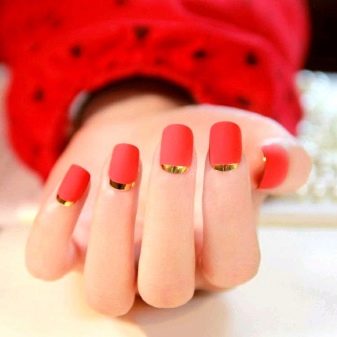
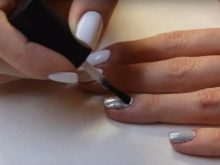
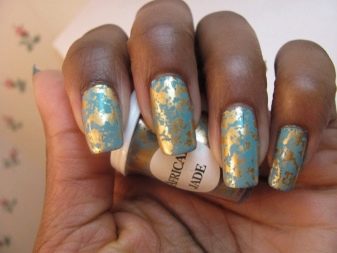
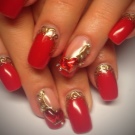
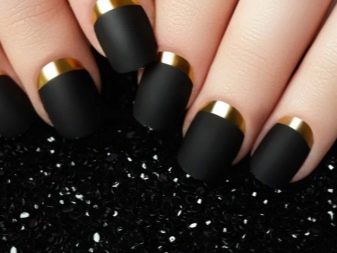
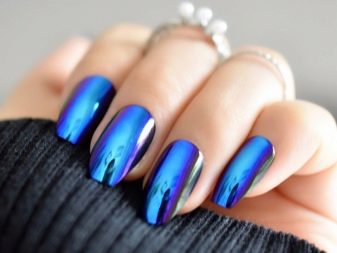
- Foil backing. The gold or silver color of the foil, which peeks out along the contour of the nail plate from under the main color, looks incredibly elegant. This option makes a black or blue manicure deeper and more feminine.
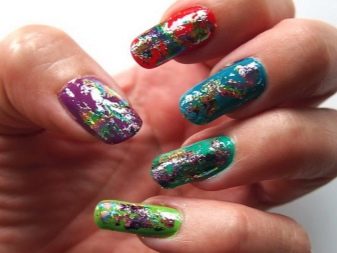
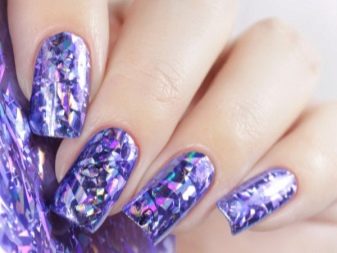
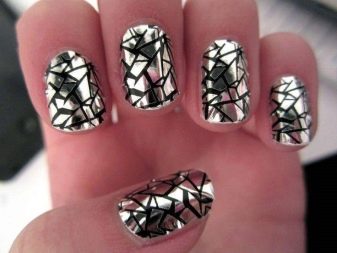
- Chopped foil imitates shards of glass or metal parts, which is very suitable for urbanists.
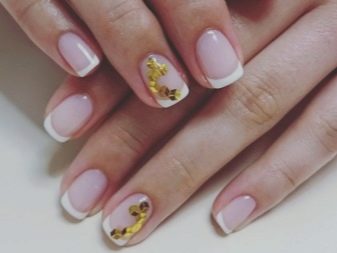
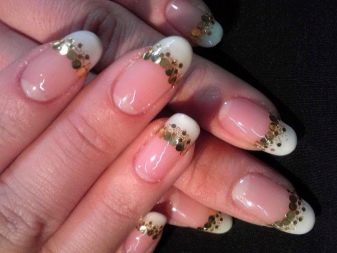
- French using mirrored areas. Colored French manicure is successfully combined with brilliant "smiles".
For special occasions, stylists offer creative manicure ideas that use foil designs, stencils, decorative details and the like.
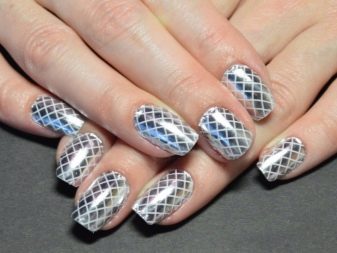
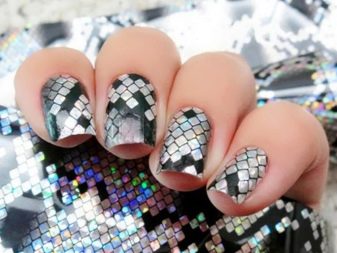
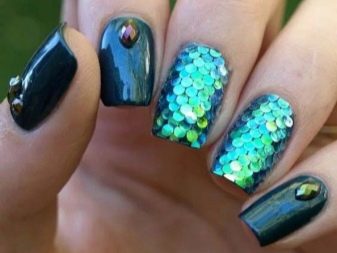
- Scales. A defiantly beautiful design created by sequentially laying out small pieces of foil in the form of fish scales. It turns out extraordinary and interesting.

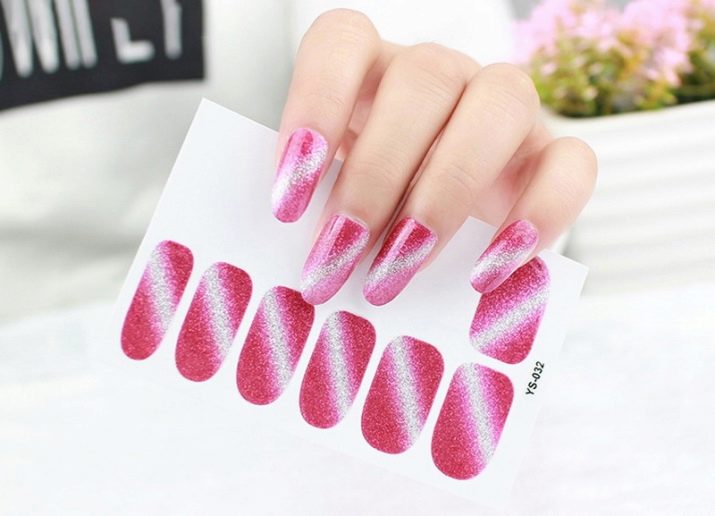
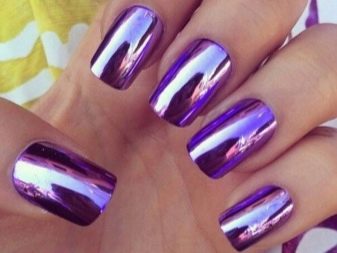
- Diagonal gradient. The design solution is carried out as a transition from a deep and rich colored varnish, usually glossy, to a metallic surface.
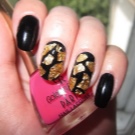
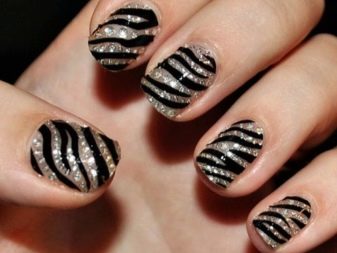
- Zoo design suitable for lovers of the animal world. Leopard spots, zebra stripes, giraffe spots are reproduced on a foil background.

- Tapes and stripes. Geometry in manicure has always been a trend, but made with the addition of foil has become even more effective. Metallized manicure tape helps to create various abstractions both in monochrome and in color.

- Stickers. Manufacturers have developed unique decorative self-adhesive foil elements that allow even novice craftsmen to create bright and interesting looks.
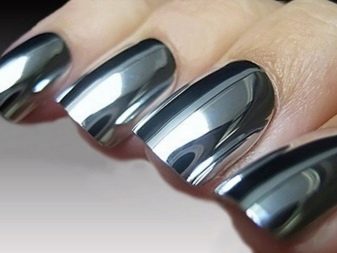
At the word "foil" the first association that arises is a metal of a silvery hue. Silver is considered a noble color, discreet, suitable for everyday use.
The silver color goes well with any color scheme. Therefore, individual elements on a colored background will be unobtrusive and very appropriate.
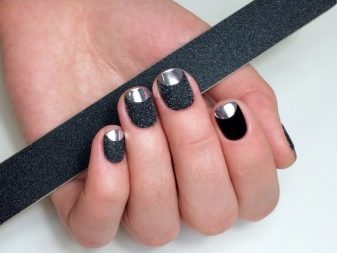
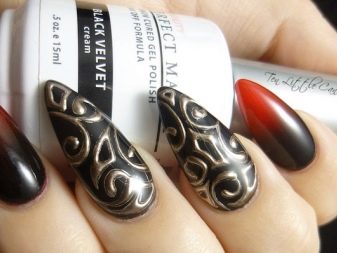
Nail art experts know that silver foil can make dark shades deeper, and bright ones slightly muted. For example, if you dilute a black manicure with silver glitter on at least one nail, then it will become less defiant, more calm.
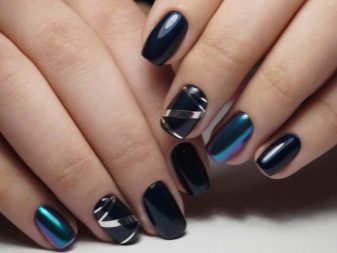

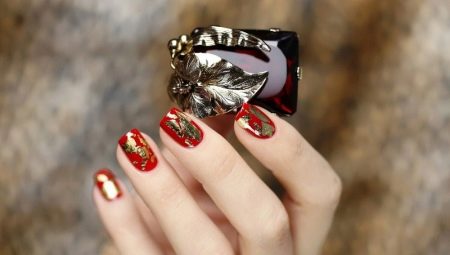
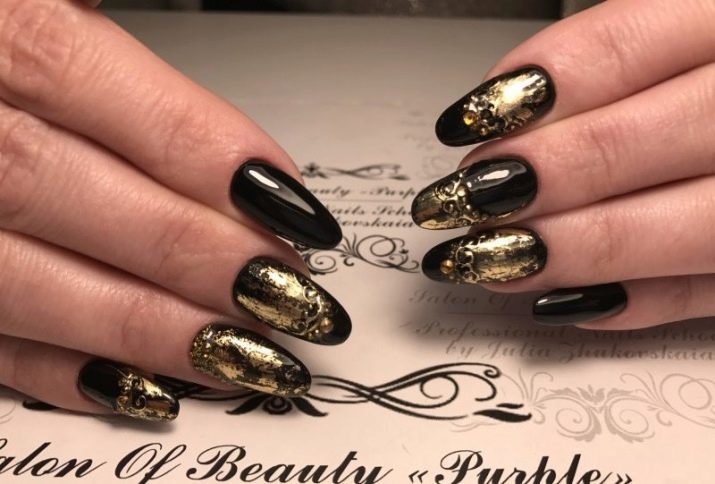
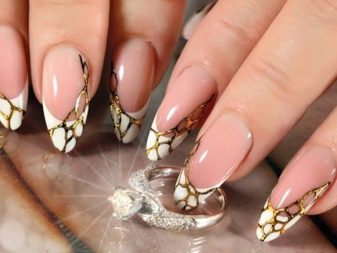
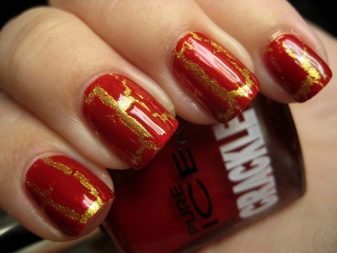
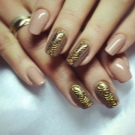
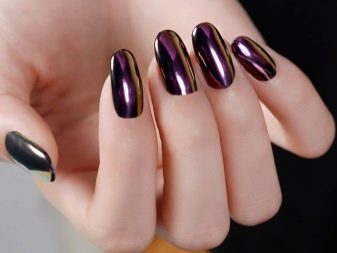
Gold is the color of luxury and chic, so it is better to time a manicure with its use for going out or for a party. In combination with black or navy blue, it looks especially chic.
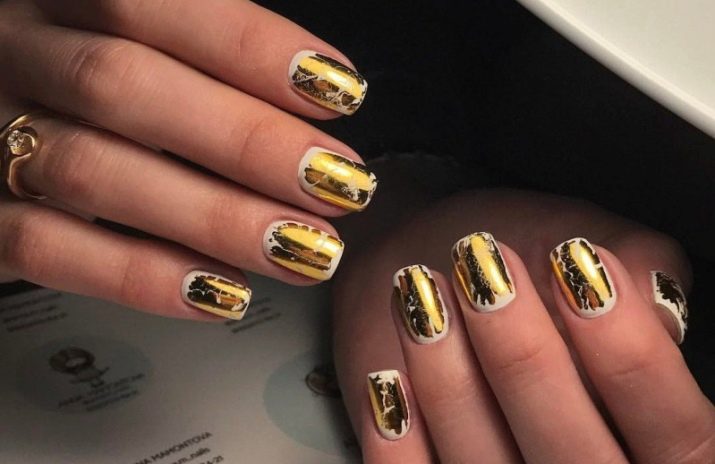
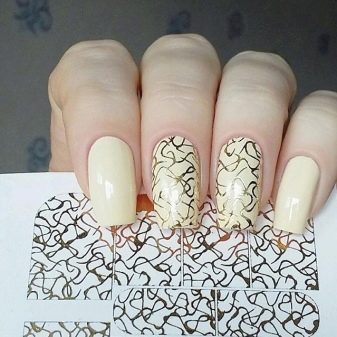
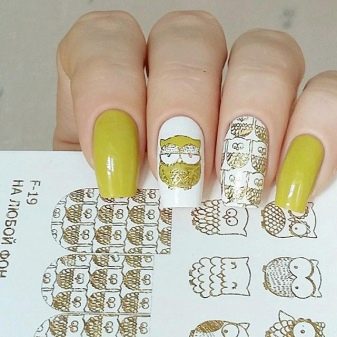
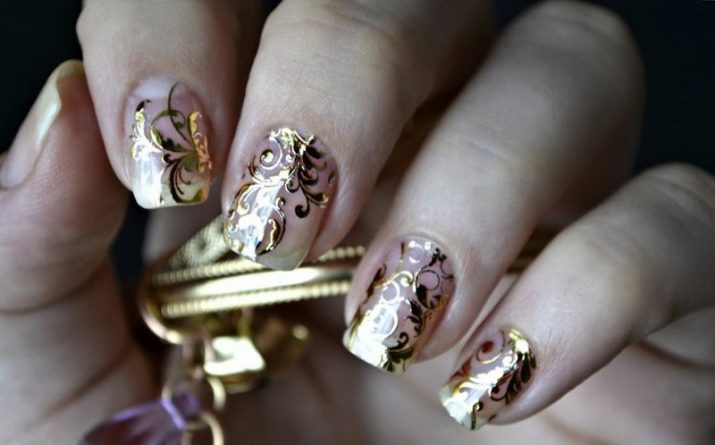
Original design made using stamping technique. The method consists in the fact that the pattern is recreated not on the nail, but on a special silicone blank. After drying, it is applied to the nail plate and fixed. Such translucent patterns fit perfectly on a golden foil background.
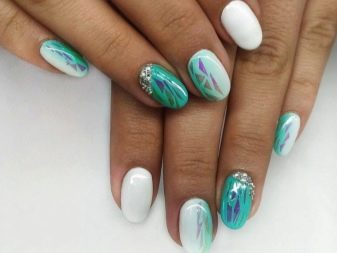
The iridescent coloring of the foil creates a play of light for striking effects.
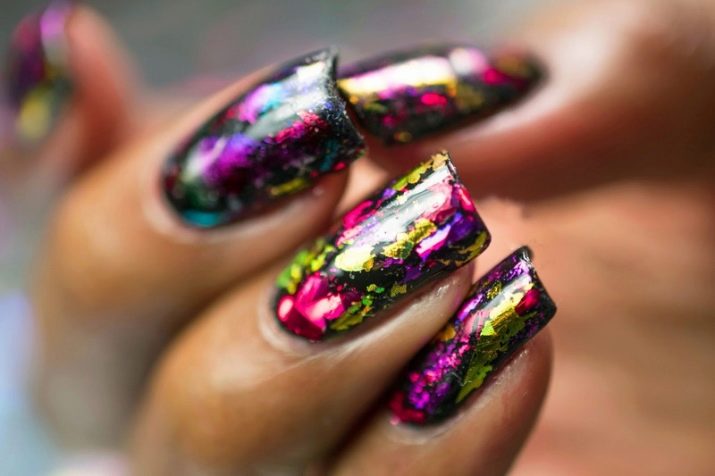
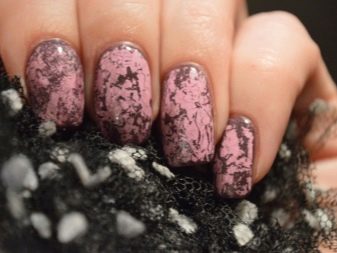
The effect of broken glass in manicure is a trend using just such a metallized film.
A classic jacket, decorated with rainbow foil along the edge, will sparkle in a completely different way, become more elegant and brighter.
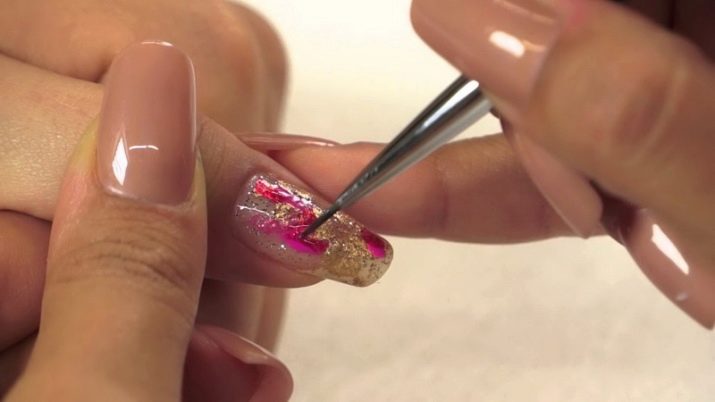
Foil is used to decorate individual details of a manicure. For example, if you reproduce a volumetric pattern with a gel and let it dry, and then apply a metallized film on it, then in the final you will get a decor that looks like a cast part. The idea is often used by professional craftsmen to create unique evening looks.
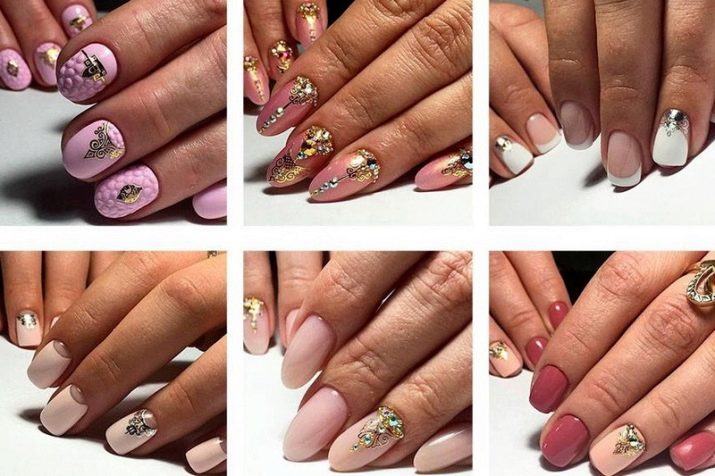
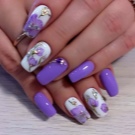
Lunar nail art using foil is a sophisticated option for nails of any length. In the nude version, it looks most advantageous on long or medium round nails. For a short manicure, it is better to choose variegated dark tones in a pair with metallic. The moon design looks great in red, black, white and chocolate.
Among the fashion trends today - a moon jacket in black or red with gold foil, as well as beige with "fragments" of broken glass.
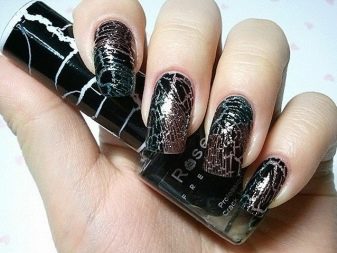
An original design move - the effect of cracks, which is obtained by gluing the foil not on the entire nail plate, but in sections. The spaces between the foil "patches" play the role of "crackle".
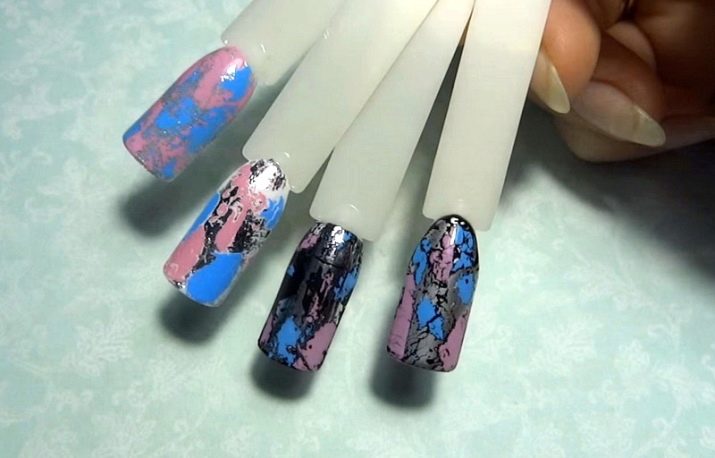
Interesting solutions are obtained if contrasting materials are used, that is, varnish and foil. For example, the now classic black background with gold or silver craquelure.
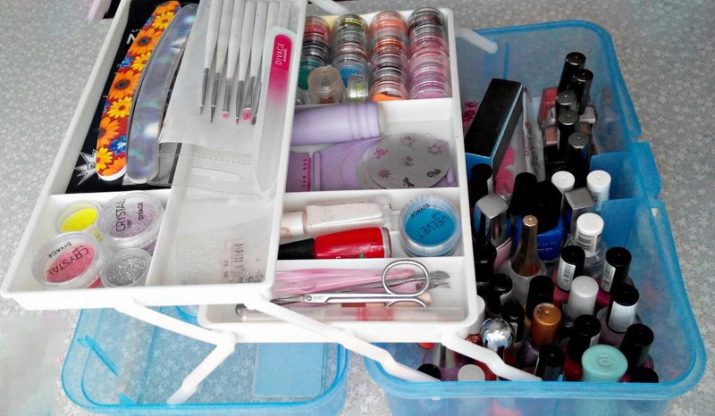
Required materials and tools
In order to work with foil, it is necessary to have a certain set of tools and materials.
- First of all, this is the foil itself, the choice of which depends on the woman's preference.
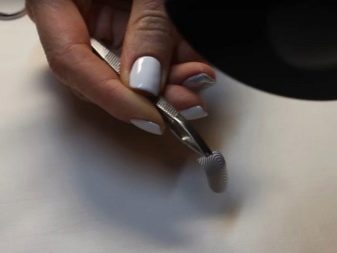
- Nail scissors. They need to be approached with particular pickiness, since thin material does not fail. The instrument must be sharp and made of high quality surgical steel.
- Tweezers or tweezers are needed to lay out the foil pieces on the surface of the nail plate.
- Cotton and wooden sticks. With their help, the foil is smoothed and distributed over the nail.
- Varnish. This refers to everything that will be used to create the design: base, background and varnish for decoration.
- Foil glue is a specific tool designed for fixing various decorative elements in manicure. It is based on acrylic polymer, which not only glues, but also protects from ultraviolet radiation.
- Fastener-top.
How to do it yourself?
Before embarking on the implementation of manicure at home, you should stock up on the necessary tools and materials, pick up foil, read the advice of professionals.
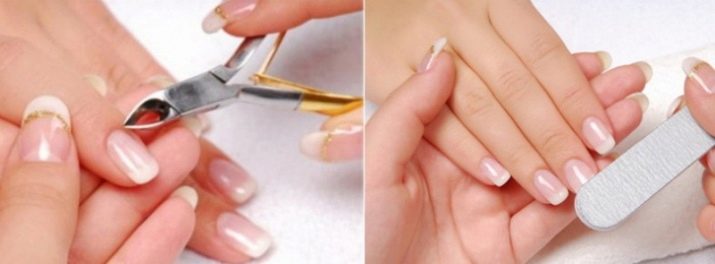
The first step is to prepare the nails themselves. For this, the procedure for cleaning and processing the cuticle is carried out. Next, they shape each nail plate and grind them with a special file.
At the second stage, a primer is applied to the nails in case of further use of the gel polish.
After all the preparatory steps, you can proceed directly to the manicure. Let's consider several options step by step.
With sheet foil
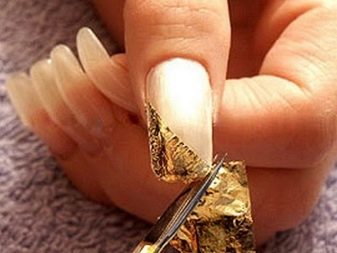
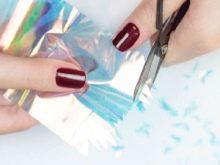
- Using scissors, the selected foil should be cut into separate pieces of the shape you have in mind. The smaller they are, the more natural the drawing will be, and the period will be longer.
- A base coat is applied to the nails prepared in advance, and then a colorless or colored varnish, depending on the chosen design.
- Foil is carefully laid out on the dried layer with tweezers in accordance with the selected pattern. Each piece should be pressed against the nail, smoothing in different directions with a special manicure or cotton swab.
- At the end of the work, you should cover your work with a fixer.
Various designs can be achieved with this technique. For example, the well-known "broken glass". For this, the foil must be cut into fragments.
If you take rainbow foil for decoration and cut it into shapeless pieces, then, laying it out in a certain way, you can achieve the "crackle" effect.
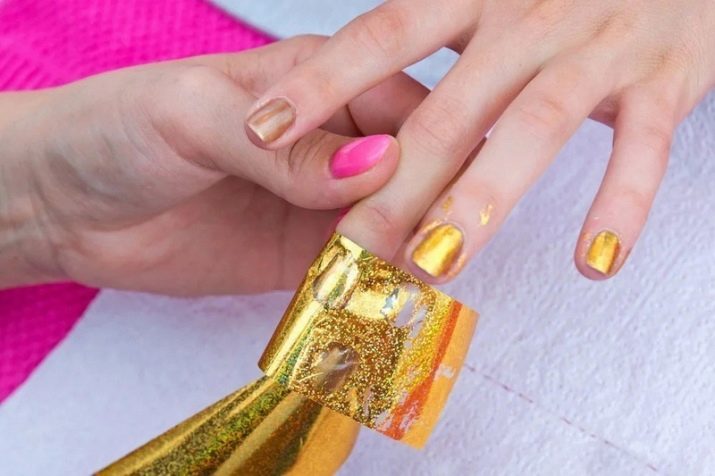
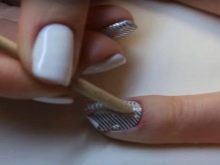
With transfer foil
- At the first stage, the nail plates should be covered with a base, and then with a layer of colored varnish, which will serve as a background. For beginners, it is not recommended to choose nude shades, since flaws are more visible on them.
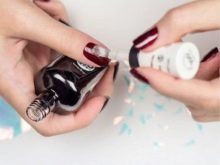
- A special glue is applied to completely dry nails. They can completely cover the plate or draw a pattern with it.When using this technique for the first time, for simplicity, it is best to purchase a product that changes color as it dries.
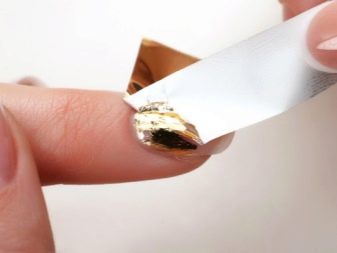
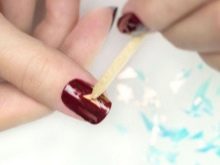
- Wait until the glue dries. Next, they start working with the foil. In order to translate the drawing with high quality, you should carefully attach the foil sheet to the nail with the matte side, press it well and iron it with a special stick - a pusher. At home, you can use a regular cotton swab. The main thing is to walk over the entire surface of the nail plate.
- Grasping the corner of the foil, tear off the glued sheet with one soft, unsharp movement. The areas treated with glue will remain shiny.
- The result obtained must be fixed, for which a top coat is applied.
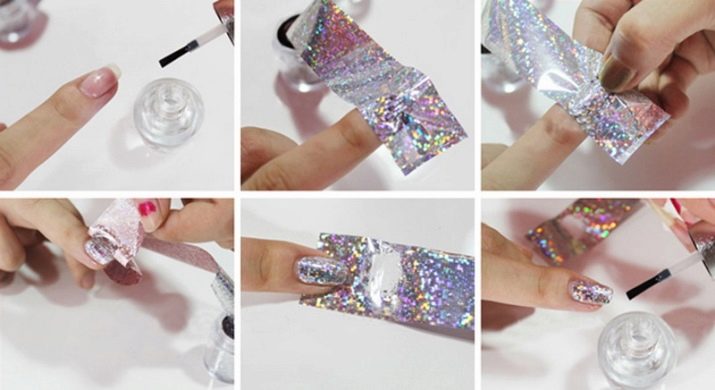
Lunar manicure with foil
- On pre-treated nails, glue is applied in the area of the hole.
- After the adhesive dries a little, a silver or golden foil is applied to it. It should be well pressed and smoothed in the place where the glue was applied.
- Next, you need to carefully remove the foil sheet. Do not worry if the exact shape of the smile does not work out, since all the blemishes will disappear under the layer of varnish.
- After that, a decorative coating of the selected shade is applied. To make a smile beautiful and with clear boundaries, it is better for novice masters to use stencils. With a silver and gold smile, dark colors look organic: black, burgundy, blue, chocolate.
- In the final - securing with the finishing top.
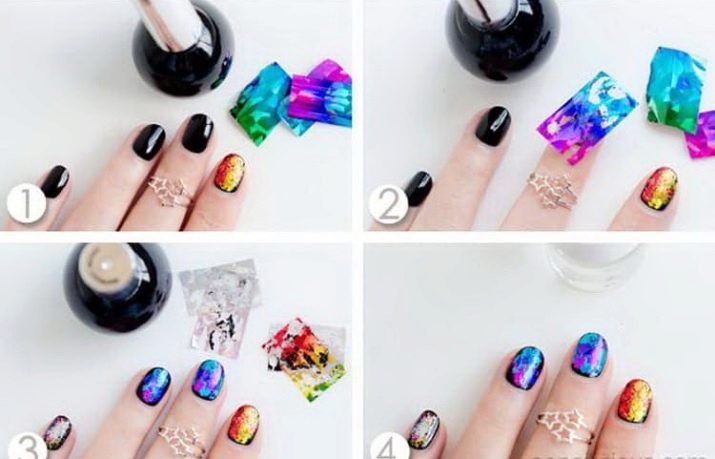
In order to obtain the cracking effect, it is suggested to use a transfer foil. Now manufacturers also offer special craquelure varieties. Professionals advise choosing contrasting shades as a background. On them, the design will turn out to be brighter, more effective. Below is the simplest step-by-step instruction on how to reproduce a craquelure manicure with your own hands.
- Prepared, shaped and cleaned nails are coated with a base.
- At the next stage, a varnish for the background is selected and applied to the nail plates.
- After the decorative coating has dried, proceed directly to the craquelure. A special adhesive is spread with a brush over the nail in the form of a grid pattern of cracks and allowed to dry.
- Then apply the foil, press it carefully, ironing it with a manicure stick.
- Carefully tear off the foil in one motion. In places where there is no glue, the foil will not be printed.
- You can fix the resulting effect either with a transparent top or with the same adhesive. It must be remembered that the glue will make the manicure matte and slightly muffle the metallic sheen of the foil.
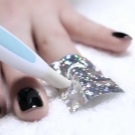
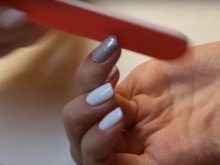
The simplest option using foil is thermofilm. The only difficulty is the need to accurately cut the workpiece in the shape of the nail.
- First of all, a base coat is applied to the nails and dried thoroughly.
- Next, the workpiece is heated with hot air, for which it is held either over a working hair dryer or over a switched on lamp. A few seconds are enough until the edges begin to curl.
- With tweezers, the thermal blank is placed on the nail plate and smoothed with a wooden stick.
- After the foil has set, you can remove the blemishes with a file.
- Next comes the protective coating. The manicure is ready.
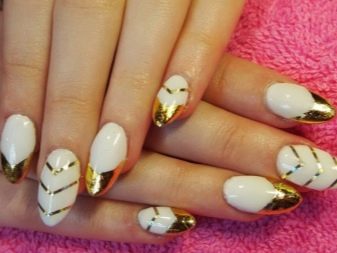
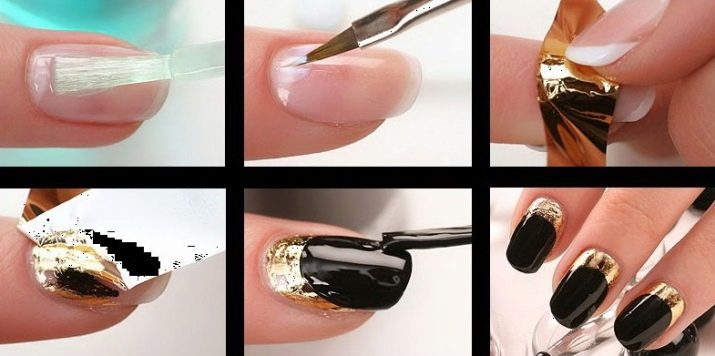
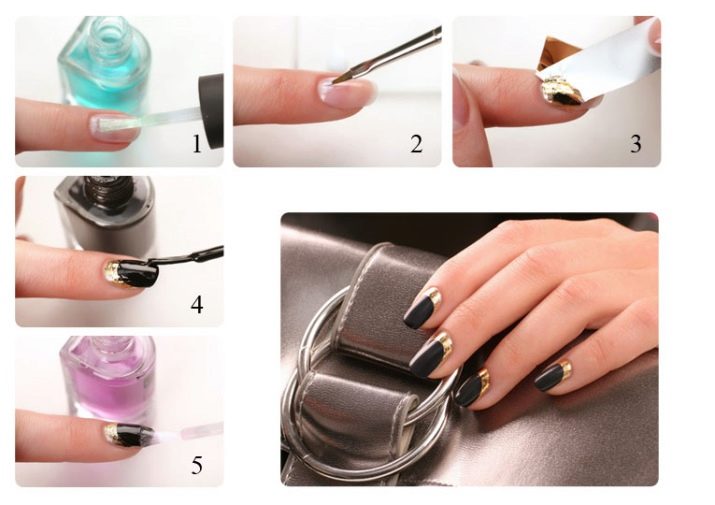
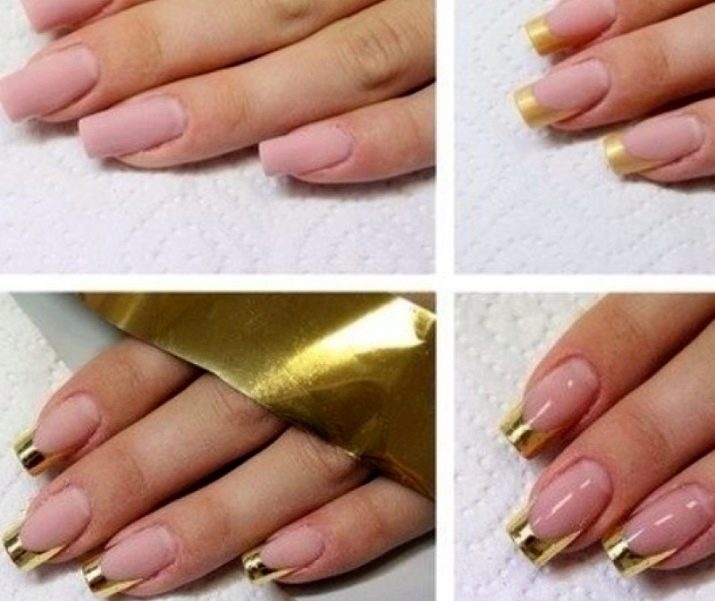
Consider a classic example of a white French manicure with gold edging.
- As usual, the base coat is applied first to flatten the nail plate.
- Then a bright white lacquered finish is applied. By the way, the matte version looks more effective than gloss in a pair with a metallic sheen.
- The varnish must be completely dry before you start working with the foil.
- Next, glue is applied to the nail tip. If you are worried about an even contour, then use special stencils for a jacket.
- The adhesive should dry.
- A piece of transfer foil is placed on the glue-treated part with tweezers and smoothed with a pusher.
- The substrate is carefully removed, the excess and irregularities are cleaned with a nail file.
- The resulting jacket is fixed with the finishing top.
Crumpled foil can be used to create a similar design, but then the effect will be different, because it does not have a metallic smoothness.
An even more extravagant jacket can be obtained using an embossed modification of the foil film.
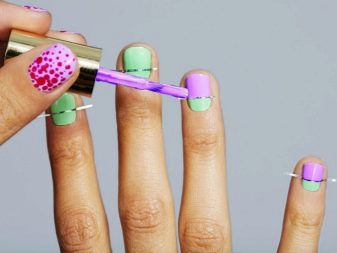
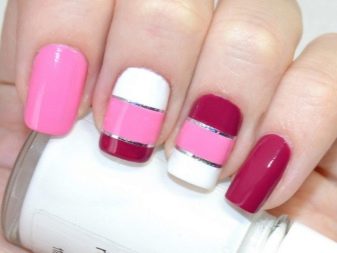
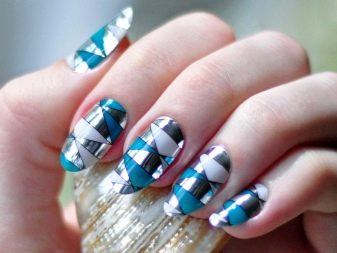
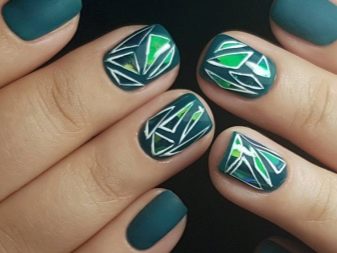
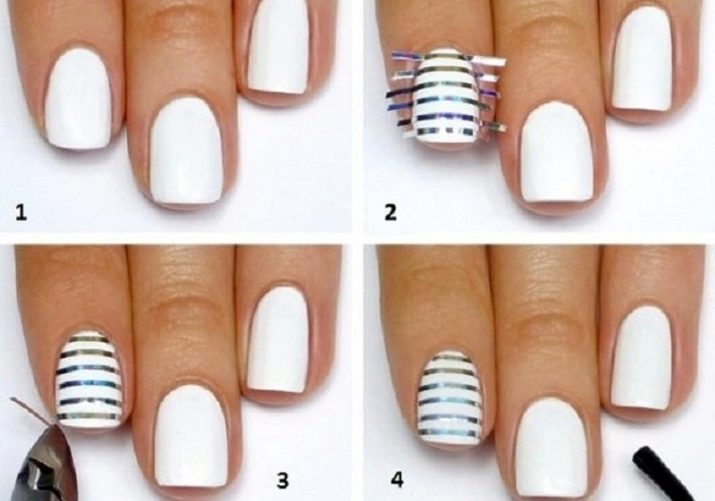
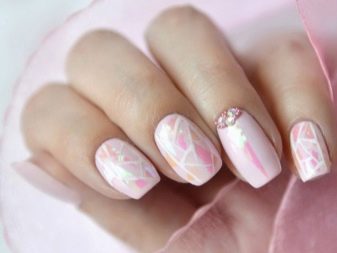
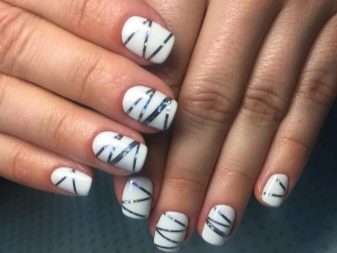
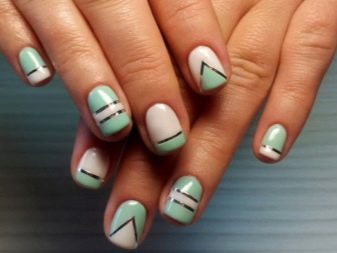
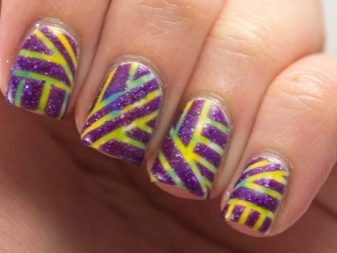
Geometric patterns are always laconic, which makes such a manicure look stylish and relevant.
Metallized scotch tapes of different widths and colors are suitable to reproduce this design. It is convenient to use thanks to the sticky inside.
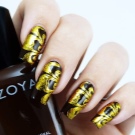
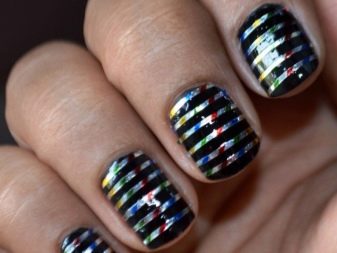
Use foil strips to draw lines on any background. Gold geometric shapes look advantageous on a black manicure. Such a manicure is simple to perform, but luxurious in perception.
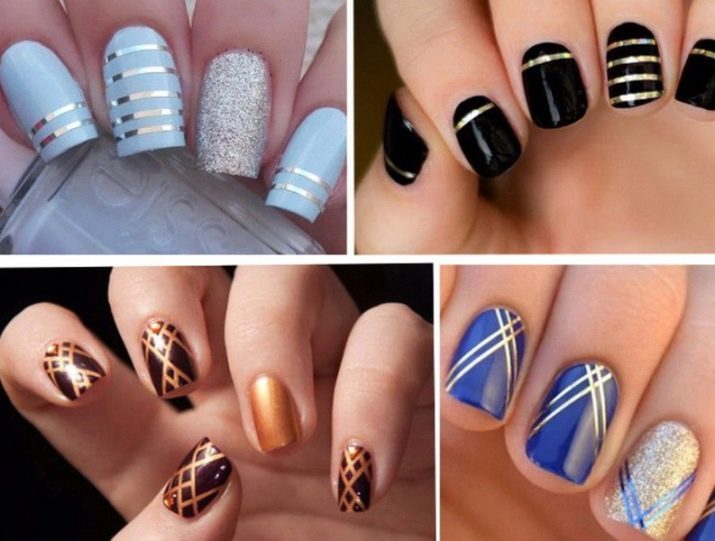
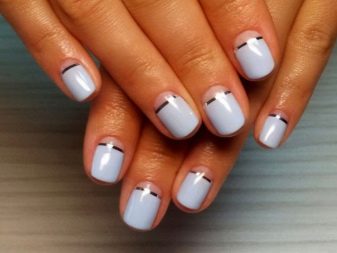
Pastel colors work well with silver lines, as silver is more restrained and calm.
- Prepared treated nails are first covered with base varnish and dried thoroughly.
- This is followed by a layer of decorative coating of the selected shade and drying.
- Then you should cut strips of the desired size and color from foil. You can first estimate their location on the nail.
- There are two options for gluing geometric decor: using glue, or the adhesive backing in the case of tape.
- After the pattern is applied, the nails are covered with a transparent top.
Beautiful examples
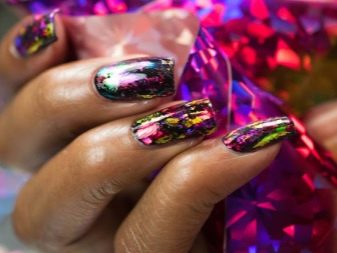
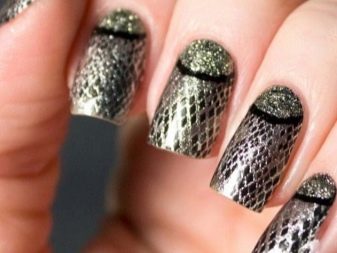
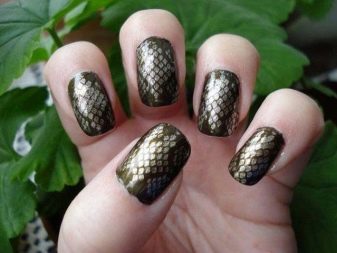
Magical futuristic nail art using foil looks gorgeous in evening looks.
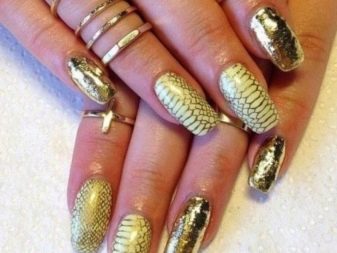
For example, the scaly version is great. He is great for shocking, attracts attention. The scales can be made to imitate a fish or snake cover.

Craquelure is one of the latest trends in manicure. On contrasting shades, it looks bright and impressive, while in a nude version it is quite suitable for an everyday version.
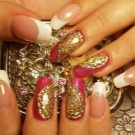
Another outrageous design is casting. Using this technique, craftsmen reproduce amazing patterns and designs with a metallic sheen. They resemble decorative figurines or openwork details cast from metal.
Already known for a long time, but from this no less popular design "broken glass". To create it, use ordinary sheet non-transfer foil of different shades and textures. Thanks to the huge assortment, unique options are obtained for both solemn and everyday occasions.
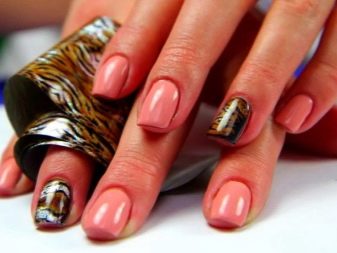
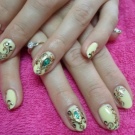
The use of foil is also no stranger to classical manicure. Amazing decorative images can be created using it for individual elements or as a background. In any case, the metallic shine will diversify the modest business manicure.
Absolute metallic manicure is wildly popular among young people and fans of urban style. It is suitable for daring, bright, ambitious and daring natures, as it attracts attention.
Geometric patterns in manicure are relevant at any time and for any occasion. With their help, craftsmen create podium options, designs for publication or appropriate for a business style. Foil is very suitable for these purposes. Crisp metallic lines add laconicism, set off by a metallic luster. Moreover, depending on the shade, the foil introduces either elements of luxury or restraint and elegance in the image.

Thus, foil makes life much easier for a novice master, but at the same time helps to create unique manicure images.
For information on how to make a manicure with foil, see the next video.


