How to make a nesting doll with your own hands?
The Russian nesting doll is a symbol that does not need advertising. But repetition, rethinking, from the point of view of creative embodiment, will not be superfluous. Because not only with the help of a wooden blank, paints and brushes you can create this famous doll. Cute nesting dolls are made from felt, textiles, paper, and even plastic bottles.
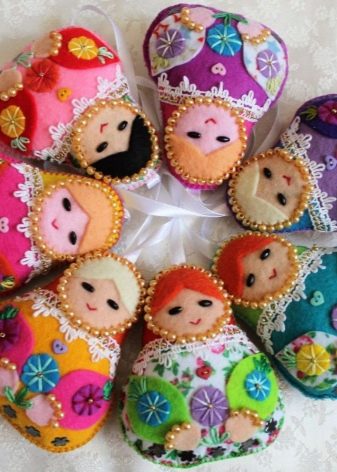
Felt creation
Felt is a material that even those who are not particularly friendly with threads and needles are not afraid of. Because it is comparable to paper: cut out, and nothing needs to be done with the edges, they will not crumble. And it is also a beautiful and pleasant tactile, relatively inexpensive and affordable material.
Tools and materials
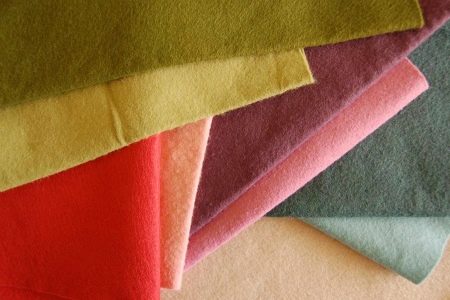
You will need, first of all, the felt itself. Colors - the choice of the master, someone loves more muted, someone brighter. You can repeat the traditional colors of painting matryoshka dolls. But unambiguously it should be quite variegated, because restraint is not inherent in the painting of this doll.
Also useful:
- a needle and thread for sewing parts by hand;
- sharp scissors;
- thick threads for hair formation (floss);
- PVA glue;
- synthetic winterizer;
- hanging thread;
- paper for creating templates.
The proposed version is easy to manufacture, designed for beginners, not real craftswomen. You can make such a doll with your own hands in a little over an hour, even if you work slowly and thoughtfully. It is assumed that they can be sewn in sets.
Step-by-step instruction
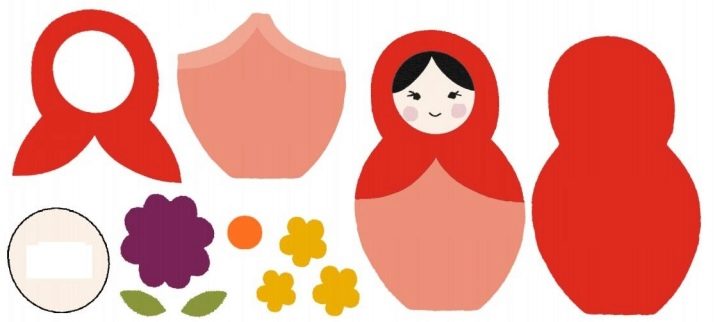
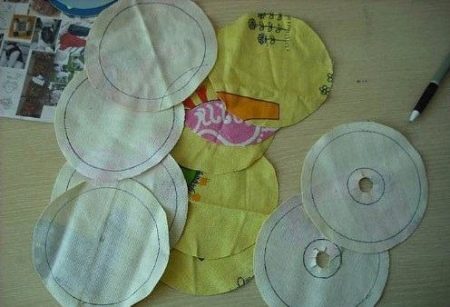
First you need to print the pattern: just download and print it, not necessarily in color. Cut out the details of the pattern and transfer to the fabric.
Master Class.
- The parts transferred to the fabric must be cut out.
- Fragments of the upper part are glued together.
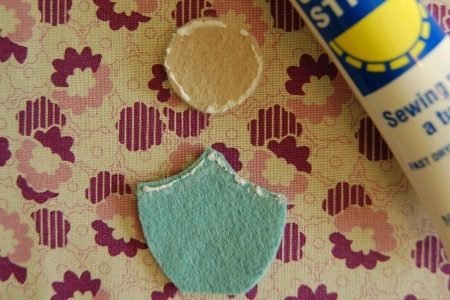
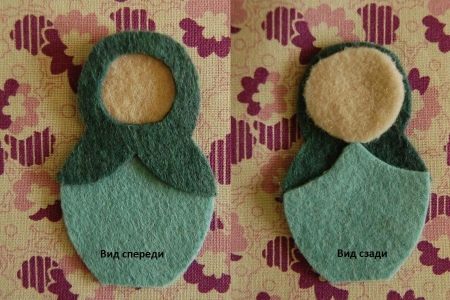
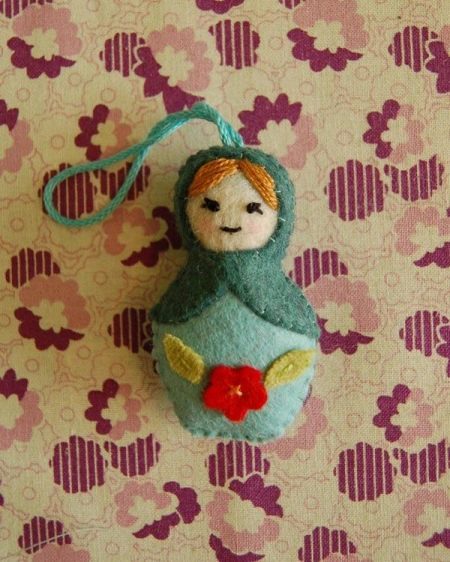
- You will get the outline of a matryoshka in clothes and a scarf, while without facial features.
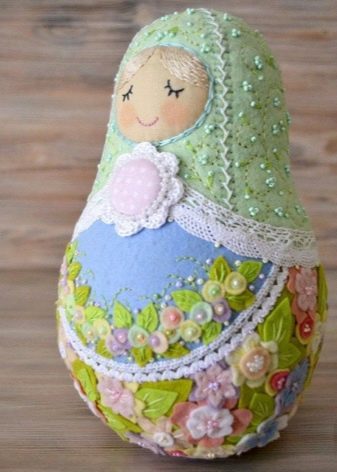
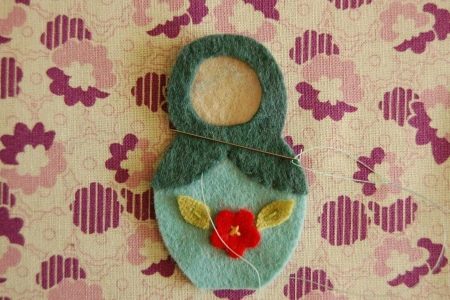
- It's time to form a pattern on the heroine's dress - for this, a flower is cut out of red felt, and leaves from green felt. The pattern on the dress must be placed symmetrically. Details are sewn by hand, with simple stitches. The scarf can not only be glued to the base, but also sewn on. The threads are taken in color so that they are not conspicuous.
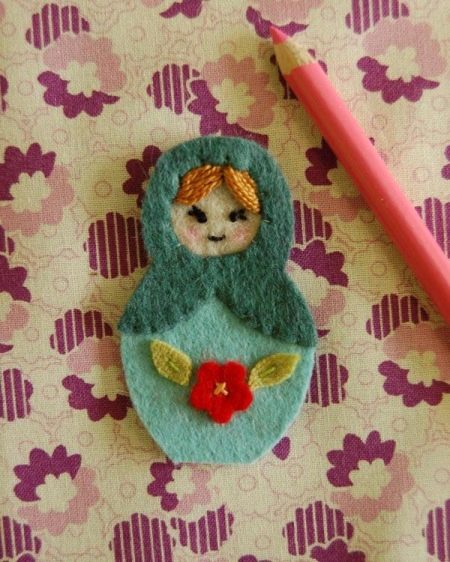
- From the threads of the floss, hair is formed, with an even parting in the middle. Eyes and cilia are made of black threads. The mouth is also formed with one stitch of black threads. To make the matryoshka blush, you can use a simple pink pencil or pastel.
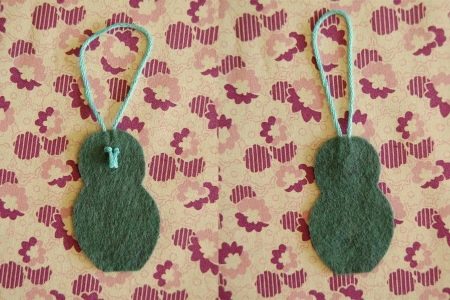
- A suspension thread is sewn to the back of the matryoshka. After fixing it, you can apply the back to the front part. They need to be sewn with sewing thread.
- The bottom hole remains unstitched, it must be filled with padding polyester for the matryoshka to take shape. After that, the hole is carefully sewn up.
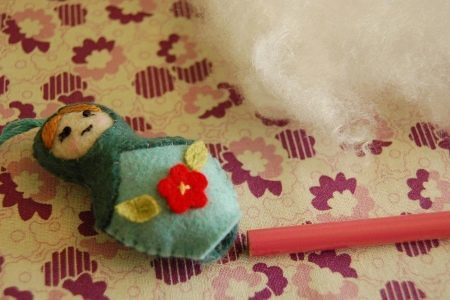
Matryoshka is ready! Children from the age of 8-9 can also master the manufacture of such a doll.
Manufacturing from plastic bottles
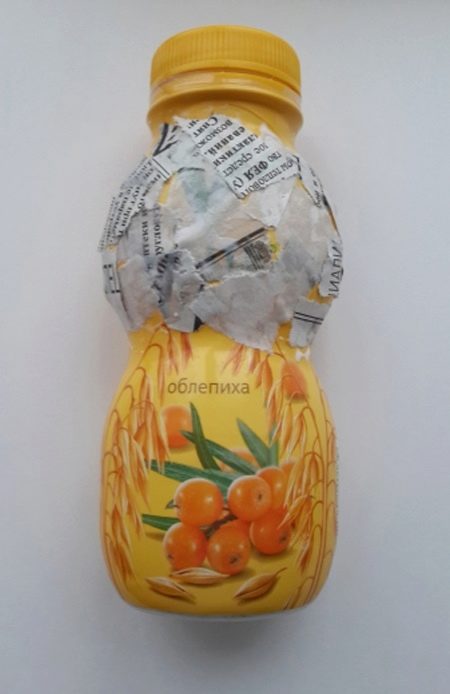
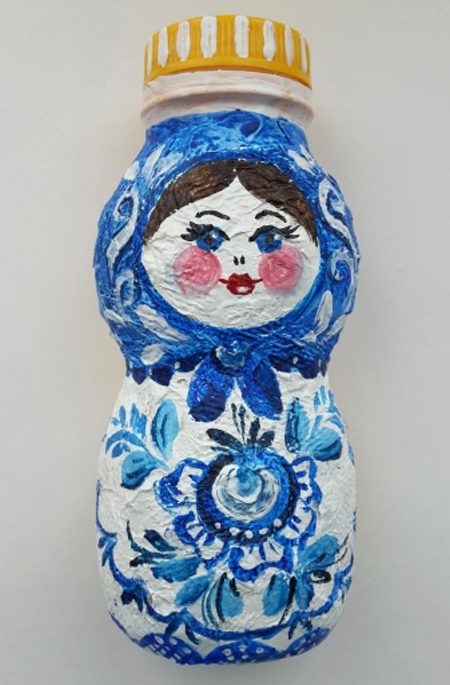
A very interesting nesting doll for Gzhel can be made from an ordinary plastic bottle (from under lemonade or yogurt).
What to take for work:
- bottle;
- newspaper;
- paper napkins;
- PVA glue;
- pencil;
- stiff bristle glue brush;
- watercolor;
- water-based paint;
- gouache (optional);
- acrylic lacquer.
Manufacturing procedure.
- First of all, the bottle must be suitable so that its shape resembles the silhouette of a nesting doll. Containers from drinking yoghurts are more suitable in this sense.
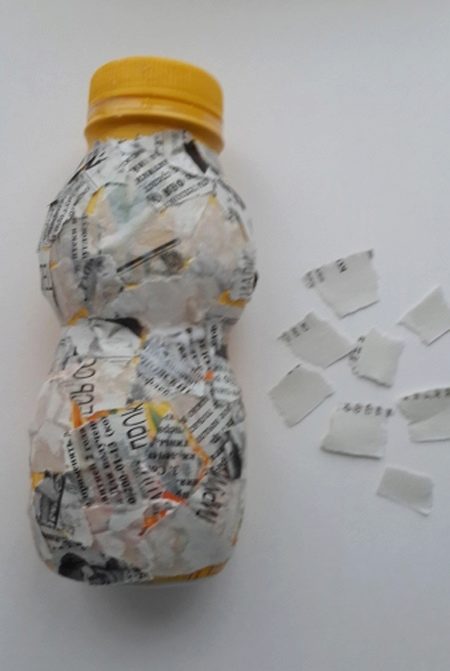
- Tear the newspaper into small pieces, then use PVA to glue the bottle over with these pieces.
- To level the surface, you can paste over it with napkin fragments. If the matryoshka is not just decorative, but the container will still be used as a bottle, you do not need to remove the lid.
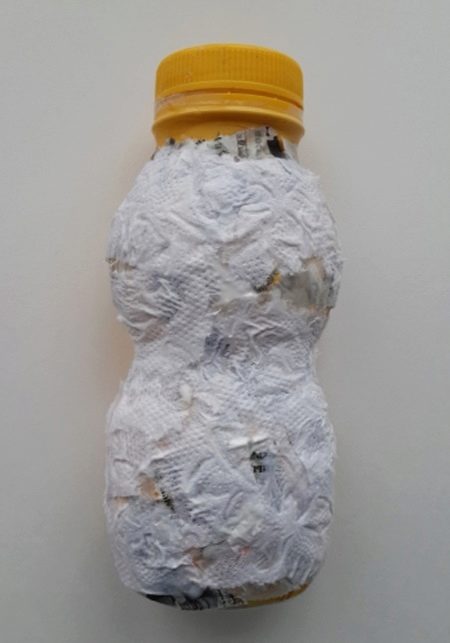
- The dried surface of the pasted bottle must be coated with a water-based emulsion, acrylic white paint is also suitable.
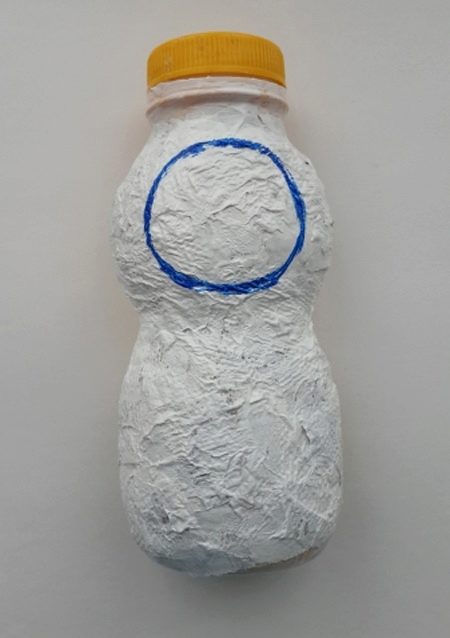
- With a pencil or felt-tip pen, you can outline the doll's face and other details of the image.
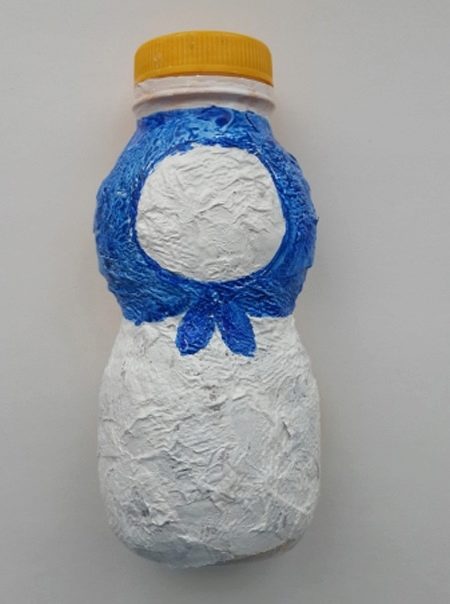
- The basis of the painting is a floral apron. Leaves, postscripts should repeat the real Gzhel patterns. Of course, simplified, taking into account the level of preparation of the master. You can paint with both high-quality felt-tip pens and acrylic paints.
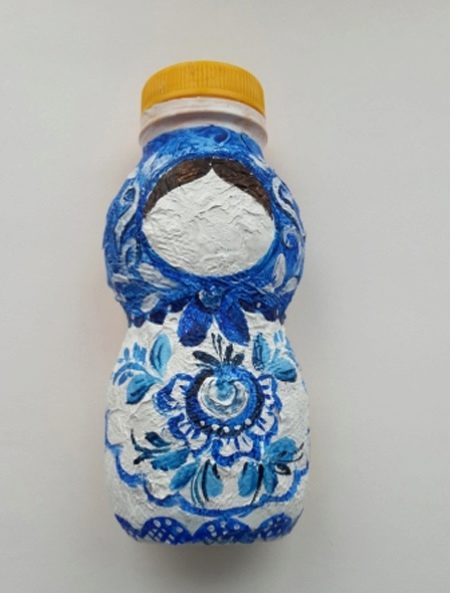
- After the apron is ready, you can take up the scarf. Then they draw a face: a dark bang, round eyes, a mouth, a blush on the cheeks.
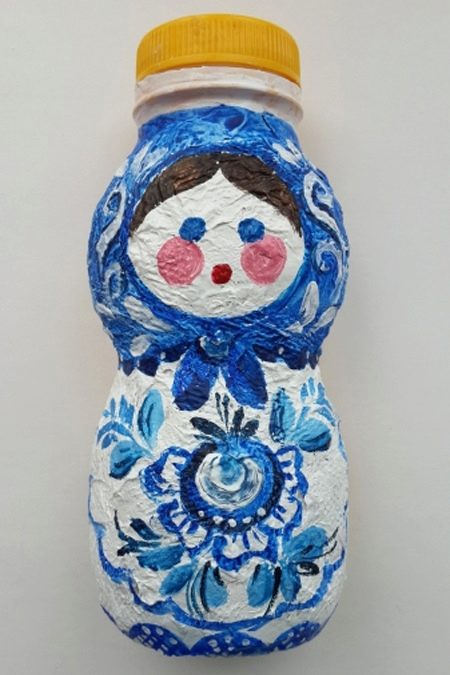
- The end result can be varnished.
This is a variation on how to make a small nesting doll from a bottle. But if you take voluminous plastic containers, you can make a decorative figure for the garden. However, for its manufacture you will need a cement mortar, because the figure must be strong, ready to "live" on the street.
Homemade paper toys
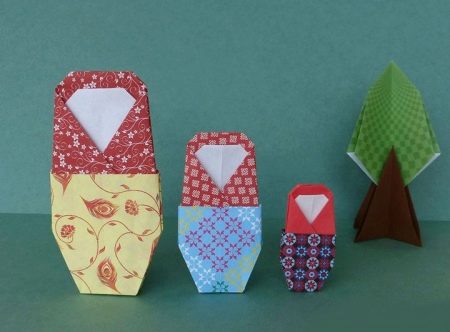
Variants at the intersection of cultures have become very popular: for example, a Russian nesting doll, created in the Japanese origami technique. Children like these tasks very much.
Origami matryoshka step by step.
- Take a square of white paper. Fold it diagonally. Bend the side corners to the fold line (from the made diagonal). Turn the workpiece over, bend its upper corner. Occupying approximately one fourth of the entire length of the leaf.
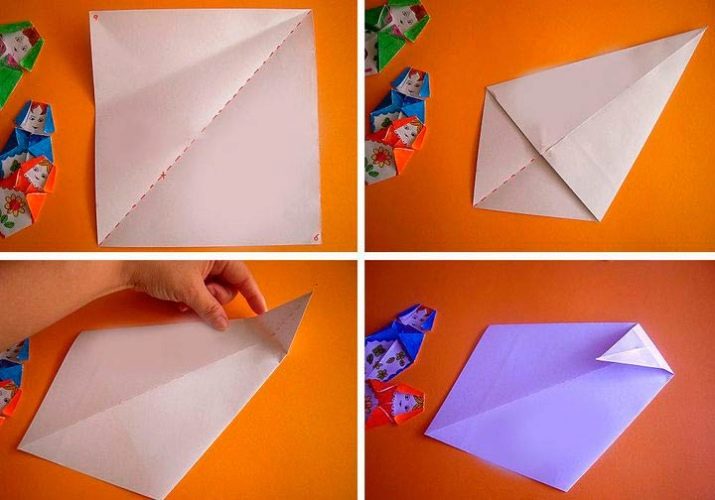
- Expand the craft. Along the line of the bends made, it is necessary to separate half of the part with the help of a dash-dotted line, then it will have to be cut. The parts obtained during cutting must be bent up.
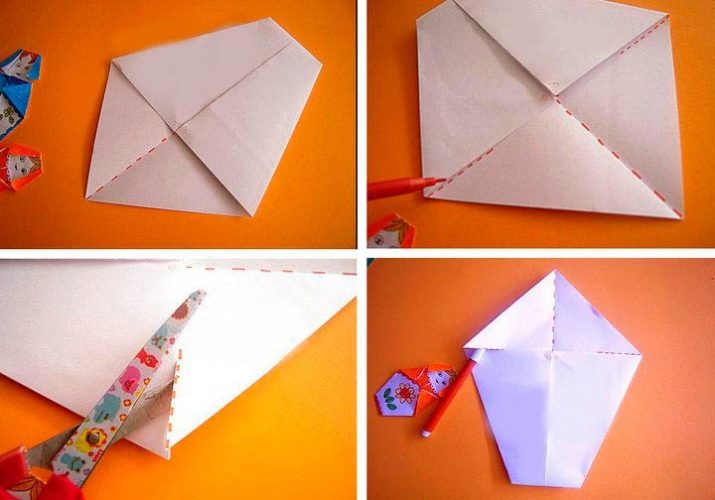
- The cut parts are bent - from the top corner to the base. At the base of the cut, edge pockets are formed, wrapped inside the fold. The excess length of these parts can be cut off (the cut point must first be marked). And again the workpiece unfolds, the bottom corner is bent.
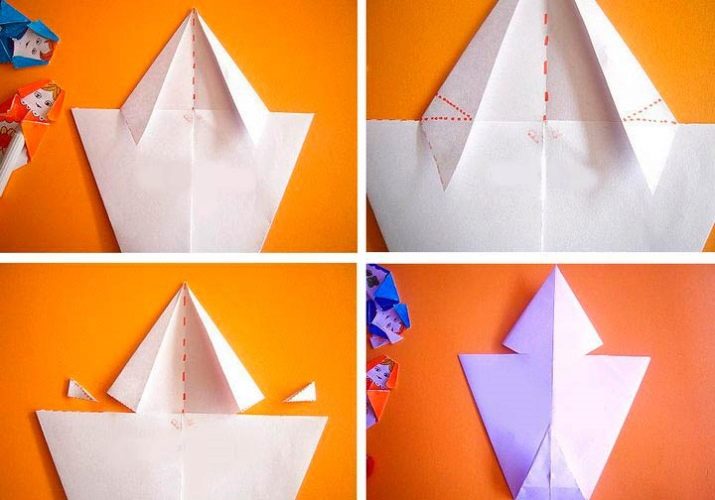
- Now you need to bend a little from the top corner. Turn the workpiece over. The side corners are folded towards the center fold line.
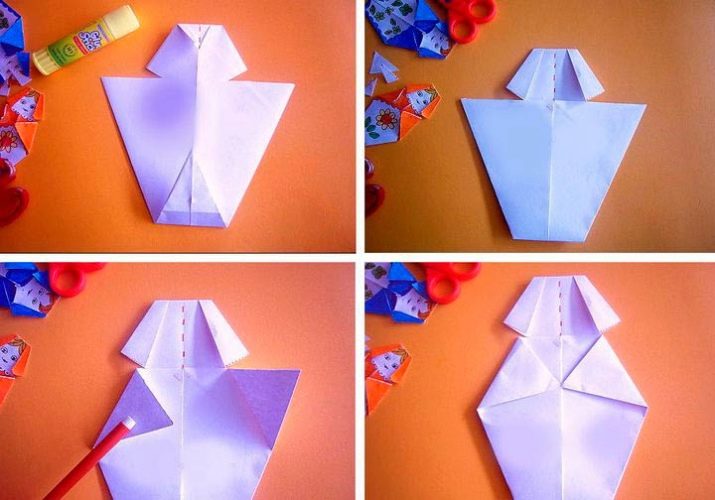
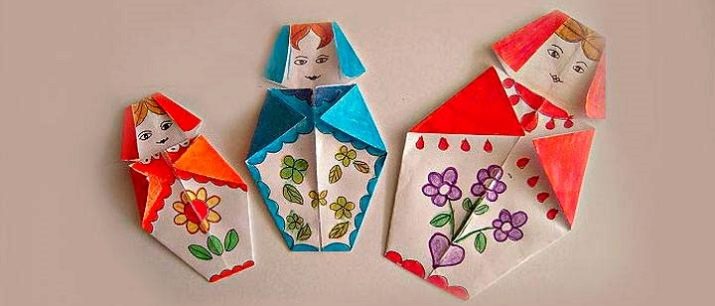
- The workpiece is ready, it remains to paint it. This can be done with paints or felt-tip pens, pencils. You might even think about decorating the blank with applique.
Origami, of course, is not the only option for making a paper nesting doll.
And a few more interesting ways to make a Russian doll out of paper.
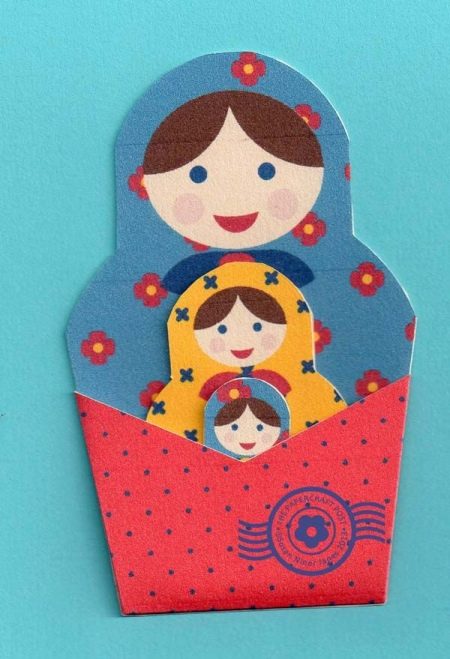
- This example retains the toy principle - several dolls are arranged in size to fit into one. The nuance is that the larger doll should have a pocket where the rest will fit. For making more textured crafts, you can use printed colored paper, velvet, metallized. For the rest, the principle of application works.
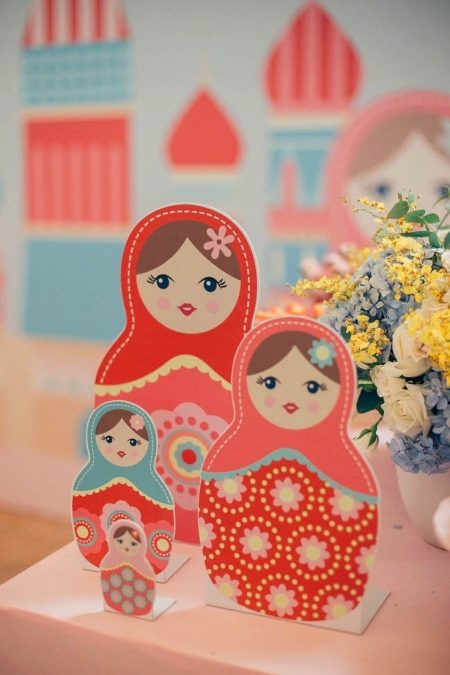
- Matryoshka on a stand is convenient as a table decor, as a postcard, as a craft that should be in plain sight. Also, for its manufacture, printed colored paper helps out, eliminating the need to draw patterns.
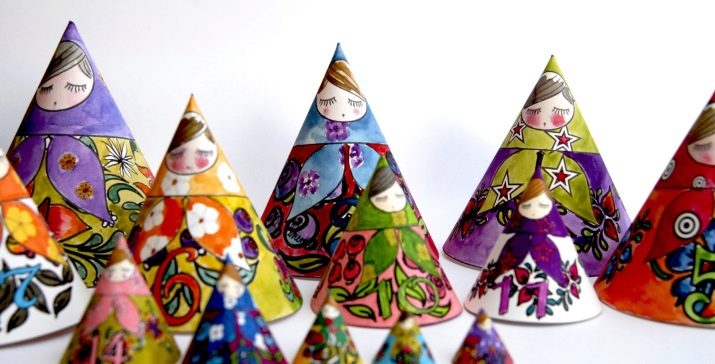
- If you paint a paper cone, you will also get a cute and original nesting doll. Only you need to paint usually a sheet that has not yet been collected in a cone. Watercolors or gouache, preliminary sketch - and even children can cope with this task.
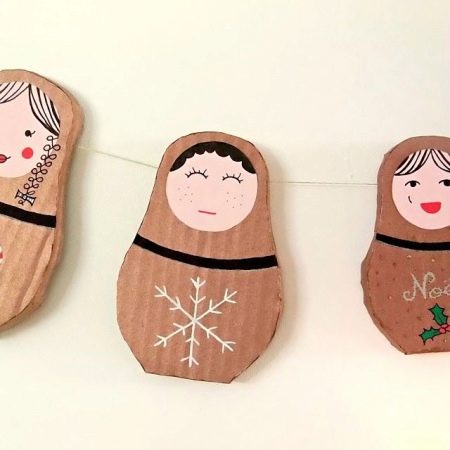
- Cardboard or thick craft paper suggests a new look at matryoshka dolls. Its appearance already differs from the more striking traditional one, but its recognizability is still preserved. A good option if you need to make a garland of nesting dolls, that is, string several painted figures on a thread.
- The dolls folded from paper are turned to ethnicity, to folk ways of folding such toys. Since this doll is protective, it has no face. Thanks to the folding principle, a parallel with origami is also guessed. It is easy to fold such a doll from napkins, printed paper.
Techniques can be combined. For example, a pattern on a nesting doll can be formed using a vytinanka, and a doll made of thick paper can be decorated with simple cross stitching.
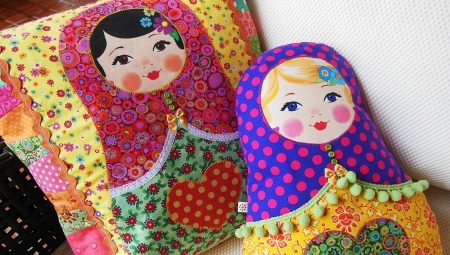
How to make from fabric?
This is already from the category of "task with an asterisk", but even novice craftswomen can cope with it. You need to decide on the pattern: evaluate its complexity, size, etc. Now it's easier - you don't need to draw yourself, you can just print and cut.
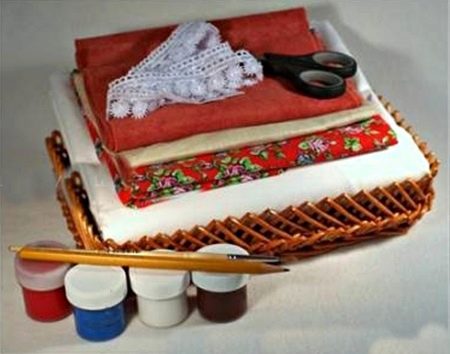
What is needed in the work?
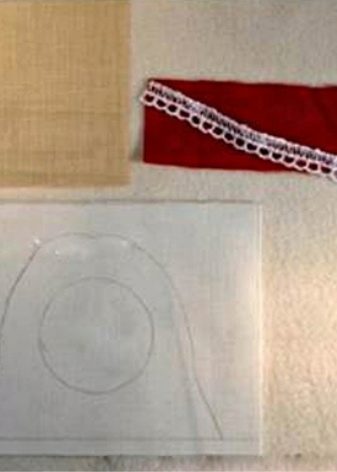
- Textile. Any cotton fabric will do. You can connect the shreds, so the matryoshka will be more colorful.
- Decoration elements. Braid, decorative ribbon, buttons, lace, satin ribbon, sequins, beads - the list goes on. Many even postpone the search for decor until the end of the work: when evaluating the finished base, it is easier to understand than to decorate it.
- Filler. Usually they take a synthetic winterizer or its equivalent. If the nesting doll must be heavy, dense, use cereal.
- Scissors, needles, threads in the color of the fabric. This characteristic is standard.
- Acrylic paints and paintbrush. Even a textile nesting doll will be hand-painted.
The manufacturing plan is as follows.
- You need to prepare a pattern - draw or print, cut. After use, it is advisable not to throw it away, but put it in a folder or file: all of a sudden you want to repeat the matryoshka.
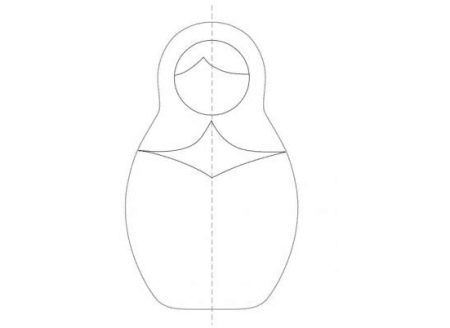
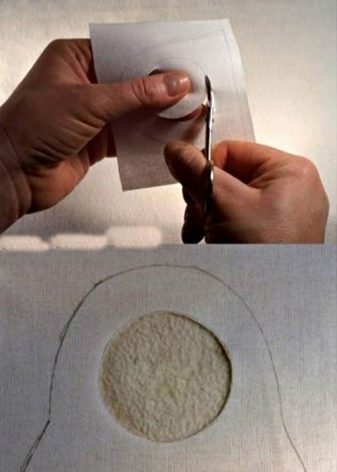
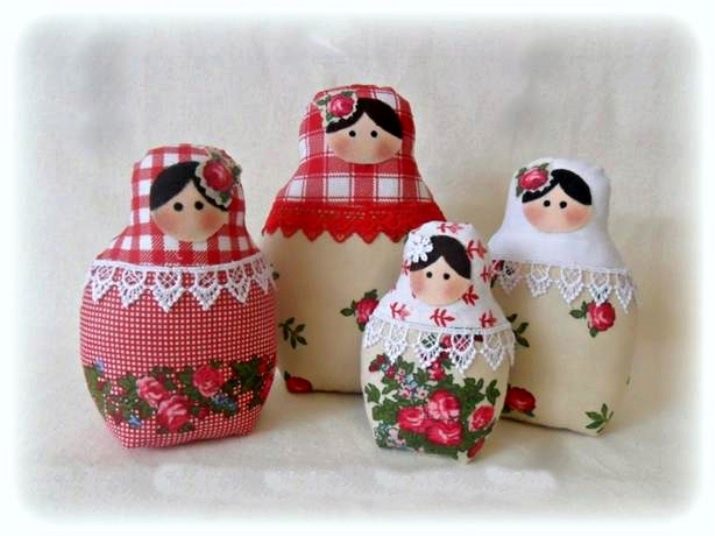
- This doll will consist of three colors: the top will be white, beige fabric is selected for the face, and the bottom will be red. Better to start from the top. According to the pattern, 2 identical parts are cut from a white piece of fabric. In one of them, a slit is made for the face. The scissors must be sharp.
- A not very wide strip is cut from the red fabric, to which lace is to be sewn. It's easier to do this on a typewriter. This element will cover a part of the matryoshka's face, which will resemble a handkerchief.
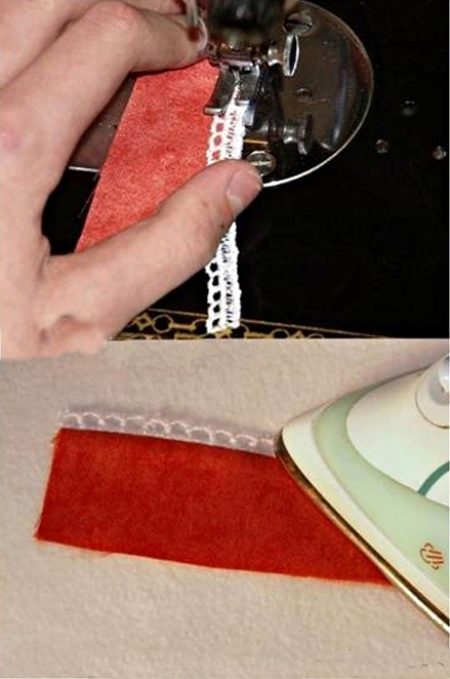
- Then a strip of lace is superimposed on a beige square, and a white segment with a hole is placed on top. A handkerchief peeps out from under him.
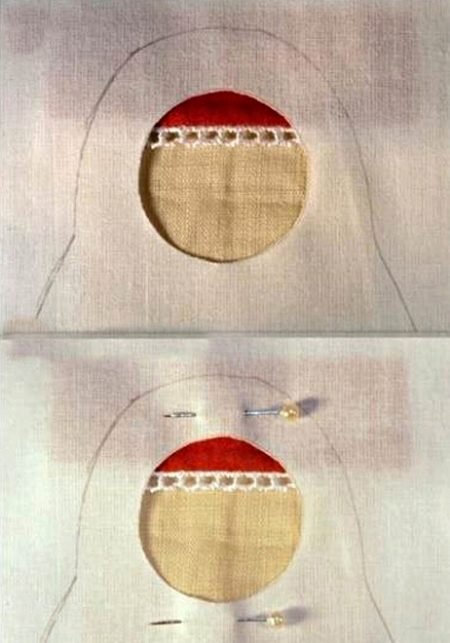
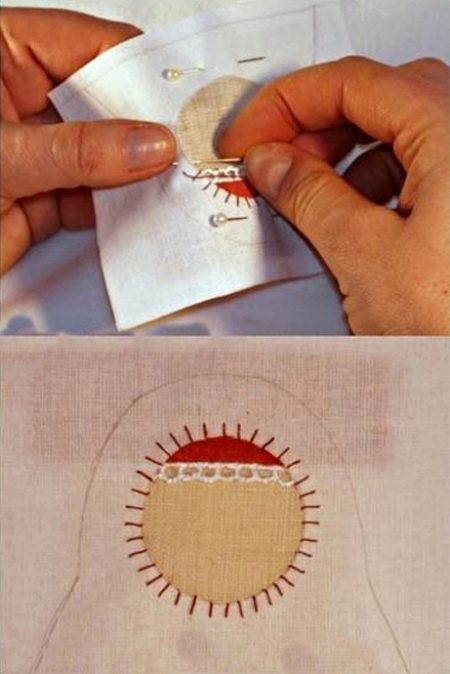
- To prevent the parts from moving when sewing, they need to be pinned with a needle / pin. Next, you should select the contour of the face, this is done using the same stitches with red thread, going in a circle.
- You can grab the bottom of the matryoshka.It is necessary to return to the pattern, cut out 2 colored parts and sew them with the front parts, as well as with the back of the head. When all the parts are already connected, they should be sewn along the contour. It is imperative to leave a hole for filling (this area is indicated by a dotted line on the pattern).
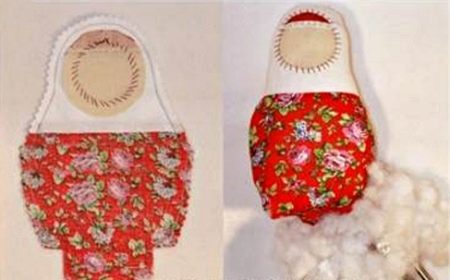
- The sewn product must be turned out, filled with filler, and then the bottom is sewn up using a blind seam.

- The matryoshka is almost ready. Now, with a pencil, you need to outline the eyes, eyebrows, nose and mouth on her face. And then make everything colored using paints and a thin brush. The blush of the doll can be organized with a pencil (you can grind it a little, and this powder will go for a blush). You can just paint on it with pastels.

- This is followed by the decor, the main thing with it is not to overdo it. It is often made from materials at hand: a piece of "ownerless" braid or thin lace ribbon, from a decorative cord. It should separate the scarf from the outfit, become the border of the scarf. You can sew a couple of buttons on the outfit, but not very large ones, they will look awkward.
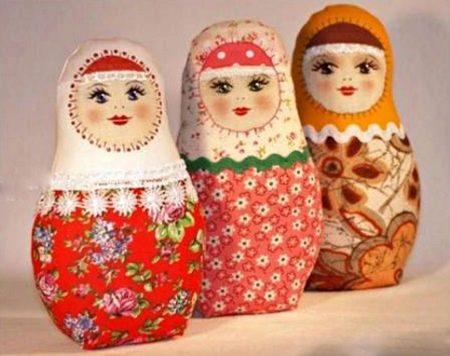
Matryoshka is ready! Such figures look more interesting when there are several of them. For example, you can make 3 such nesting dolls, fix them vertically on top of each other. For example, on a beautiful braid or thick ribbon, knitted from yarn in a pigtail. And always at equal intervals. Such a suspension will be appropriate in any room: from a nursery to a kitchen. Also cute textile nesting dolls look in a wide vase-fruit bowl - an ideal visual dessert, and even in the folk style.
And also from fabric nesting dolls nice tack-holders for curtains are obtained.
Detailed manufacturing instructions in the next video.


