How to sew a sun skirt with your own hands and what patterns to use?

Every fashionista should have this stylish piece of clothing in her wardrobe. Do you want to know how to sew a sun skirt with your own hands and what patterns to use? So this article is for you!
Let's consider the step-by-step process of creating a fashionable skirt, show all the options - from simple to complex - and tell you what to wear with it!

How much fabric do you need?
The first and most difficult thing in this matter is the choice of fabric. Regardless of the season for which the skirt is sewn, it is desirable that it keep its shape. Therefore, it is better to take a dense, smooth material.
If, when choosing a fabric, start from fashion trends, then you can stop at cotton, light viscose or linen - they are always relevant. Jeans, small corduroy, jacquard are also considered fashionable fabrics lately.


Fabrics such as organza, taffeta, satin, velor keep their shape perfectly. Depending on the style in which you see your future sun skirt, you can opt for one of these options.
When you decide on the material, calculate how much you need.


Necessary calculations
To calculate the amount of fabric you need, take the following measurements:
- Determine how long the skirt should be (it depends solely on your wishes and physique).
- Measure around your waist.

Now you can draw up a formula to calculate the required amount of fabric: the length of the future skirt, multiplied by 2 + the waist circumference, divided by 2 + 10 cm (calculated for fabric shrinkage and allowances).
That is, if you are planning to get a skirt that is 50 cm long and your waist circumference is 60 cm, then you will need a 140 cm long piece of fabric [(50 x 2) + (60/2) + 10]. These calculations will be enough to buy the required amount of fabric.
You will also need glue tape to handle the belt. Its width is selected so that it matches the width of the belt (and you define it individually, to your taste). When everything you need is purchased, you can start the cutting process.
How to cut a skirt?
The style of the sun is considered one of the simplest. Even a novice seamstress can easily open such a skirt.
To work you will need:
- big table;
- scissors;
- pins;
- crayon or remnant (sharpened);
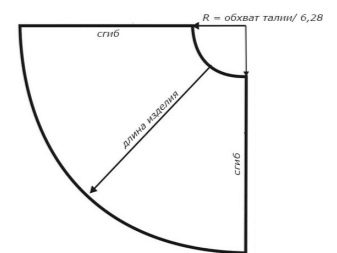
- measuring tape;
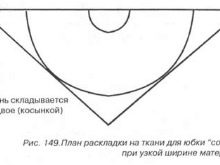
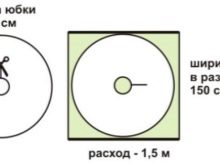
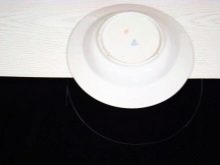
- circumference, the diameter of which exceeds the girth of your waist by 3 cm (allowances (1.5 and 1.5 cm) along the middle seam) - this can be a plate.

When the work area is ready, start preparing the fabric for cutting.
The first step is to check the fabric for defects (if there is one, you need to avoid this place when cutting). Next, determine which side is front and which side is wrong.
Before proceeding directly to cutting, the fabric must be ironed from the wrong side using steam. Here, not only an aesthetic, but also a practical goal is pursued - this is how the material will shrink.
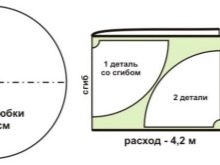
Now you can cut! Instructions:
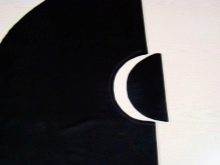
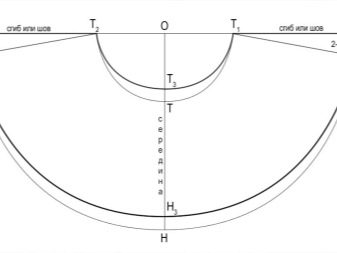
- Fold the fabric in half, right side in, with the edges lying horizontally, closer to you. Attach both halves of the fabric to each other with pins.
- Along the fold line, set the length of the skirt + 2 cm (hem allowance for the bottom edge). Mark the control point.
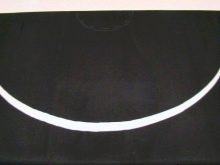
- Take a circle of the diameter specified above, attach it to the control point so that its middle passes through the fold line, and outline. This is your top cut line of your skirt.
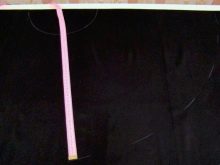
- From the resulting line, use a measuring tape to set aside (rays) several times (in all directions) the length of the skirt, adding 1.5-2 cm to it for an allowance. Make control points, then connect them together. This will give you the bottom cut of the skirt.
- Along the upper cut line of the skirt, mark up the allowance for sewing on the belt - 1 cm.
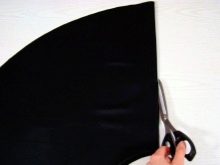
- Start cutting from the bottom of the skirt. Cut off excess fabric along the marked line.
- Next, cut off the excess fabric along the top line.
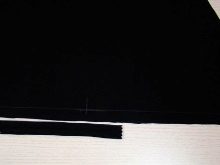
- Make a cut along the fold on one side (from edge to edge). There will be a seam in the back of the skirt (in the middle).
Open the belts
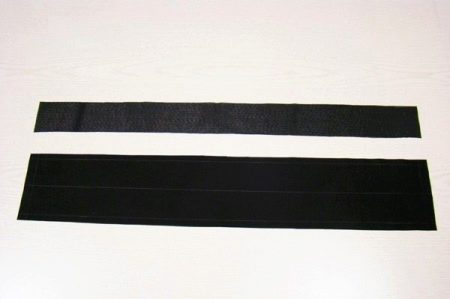
To do this, you need scraps of fabric that are left over from cutting the skirt, and adhesive tape.
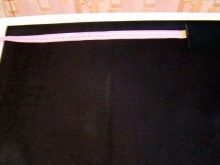
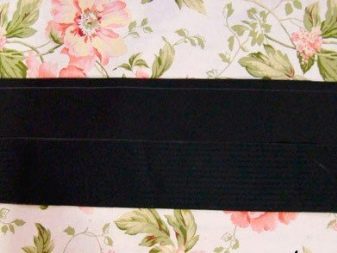
The belt for the sun skirt is a regular rectangle. Its length is equal to the waist circumference, to which 3 cm has been added (1.5 cm each for the seam allowances). The width of the belt is determined by you to your taste, but multiply the desired width of the finished belt by two and be sure to add another 2 cm (for an allowance).
Measure the required values on the fabric, outline, cut out.
Patterns
The cutting process described above is elementary and does not require preliminary construction of a pattern. But for more peace of mind and confidence in the success of the enterprise, you can take the ready-made patterns that we offer you.
Among them is a pattern of an elegant model of a sun skirt on a yoke. In her case, you can experiment with the length, choosing the ideal one for yourself (maxi, midi or mini).
You can also, using the simplest sun skirt pattern, play with layering, making a second or even a third layer using the same patterns. Then you should choose more airy fabrics for the lower layers.
The entire skirt can be made of translucent materials. There is an endless space for your imagination!

Sewing process
To finish creating your perfect sun skirt, you need to set up a sewing machine and all the necessary accessories (thread, scissors, needles, etc.) on your desktop.
You may also need an iron and safety pins and shouldn't be removed too far. Each seam will first need to be basted by hand (with a thread and a needle), then try on a skirt, and only after that, if everything fits and sits well on you, make the final seams on a typewriter.
We will consider two options for sewing: the simplest type of skirt is the sun and the model is a little more complex, but also more versatile.


How to sew a simple model with an elastic band?
You can try to create the most elementary variation of the sun skirt for a start. To do this, you need to cut the model proposed above, but without the belt. In this case, the allowance on the upper cutting line will need 4 cm more - the elastic will be sewn here.


In this case, the cut for the seam on the back of the skirt should not be made either. That is, to get the simplest sun skirt, you need to follow the first 7 steps given in the instructions above.
Then do the following:
- Measure the elastic around your waist. When trying on, take the elastic band slightly in a stretch so that it will securely hold the skirt later (if you take it exactly along the girth, the skirt may fall off).
- Fold the elastic around the top edge of the skirt, while gently scrunching the fabric. Baste by hand, try on. If the skirt fits perfectly, use a typewriter to sew the elastic.
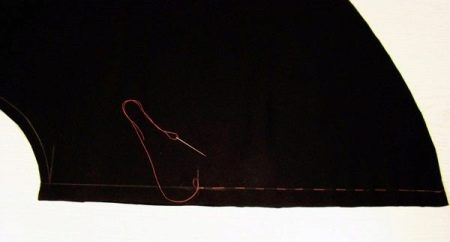
- The final action is to process the lower edge of the skirt. Fold the edge twice (the first time 0.5 cm, the second time 1 cm). Iron each fold carefully. Sketch, try on. If the length suits you, you can sew on a typewriter. If the fabric is too thin, you can overcast the edges with a fine zigzag stitch.
4. That's all! The simplest sun skirt is ready!
Sewing skirts-sun with a zipper
The model, by the example of which we taught you to cut the sun skirt a little higher, is sewn just with a zipper. Therefore, let's move on from a master class on cutting to a step-by-step guide to sewing. If you cut out the belt last, then start the process of assembling the product with it.

The mechanism of action is as follows:
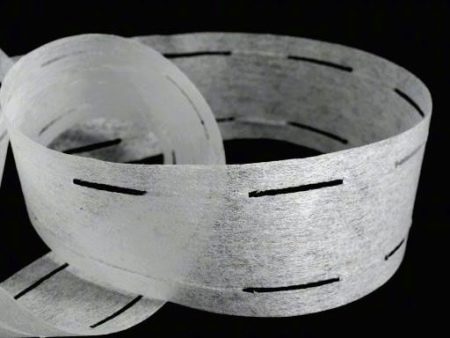
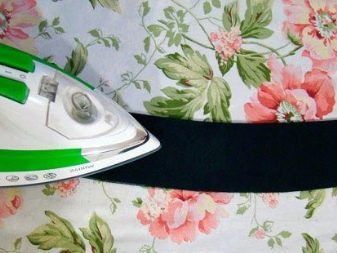
- Use glue tape to process the belt pattern along the entire length and half the width. To do this, place adhesive tape on the seamy side of the future belt. Position it so that it stretches along its entire length and is half the width of the belt blank (the top edge of the ribbon should line up with the top edge of the fabric).
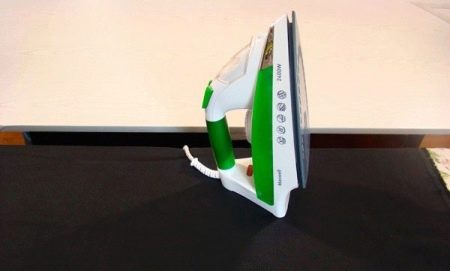
- You need to attach the tape to the fabric with an iron. Iron through a piece of unnecessary cotton fabric, otherwise you will ruin the soleplate of the iron. It is better to moisten the tape a little before gluing. Fold the belt in half (lengthwise) so that the wrong sides are inside and the cuts are aligned. And in this position, iron again. The final touch is to give the belt its final shape. To do this, you need to iron it again, strongly pulling the cut and ironing the fold. This will help the belt fit snugly around your waist. Be sure to overcast the belt cut after this.
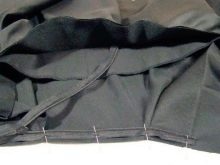
- Now sweep the middle seam at the back of the skirt, leaving space for the zipper on top (taking into account the width of the waistband, since it starts on it).
- The next step is to baste the belt (with the part where the cuts are connected) to the top of the skirt. At the same time, fasten the belt so that it extends from one edge of the back of the skirt to the other (here it will be connected to the skirt by a zipper). Now you can try on the skirt.
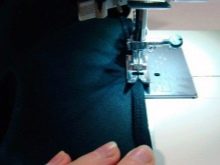
- Once the fitting has shown perfect results, you can machine the middle seam at the back of the skirt.
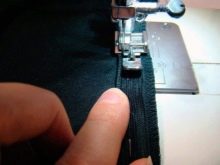
- Now sew in the zipper.
- Sew the bottom of the skirt, tucking the edges, as indicated above (see How to sew a simple model with an elastic band?)
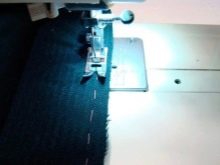
- Process the slices on an overlock.
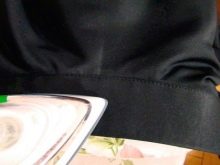
- Iron and fasten the allowances.
- Turn the finished skirt to the right side and iron the fastener and all seams with an iron again.
The skirt is ready!
For a simpler version, see here.
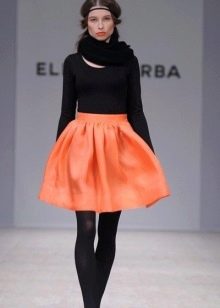
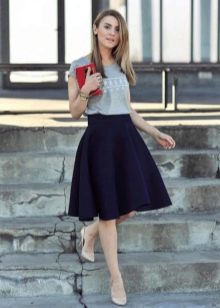
What to wear with?
In conclusion, I would like to give some fashionable tips for combining a sun skirt with other wardrobe items:
- Since the sun skirt is a very bright thing, the top should be chosen for it in a more restrained, simple cut. For example, a blouse with lace or satin, a jumper, a jacket or even just a top will be ideally combined with it.
- With a short skirt-sun, a cropped jumper with a free cut and a moderate amount of jewelry that match the style of such an ensemble looks great. It could be something in the boho style.
- Fluffy summer skirts made of airy fabrics are in perfect harmony with tight tops and pumps.


Class!