How do I trim the ends of my hair?
Women tend to pay more attention to their appearance than men. Stylish clothes, beautiful shoes, fashion accessories - all these things, of course, help to create the desired image, but if the hair looks lifeless and dull, then all efforts come to naught. Sometimes, to solve a problem, you need to take drastic measures, but in most cases it is enough just to cut the ends of the hair and the problem will disappear.
Peculiarities
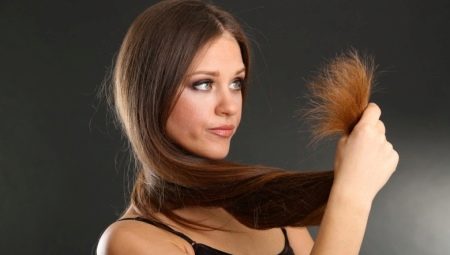
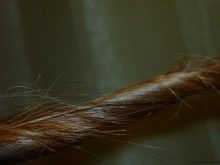
Each hair has an outer sheath, the cuticle, which is damaged, especially at the very bottom of the hair, at the ends. Split ends are nothing more than delaminated parts of the cuticle. The gradual thinning and then delamination of the upper shell reveals the inner structure of the damaged hair, which leads to dryness, brittleness and loss of shine. Split ends will not disappear on their own, they need to be trimmed, and this can be done not only in a beauty salon, but also at home. Damage to the cuticle is not always the motive for shortening the ends, sometimes it is just a desire to slightly change your image: to trim or cut your bangs, make a ladder or cascade, just shorten the length of your hair. Whatever your motives, cutting the ends of your hair yourself is not such a difficult task, moreover, it has a lot of advantages.
First of all, it is, of course, saving money. The cost of this manipulation in beauty salons can be unreasonably high, so it is more profitable for yourself to trim the tips. Visits to the salons take up time, which, for various reasons, is not always possible to carve out. An equally important argument in favor of self-cutting ends is length adjustment. It is not always possible to correctly explain to the master the degree of length shortening.
Therefore, you can cut the ends exactly and to the desired length at home. The main thing is to clearly follow the instructions, and choose the right tools for this procedure.
Required tools
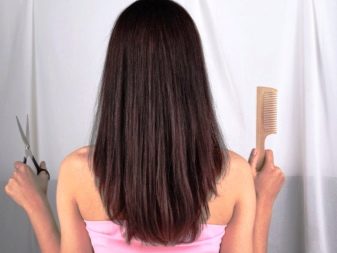
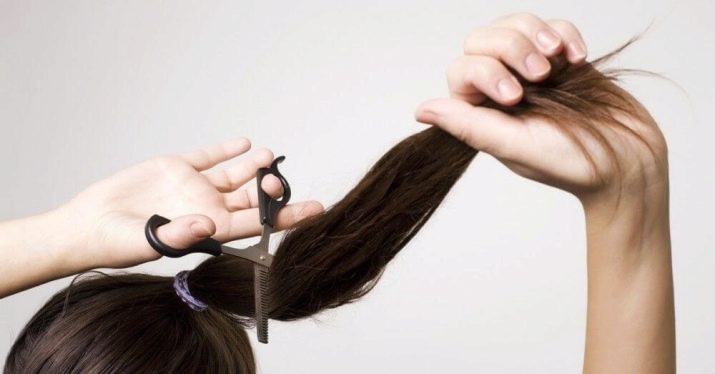
At first glance, cutting the ends does not require any special tools other than ordinary scissors and a comb, but everything is not as simple as it seems. In order for the result to exceed your expectations, in a positive, of course, sense, you need to choose the right tools. First of all, these are, of course, mirrors, where can we go without them?
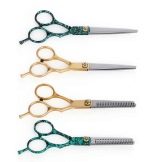
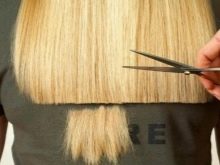
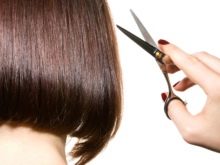
It is best if there are two of them: a large wall-mounted and a medium-sized tabletop. A large mirror is necessary to monitor the process, and with the help of the second, you can see the result of shortening from behind. In order to trim the ends evenly, it is better to use straight hairdressing scissors, standard sharpening is quite acceptable.
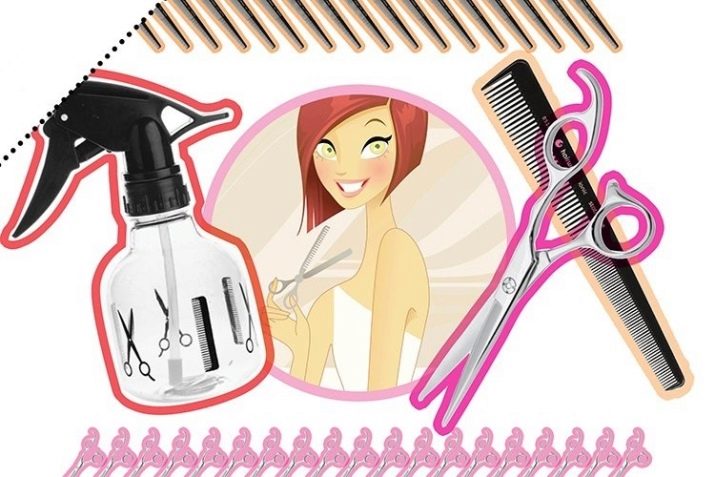
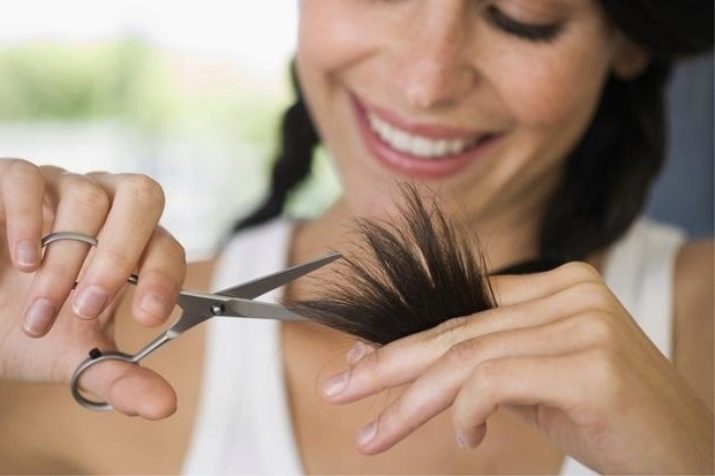
You should not use clerical, household, and even more old blunt scissors, since there is a high probability of damage to the hair structure, and, instead of the desired effect, you can get a completely opposite result - the appearance of new dissected ends.
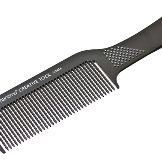
Thinning scissors may be needed depending on the type of haircut you choose. With their help, you can defuse your hair in the chosen place. The comb is another tool, without which it is impossible to trim the ends evenly.
It is better if there are two combs: one large massage one is useful for smoothing the curls, and the second straight line with two types of teeth (frequent and rare) is needed to align the strands before cutting.
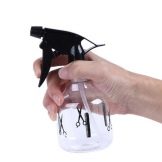
Of course, it is impossible to do without hairpins, elastic bands and all kinds of clips. Their number and size depends on the type of trim. Cutting and straightening the ends is very difficult to do on dry hair, so you need a spray bottle with water.

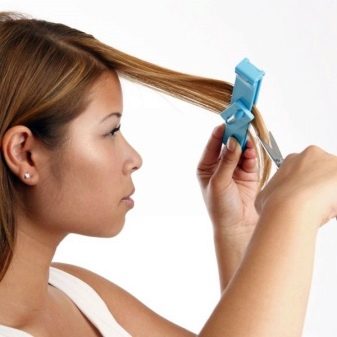
The barber's level, shaped like a clip, makes the process much easier. The choice of the type of level depends on where you cut the ends. If you need to trim the bangs, then it is better to purchase a small level, and if you want to trim the hair along the entire length, then you need to use a larger level.
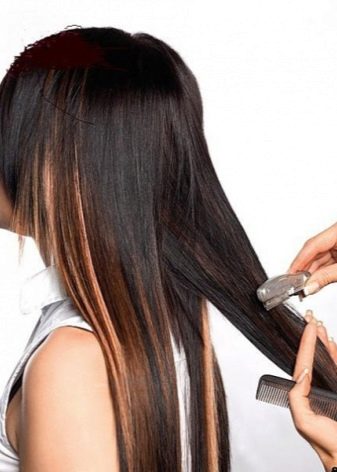
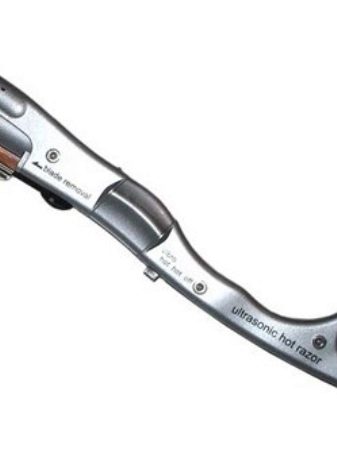
For severely split ends, it is best to use a special device. The sharp hot razor of the appliance will not only allow you to trim the hair to the desired length, but also solder the ends, thereby preventing further delamination of the cuticle.
The device for split ends, which does not require special skills during operation, will allow you to improve your hair, significantly saving your time, and the result will last about six months.
The ways
There are many ways to trim the tips. The choice of this or that method depends on many factors. You need to take into account everything: the length of the hair, and the structure (thickness), and the type of haircut. It's no secret that the longer your hair, the easier it will be to line up the ends of your hair. Correctly trimming hair that is too short, especially in the back of the head, is unlikely to work, so it is better to contact a professional.
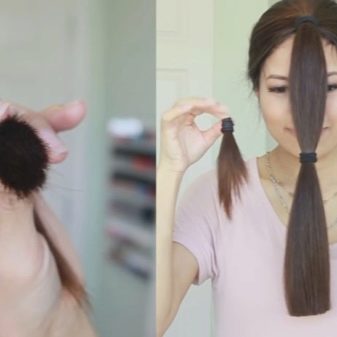
But if your goal is to cut or shorten the length of the bangs or cut the ladder in the area of \ u200b \ u200bthe temples, then such manipulations can be carried out independently. For long hair, there are at least 3 ways to trim the ends, implying different methods of capturing them: tourniquets, ponytail on top of the head, low tail set. Other methods of trimming the ends, such as 2 tails, 6 tails, combing the hair forward and some others, are used a little less often.
The most time-consuming and long-lasting, but at the same time allows you to trim the hair along the entire length, and not only in the lower part, is twisting the curls into small flagella. This method is suitable not only for long, but for medium length hair. When curling, hairs with dry lifeless tips are knocked out - and they are cut.
The rest of the methods help not only get rid of dry ends, but also give the hair the desired shape. Some techniques are based on pinning the tail. Depending on the location, you can achieve a different cut shape.
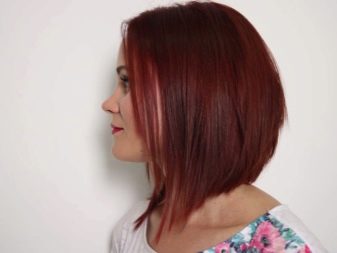
To trim your hair in a semicircle, the ponytail should be as close to the neck as possible. For a cascading haircut, the tail is fixed on the crown or fixed closer to the neck 2 tails, having previously divided them into 2 equal parts. For a beautiful square, the 6-tails method is suitable.
If the hair is quite long or you need a ladder in the temporal part, then you do not need to resort to rigid fixation of the hair. With the help of a clear selection of zones, the hair can be cut with a triangle, cascade, or simply make a classic even cut.
In order to add volume to thin and not very thick hair, a cascade is well suited, but if there is very little time or you don't really like different lengths, then you can simply cut the strands in the temple area with a ladder.
Execution technology
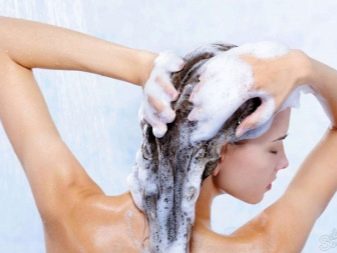
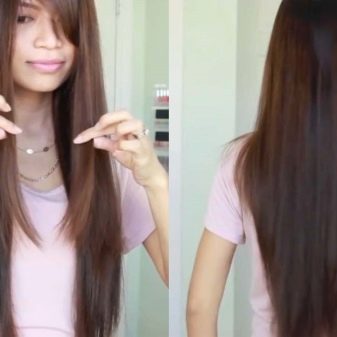
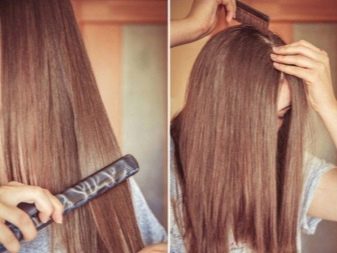
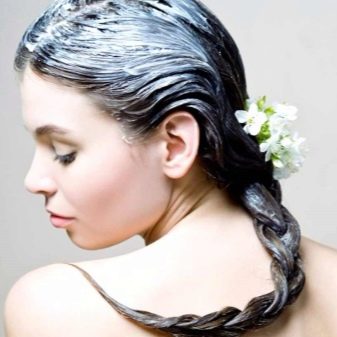
It is possible to give the hairstyle the desired shape and cut off the tips that spoil the appearance of the hairstyle only by observing the technology of execution. Only step by step following the instructions will save you from mistakes. Regardless of the method chosen, it is necessary not only to prepare the place and tools, but also the hair itself. The first step for any type of haircut is shampooing and hair balm treatment. Cutting clean, smoothed hair is much faster and more pleasant.

Let's look at different hair trimming schemes.
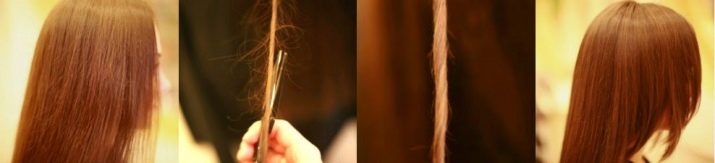
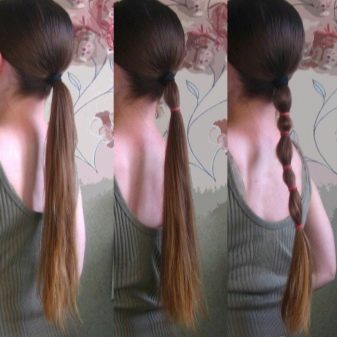
With a low tail
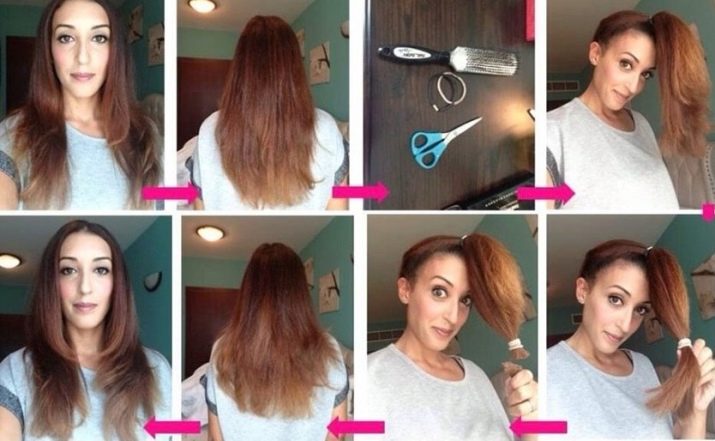
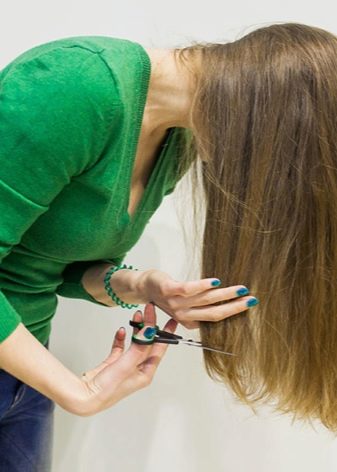
We collect well-combed hair in a ponytail and fix it with an elastic band; it should be located below the back of the head in close proximity to the lowest hairline. Carefully combing the tail, moisturize it along the entire length if the hair is dry.
Then we fix the hairs in the tail with the help of additional elastic bands, placing them every 3-4 cm along the entire length. The lowest retainer should be just above the intended cut level. Having fixed the thin tip of the tail between the fingers, and keeping the scissors parallel to the fingers, carefully cut the hair. At this stage, the hair cut does not have a very straight line, the strands in the central part are slightly shorter than the side areas.
For further trimming, remove all the rubber bands fixing it from the tail and proceed to leveling the cut. Dividing the hair into 2 halves, move it forward. Separate and then fix the upper part of the hair with a clip or elastic band. The lower part should fall freely over the shoulders.
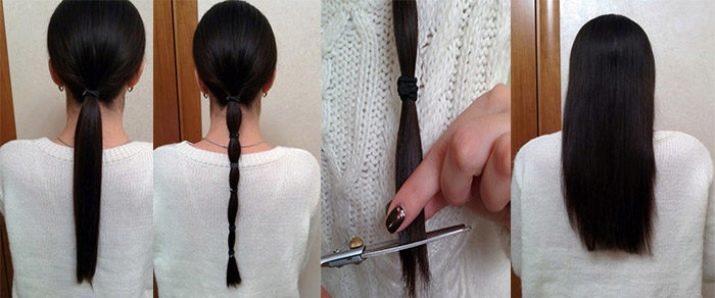
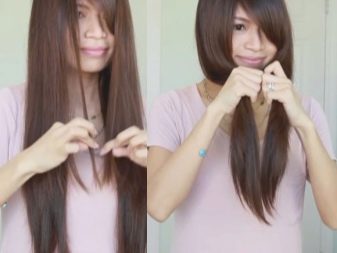
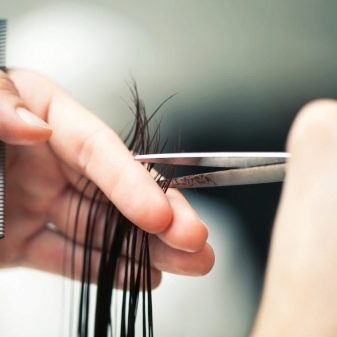
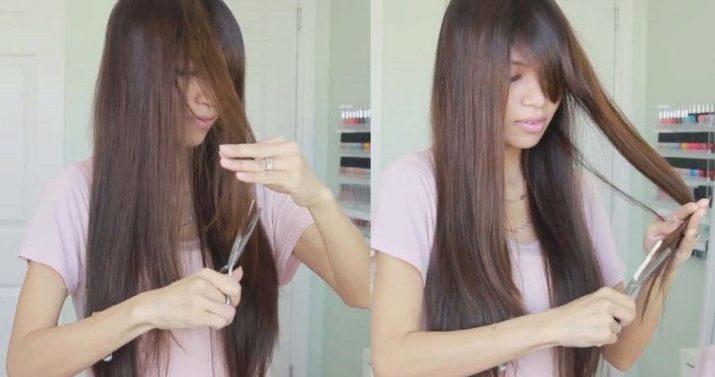
You must first align the cut on one side. Having combed out the hair well, we determine the shortest strand, and we will be guided by it. We fix the hair between the index and middle finger just above the intended cut, the shortest strand should be visible, carefully cut off all the long hairs.
We carry out a similar operation on the other side. Unfasten the previously fixed upper part of the hair and comb it out again. Shorter strands from the bottom are clearly visible among the longer strands from the top layer of hair. We fix the hair, and, focusing on the short strands, we make a cut.
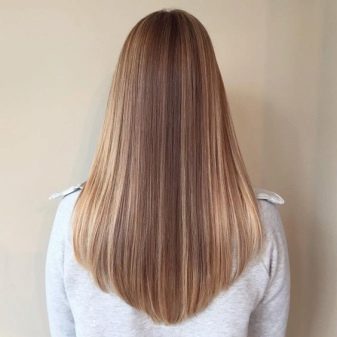
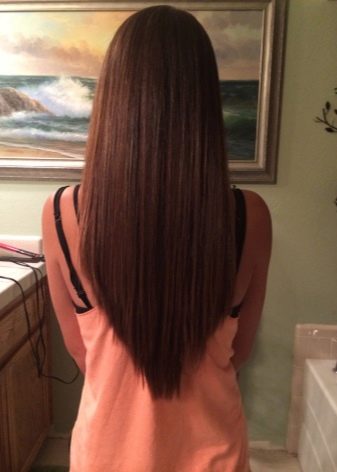
To check the cuts for symmetry, we separate the strands located closer to the face on each side and compare them with each other, the ends of the strands should be at the same level. The result should be beautiful flowing semicircle.
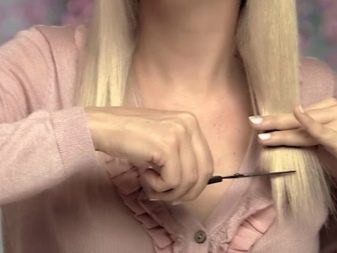
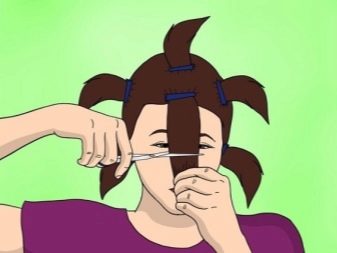
With a high tail
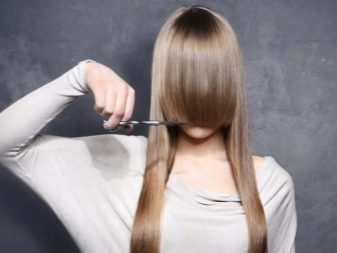
Having carefully combed the hair, collect it with an elastic band in a high ponytail. It should be located as close to the hairline as possible in the forehead area. Keeping our head straight, we begin to comb the hair forward. Holding the hair with one hand, and collecting the stray hairs with the other, we try to give them a position perpendicular to the face.
We fix the tail with elastic bands.As a rule, one elastic band is enough, fixed closer to the future cut line, but you can also fix two, one closer to the hairline, and the second closer to the cut line. We fix a thin strand between the fingers, and cut off the required length, while keeping the scissors parallel to the ends of the strand.
We cut all subsequent strands, focusing on the first. Remove the gum and carefully examine the resulting cut.
To check, we remove the elastic band, comb the hair and, holding it with one hand, give it a position perpendicular to the face, the trimmed ends should hang down. We check the cut for evenness, if any flaws are found, we correct it.
As a result of this method of trimming the ends, an even cut when combing the hair forward turns into a multilayer and smoothly transitioning cascade. In order to emphasize the multi-layered haircut, it is necessary to change the way the scissors are set relative to the cut. A smooth serrated cut will turn out if, when cutting, the scissors are not kept parallel, but perpendicular to the cutting line.
In order to emphasize the ladder in the face area, you need to highlight the side strands on each side. Release your hair and on each side, highlight the temporal strand, extending from the hairline in the temporal part to the auricle. We comb the strands and set them strictly perpendicular to the face, while keeping our head straight. Having fixed the hair between the fingers to the length necessary for the cut, we cut the ends either holding the scissors parallel to the cut, or perpendicular to obtain a serrated cut. You need to move from top to bottom.
To obtain a ladder, you can use another method. We comb the selected temporal locks, grab and pull the strand down. Strictly keeping our head straight, we cut the strand not in a straight line, but along an oblique line. The shortest tips should be at the top and the longest at the bottom.
When forming a ladder, the line of scissors and the hair line from the strand should form an acute angle, cutting, the scissors hold the strands relative to the strand with a slight deviation to the side. After the formation of the main line, we remove the flaws. As close as possible to the cut line, we fix the strand and cut off the hairs that have come out of the cut.
With a sharp triangular cut
Divide the hair into 2 parts and lower the head down. When trimming the tips, the head should be parallel to the floor surface.
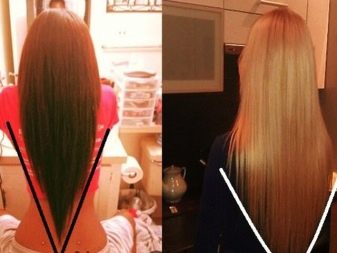
For a more pronounced ladder, the cut line should be more oval, with the shortest ends closer to the forehead and the longest ones closer to the neck. From short to long ends, you should get a smooth transition.
We start trimming from the strands located closer to the neck, where the longest ends will be. Having cut the strand on one side, we immediately equal the strand on the other side along it. We connect them together and check the length. If everything is in order, we proceed to the formation of the line. We fix the hair on one side, and, focusing on the trimmed strand, we form a line in the form of teeth. As a result of all the manipulations, an oblique cut should be obtained.
The resulting strand cut, located closer to the frontal part, is compared with a similar strand on the other side and, focusing on the short one, we cut it. Now we fix the hair and make the cut line in the same way. After the cut lines are formed on both sides, we begin to remove the flaws. Combing the hair alternately on different sides, we cut the stray hairs. The final stage in this method is the formation of a ladder around the face.
6-tail bob
This method is a little more complicated than the previous ones, but it is quite available for independent implementation.
We comb the hair, divide it into 6 strands and fix it with elastic bands. You should get 2 temporal, 1 occipital, 1 strand with bangs and 2 - near the crown. We pinch the strand of the tail between the fingers, and, depending on the expected result, we make a cut. If you need exactly trimmed ends, then keep the scissors parallel to the cut line; for a multi-layer haircut, they should be tilted a little.
If you hold the scissors perpendicularly, then the cut line will be serrated, and the haircut will acquire additional volume.
Harnesses
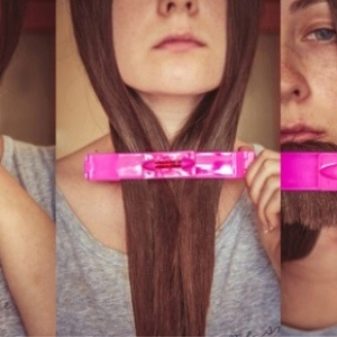
You can cut to the desired length without retainers (elastic bands, clips). The easiest way is to twist the hair into 1 bundle. Lower your head and comb your hair, gather in a ponytail and twist into a tight plait. Secure with your hands and cut to the desired length. Comb and twist the hair rope again, but this time twist it in the opposite direction. Trim any loose ends.

How often should you trim?
The frequency of trimming the ends depends on their appearance. Healthy ends do not differ from the bulk of the hair either in tone or in density. The cut ends are dull and lifeless. Hair with dry ends grows more slowly due to lack of water and vitamins, often gets tangled, and when combing such hair, healthy hair can be damaged with effort.
In order for the hair to always have a healthy and well-groomed appearance, and the shape of the hairstyle is periodically updated, it is necessary to trim the weakened ends at least once a month. This procedure should be done, no matter how long your hair is. It is enough to cut from 1 to 1.5 cm, because during this period the hair will become longer by at least 1.5, and at most by 2 cm, which will not significantly affect the shape of the hair.

Useful Tips
In order for the haircut process to be as easy as possible and to please the result, you should adhere to some of the recommendations of experts.
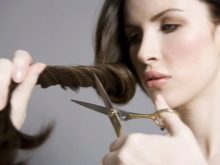
For better visual perception, especially if there are vision problems, it is advisable to choose the right tools not only, but also the color of the clothes. Blond hair is much easier to trim if the clothes are in dark colors, while dark ones, on the contrary, are better visible on light-colored clothes. The trimmed ends need to be cut not along the line of dissection of the scales, but a couple of centimeters above this place.
In order not to injure the ends even more when cutting, it is better to keep the scissors at a slope. Using conditioner and nourishing masks will help extend the interval between haircuts.
Do not wash your hair with too hot water, the high temperature has a detrimental effect on the cuticle. Tight rubber bands and metal-toothed hair brushes injure and thin the outer layer of the hair.
For information on how to trim the ends at home, see the next video.


