Iris folding for beginners
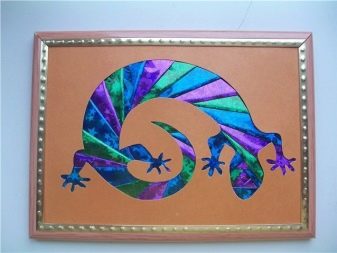
Iris Folding is the art of arranging colored strips of paper in a specific order and is translated as “rainbow folding”. The Dutch came up with creating unusual pictures in a similar way in the middle of the last century. Over time, this technique has pleased many creative people from different countries. It does not require a lot of investment and special talent, and the result is an impressive, bright craft.
Features of the technique for beginners
The iris folding technique captivates with its simplicity of execution, the availability of material and the beauty of an original picture, created by oneself. Simple options for products are subject even to children 5-6 years old, and as they grow older, the plots of crafts become more complicated. For many adults, the fascinating art of Iris folding has become a real hobby.
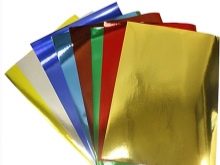
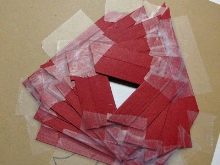
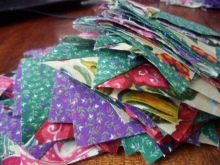
To create a postcard or mural, you need templates. It's easy to make them yourself, but you can borrow them from the Internet. Further, the image is performed using multi-colored paper ribbons laid at an angle in the form of a spiral. For the product, you can choose any type of paper - shiny, with a velvety base, corrugated or created specifically for the iris technique. Currently, in addition to paper strips, craftswomen use fabric blanks, satin ribbons and leather.
This technique gives the picture a more expressive and solid look.
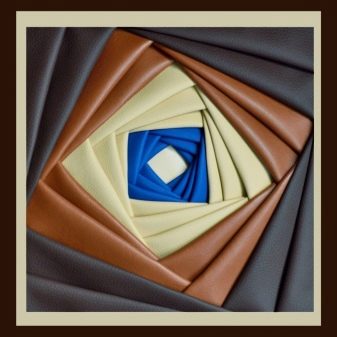
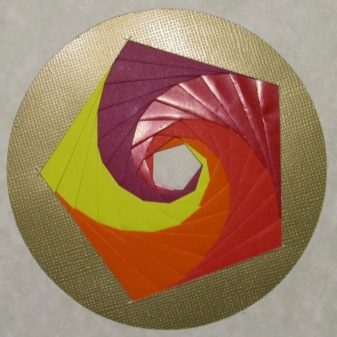
The process itself can occur in two ways:
- after the spiral laying of the strips, the center remains unfilled and is sealed with a piece of paper or cloth;
- in the final version, the middle is completely filled.
The finished drawing is often complemented with other decorative elements - bows, beads, sparkles.The iris folding technique is used to decorate postcards, photo albums, notebooks or create original paintings in order to decorate the interior.
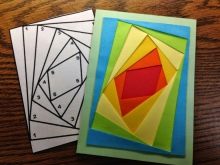
Templates
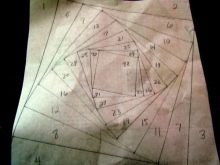
You can create a template yourself, for this you need a pencil and a sheet of paper in a cage. For beginners, it is better to choose a simple, understandable shape - a square, a circle, a rectangle, a triangle. As an example, let's take a square and draw a similar figure in it, a little smaller, then even smaller, and more ... Until the whole stencil, like a nesting doll, is filled with square figures located one in one. The step between the lines can be any - from 10 to 20 mm.
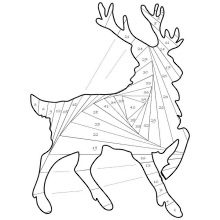
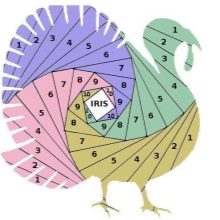
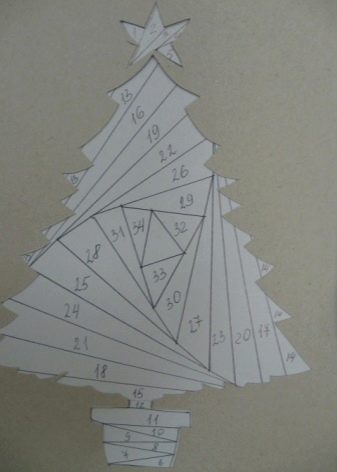
More experienced craftswomen make complex patterns to create a specific pattern. On such diagrams, the order of laying out the stripes is numbered, and sometimes the color of each blank is indicated.
Simple master classes
Before starting work, you need to decide on the topic of the craft - a New Year's card, wedding congratulations, a panel on the wall. Then prepare everything you need for creativity, including a pre-made template and a backing that helps keep the table from cuts with a clerical knife.
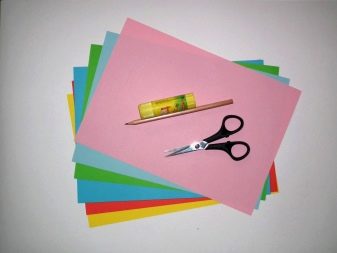
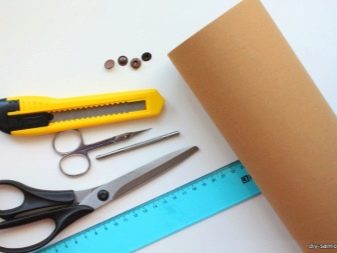
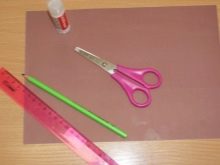
For work you will need:
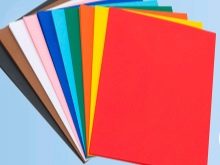
- paper of different colors;
- background cardboard;
- scissors;
- Ruler and pencil;
- paper clips;
- scotch tape or glue;
- stationery knife.
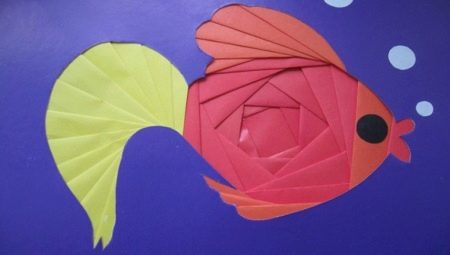
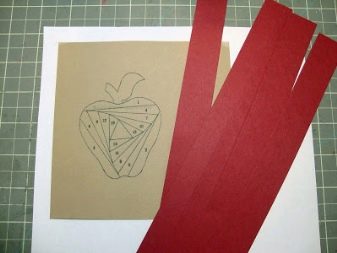
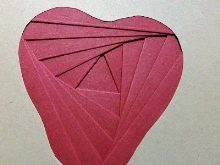
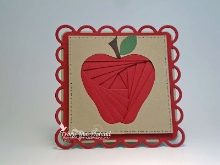
For beginner craftswomen, we suggest using simple geometric shapes for creativity. Those who find them too boring can choose simple images - a herringbone, an apple, an owl, a heart.
The application is made step by step in the following way.
- Strips of the length indicated in the diagram are cut. The stripe width should be 2.5 times the specified pitch. Do not forget about the allowance - it must be done 2 centimeters from all sides.
- Cut stripes are folded in half along their entire length.
- It's time to prepare the foundation. The background cardboard is folded in half, in the form of a postcard.
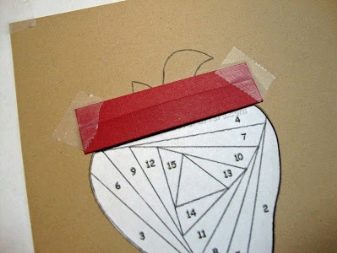
- With the help of a template, a shape, for example, a circle or a heart, is cut out with a clerical knife. To cut neatly, without errors, the cardboard with the template is fixed with paper clips.
- Further, stripes are laid out on the seamy side according to the scheme, thoughtfully alternating shades. The first tapes are fixed with tape or pencil glue to the base, all subsequent blanks are attached to the base and the previous tapes.
At the last stage, the seamy part of the craft is sealed with velvet paper or a piece of fabric, and the front part is decorated with additional elements or you can leave it as it is.
Here are examples of crafts that are easy for novice craftswomen to do.
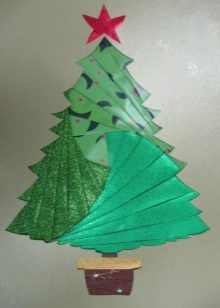
Christmas tree
Handmade in the form of an elegant postcard will be a wonderful addition to a gift to a loved one. Such a gesture is done with love, a kind attitude is emphasized and does not go unnoticed by the one to whom it was intended.
So, for the postcard, paper of 3 colors is prepared, and the following actions are performed.
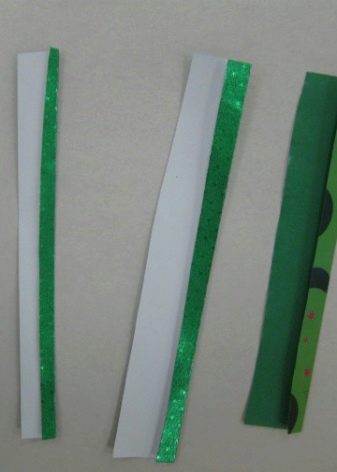
- Paper of all prepared shades is cut into strips 3 cm wide. The number of strips will become clear in the course of the action, so you should not stock up on too many details, missing blanks can always be replenished.
- The cut strips are folded lengthwise in half.
- Then strips of suitable tones for the trunk are cut and also folded.
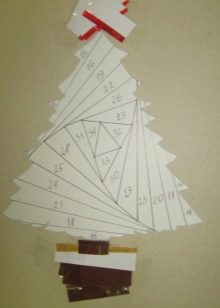
- A sketch of a Christmas tree is applied to the cardboard and cut out with a clerical knife.
- The printed cutout template is connected to the cardboard blank with staples.
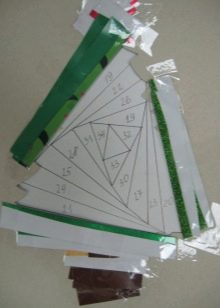
- The first strips are applied to the barrel and fixed with glue.
- Then, according to the scheme, the details of the tree itself are laid out. The color scheme of the tree is selected according to the taste of the master.
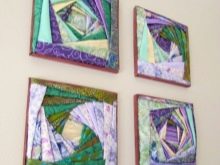
Fabric product
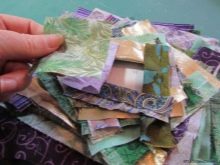
Textile crafts are more voluminous and original. A panel or picture made of fabric using the iris folding technique can decorate the wall of any room. To create a textile panel, you should prepare:
- multi-colored scraps of fabric;
- thick cardboard;
- scissors and a stationery knife;
- tape and pencil;
- prepared template.
Having prepared everything you need, they get to work:
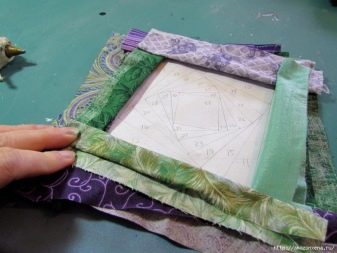
- a frame is cut out of cardboard;
- the template and frame are connected with paper clips;
- the material is cut into strips of 45x10 cm;
- carefully following the scheme, lay the strips and fix them with tape;
- the finished product is turned over to the front side to seal the wrong side with cardboard;
- if desired, the panel can be decorated with rhinestones, beads, beads.

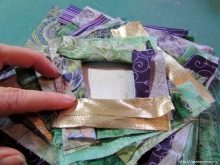
A product made of leather or velvet fabric will look especially original. When performing work from textile parts, you need to take into account some of the nuances.
- It is more convenient to work with dense fabrics - satin, velor will do. If there is a need for a thin material, each strip inside such a tape must be laid with cardboard to add volume to the future panel.
- Longitudinally folded strips should be smoothed well with an iron.
- To make the final drawing of the spiral clockwise, when making a template, the drawing is performed in the opposite direction.
Only neatly, strictly according to the pattern, the laid out spiral can look perfect
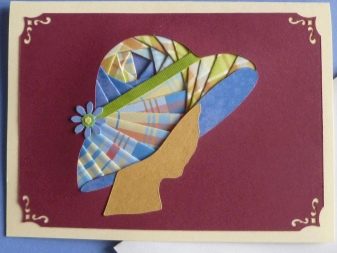
Beautiful examples
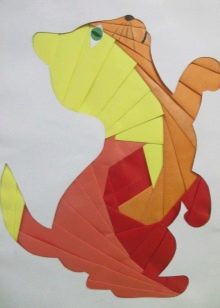
With the help of "rainbow folding" techniques, not only children's crafts are performed, but also serious work with a claim to a work of art. This can be seen by examining the products of talented craftswomen.
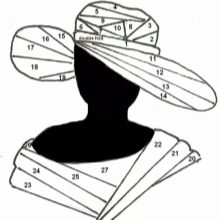
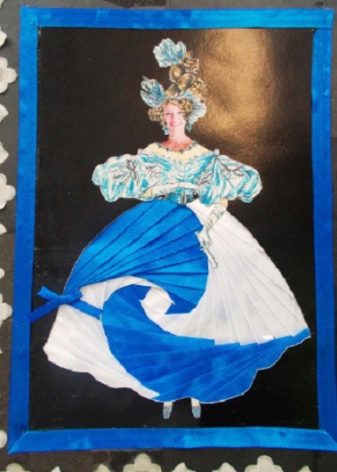
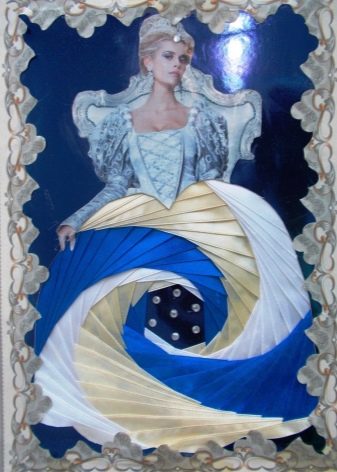
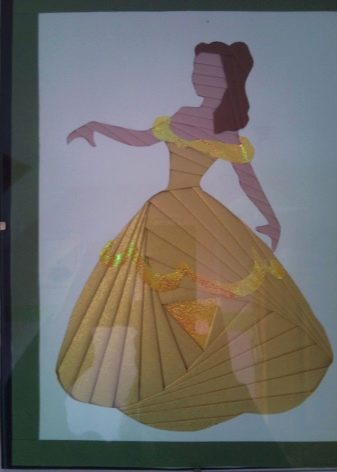
- Using the iris folding technique, a painting was made using a photographic portrait. Such decor will be an invaluable gift to the owner of the photo and a beautiful decoration of the room.
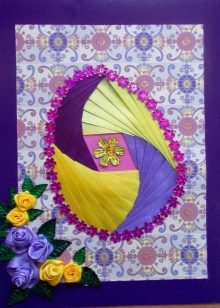
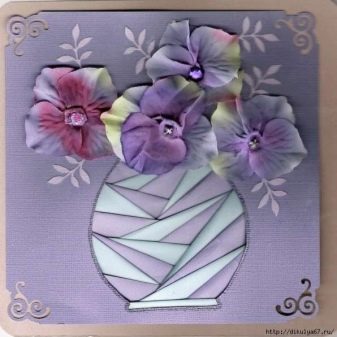
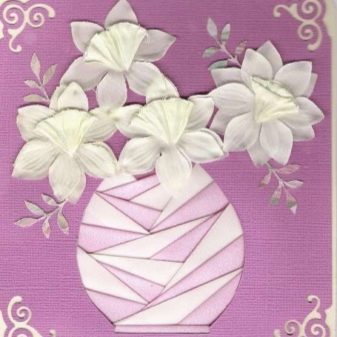
- You can decorate a gift album with voluminous flowers in a vase or put it in a frame and hang on the wall as an original painting.
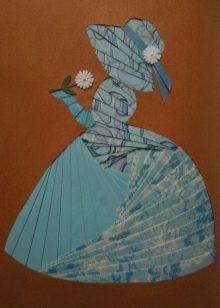
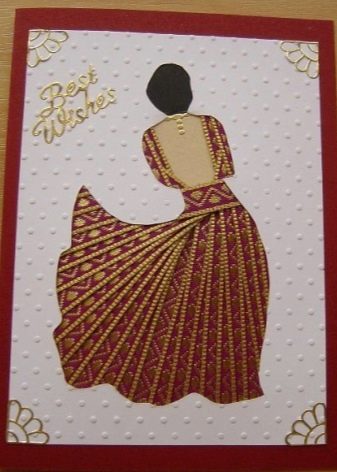
- The portrait of the leaving girl is made of fabric in monochrome brown.
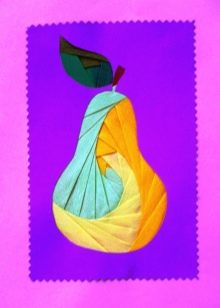
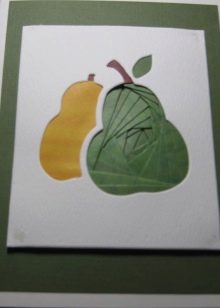
- Original still life with pears.

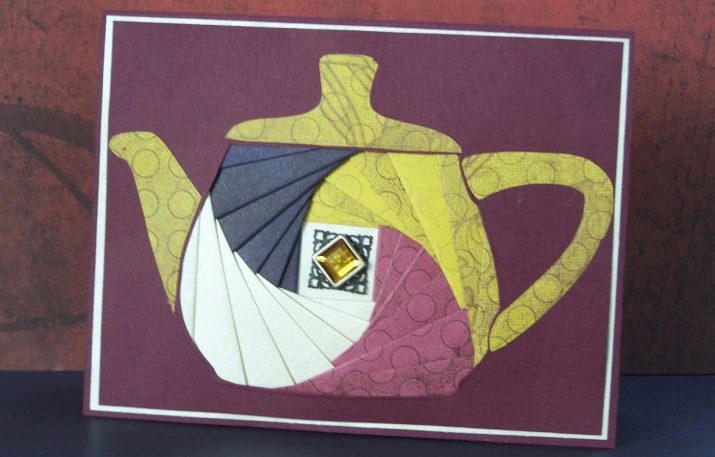
- A painting with a teapot made of folded ribbons can be a decoration of the kitchen.
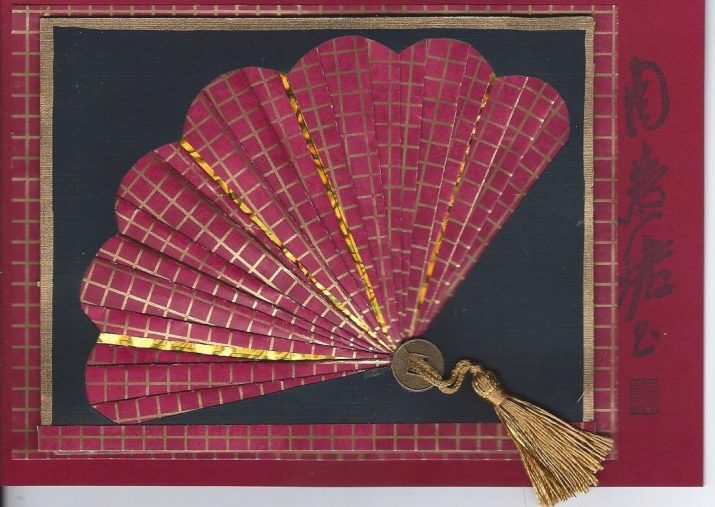
- A postcard with a fan is a simple and original solution.
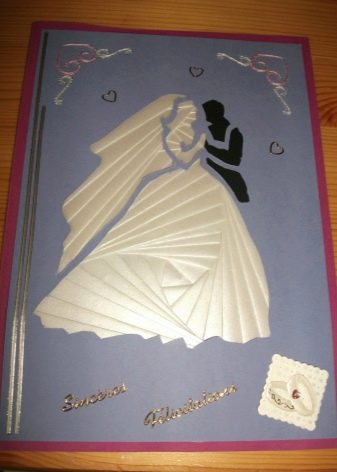
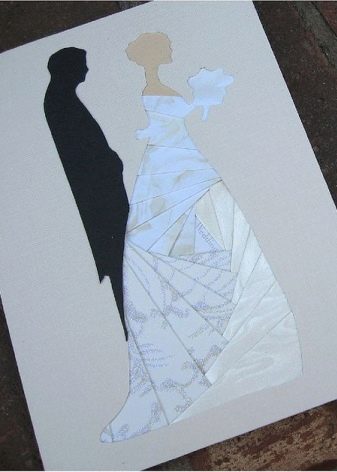
- DIY wedding gift.
The iris folding technique is useful for adults and children. She develops attentiveness, perseverance, patience, teaches accuracy, allows you to fully reveal your creative potential.
For information on how to make a postcard using the iris folding technique, see the next video.


