Description and selection of hammers for beating meat

The meat hammer is a must-have in any kitchen. This tool greatly simplifies and speeds up the process of cooking meat. Currently, the household departments offer a wide range of the most modern models, among which it is quite difficult for a young housewife to choose the most suitable attribute. Let's take a closer look at the most relevant options.

Appointment
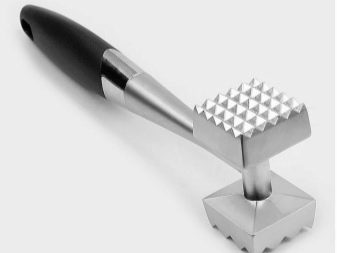
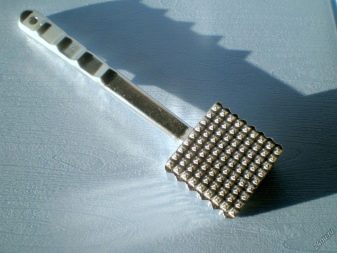
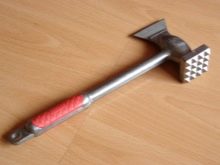
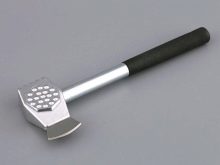
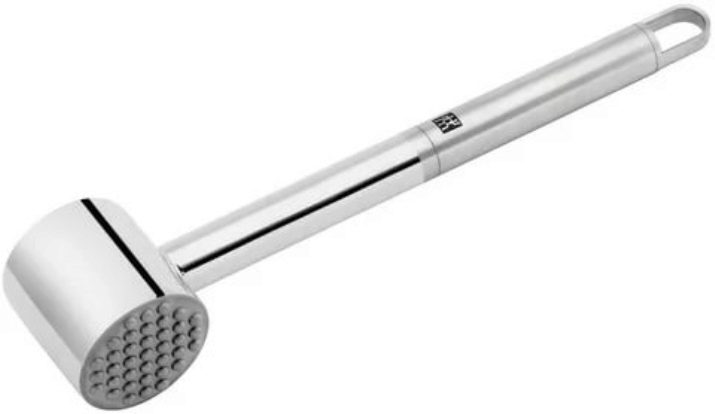
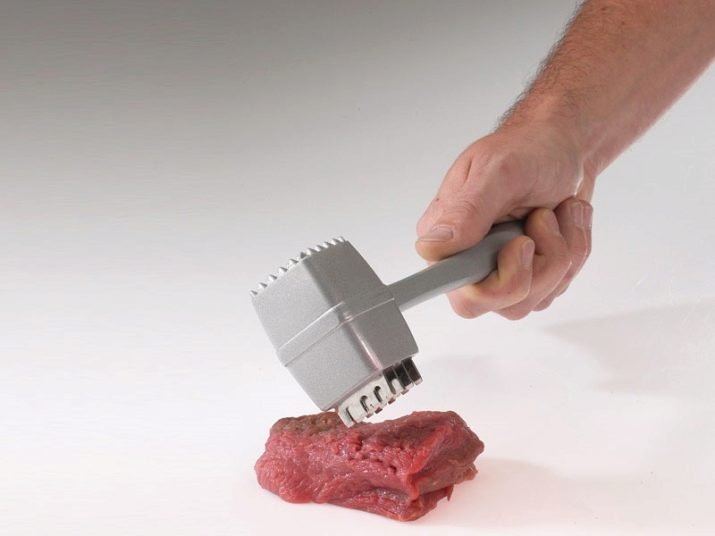
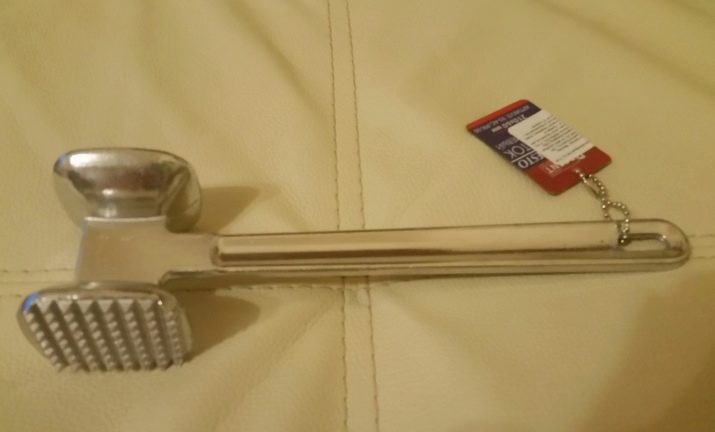
The special hammer is a kitchen utensil for beating meat. In appearance, it resembles an ordinary carpentry tool, but smaller, lighter in weight and with two working surfaces - often smooth and ribbed or jagged.
The beaten meat product with fibers softened by the impact of the impact is quickly fried, becomes soft and juicy, it is well chewed and easier for the body to absorb, that is, meat fats and proteins in the intestines are absorbed faster and more fully. The beaten off meat does not allow the proteins in the body to rot, and it is this process that is often the cause of many diseases of the digestive system. Also, soft meats are more beneficial for the teeth.
However, there are disadvantages to using a hammer. So, in the process of beating, the meat loses a lot of juice containing useful elements. Of course, most of it remains, but far from fully. Therefore, it is important to choose the correct thickness of meat so that the body can easily cope with the piece and the meat retains its maximum benefit.
To save some of the juice, experts advise not to level the surface of the meat after beating, then the liquid with the necessary salts will remain in the grooves.But in case of digestive problems, it is still recommended to sacrifice some of the nutrients and beat off the meat more diligently.

Views
Among the popular examples of chop hammers the following varieties are distinguished.
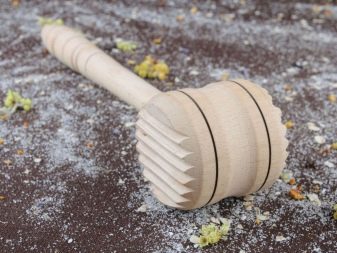
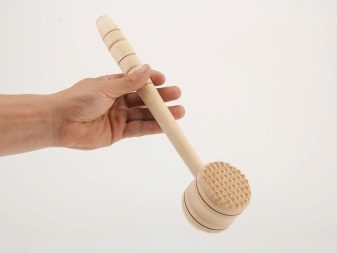
Wood. It is a very light attribute, it is convenient for them to work, but the quality of work leaves much to be desired. Due to its lightness, a wooden tool cannot give the meat a fine, soft texture. On the one hand, it is a safe, environmentally friendly material, but nevertheless, under the influence of moisture, the tree quickly collapses, and from frequent contact with raw meat, bacteria form on the surface of the product.
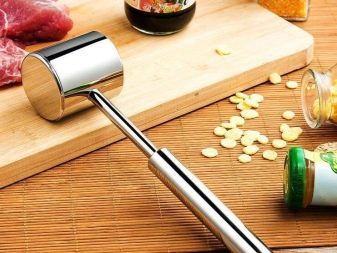
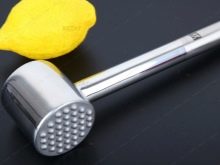
Made of stainless steel. Stainless steel inventory could be found in Soviet cuisine, and this is no accident, because who, if not grandmothers, know a lot about the selection of tools for preparing the most delicious dishes. This is the most preferable option, which beats the tenderloin accurately to the desired thickness. It is not too heavy, and therefore no effort is required to beat.
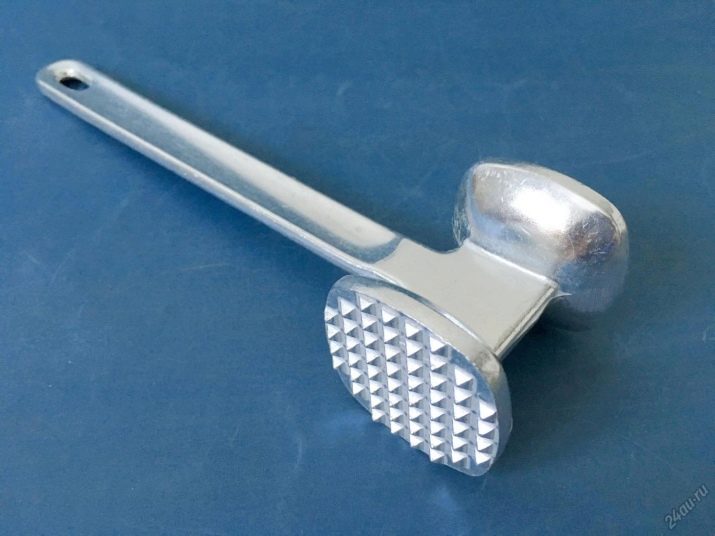
- Aluminum. This specimen is best used for chicken fillets or miniature meats, as it is quite light and cannot handle thicker meats. In general, this is a practical product that is hygienic and does not absorb moisture. For aluminum tools, temperature drops and rust are not scary.

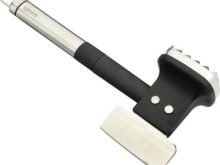
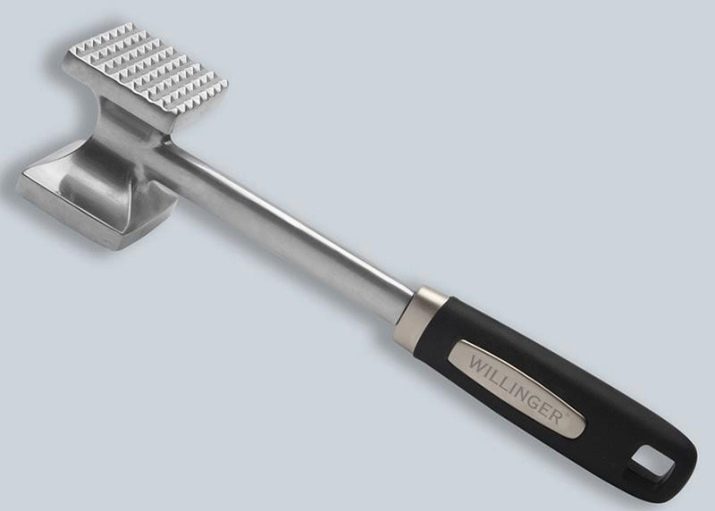
- Hatchet. This attribute looks like a classic hammer, but on the other hand it has a hatchet that can easily chop meat. A more expensive option, but if you consider that a hatchet is also needed in the kitchen, then the purchase of "two in one" will cost even less.
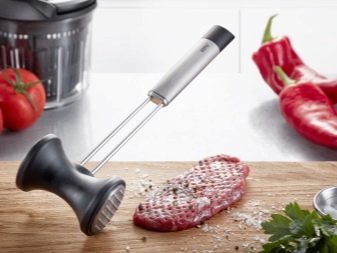
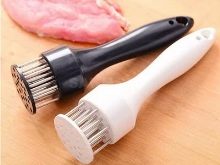
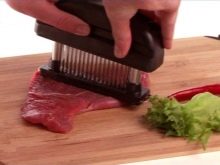
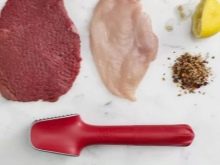
- Tenderiser. A modern tool for beating meat. It is a device with long sharp needles or a thin blade on one side. The second side usually has a raised or smooth surface to line the chop. This specimen easily pierces a piece of meat through and through without cutting or crushing it. The holes from the needles allow the marinade to penetrate to its maximum depth, making the meat well-baked and juicy.

How to choose?
When choosing a meat hammer use the following guidelines.
Choose a tool made entirely of stainless steel. Even if the attribute has a metal surface, but a wooden handle, then raw meat will still fall on the wooden covering, which is then quite difficult to process and disinfect. Wooden and aluminum products are suitable only for soft tender slices or chicken, and steel specimens are universal.
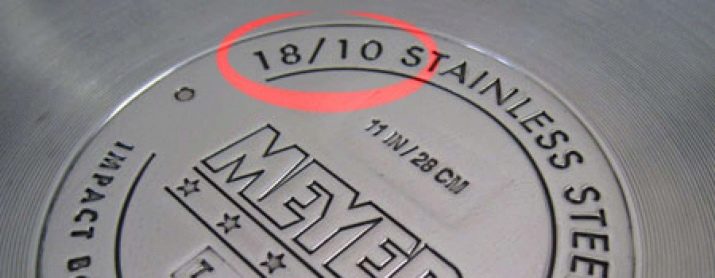
Prefer 18/10 stainless steel bumpers. Better to take models of medium weight. If you take a light hammer, then it will take more effort to hit; if it is too heavy, then you will have to be careful not to flatten the meat at all.
The work surface can be round, square or rectangular. Choose models with corners, as they can have 3 or 4 working surfaces, and round ones - no more than 2. In general, the shape does not affect the ease and speed of the workflow.
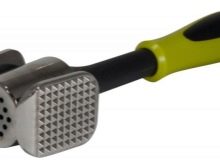
If in the kitchen you often have to beat off thick, tough pieces of meat, then choose a hammer with large teeth. Small teeth work well for delicate finishing or beating off the edges. Use a smooth surface for crunching steaks. In general, it is recommended to select an appliance that has the correct tooth height on one side and a smooth side on the other.
Do not refuse options that additionally have a wavy work surface. This element allows you to beautifully process meat for drawing, like in a grill pan.

Pay special attention to the choice of the handle. To do this, take the copy you like in your hand and make sure that it is convenient for them to work. According to reviews, handles made of rubber, synthetic rubber or aluminum can be considered comfortable. Give preference to round holders.If the choice fell on a rectangular handle, then remember that it will lie unnaturally in the hand, and the corners will press on the skin of the palms. It is recommended to buy products with a thickened handle - it is more convenient and practical.
Pay attention to the additional capabilities of the hammer. If tools are stored in the kitchen on hooks or rails, then choose products with a hanging loop. Then the bump stop will not get lost in the common cutlery drawer.
Choose classic steel models. A fashionable tenderizer is not suitable for good beating, it will only speed up the marinating and frying process, but will not make the meat soft and thin. After using the tenderizer, the piece is “chewed”. Judging by the reviews, it is more convenient to work with a simple hammer, and the products beat off much better.
- Check the model you like for strength, make sure that the parts do not fly apart during operation, and the flying hammer does not injure the hostess and other household members.
Application Tips
There is no point in teaching how to use a hammer to hit - the process is simple and needs no explanation. However, additional recommendations will help to extend the life of the hammer.
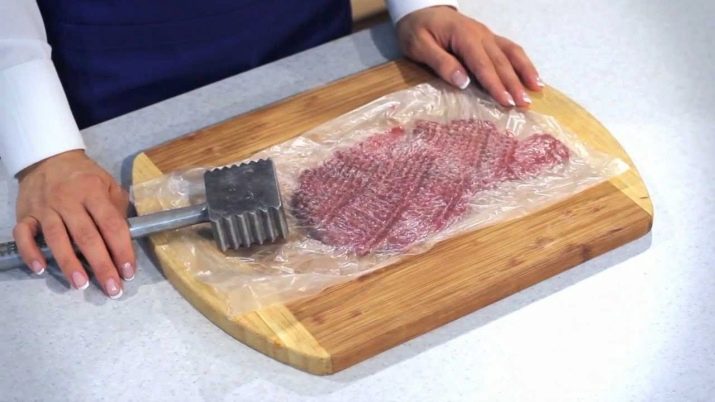
Always try to beat the meat through plastic wrap. Firstly, with a strong impact, it is less likely that the chop will flatten, and secondly, the working surface will not directly contact raw meat, and, therefore, caring for it will be much easier.
Thoroughly rinse the hammering tool after each use. You can use regular baking soda or detergents. It is important to rinse the work surface well and dry it completely, especially for wooden models.
Set out a separate kitchen board for beating meat. Hammer teeth, even if they are short, will damage the surface of the board over time and render it unusable. Therefore, it is better to always perform the procedure on one old coating, which you do not mind damaging with teeth. This problem is especially relevant when using a tenderizer with needles.
See the video below for tips on hammering meat.


