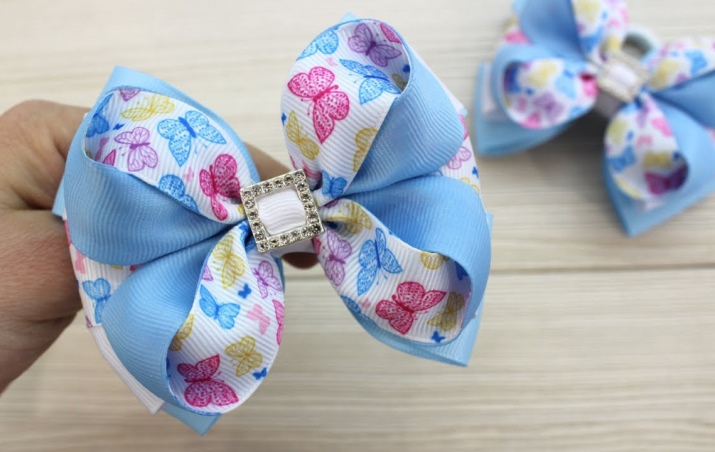
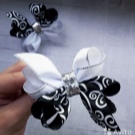
Rep ribbon bows
Rep ribbons are a very popular material among needlewomen. It can be used to create a wide variety of jewelry. Today we will talk about how to make bows from such ribbons with our own hands.
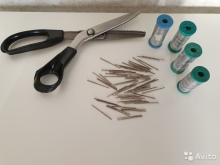
What is required for manufacturing?
Before proceeding with the creation of these decorative products, you should prepare everything you need:
- rep ribbons of various colors;
- glue;
- scissors;
- needles;
- ruler;
- threads;
- decor (beads, beads, lace and other decorative details).

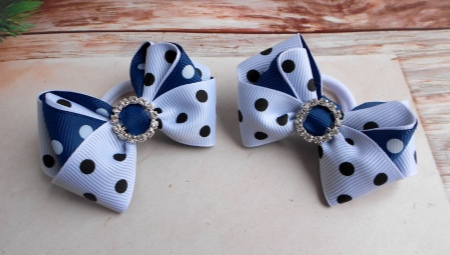
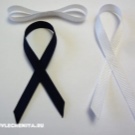
How to make a simple elastic bow?
To begin with, we will analyze in detail the instructions that will help you make a simple bow from this material with your own hands.
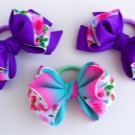
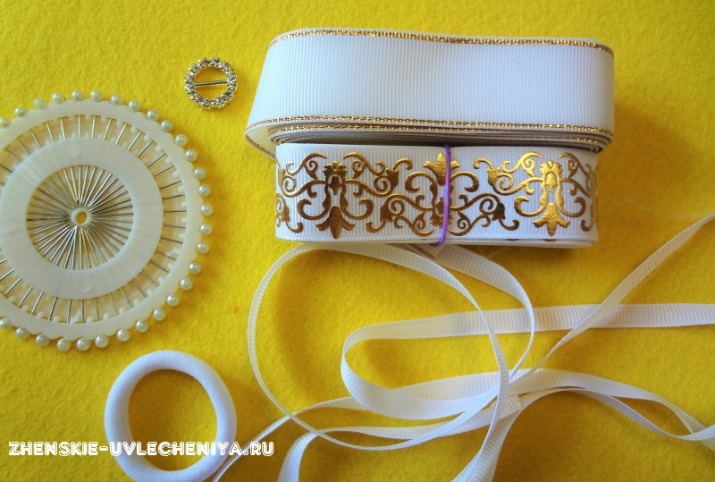
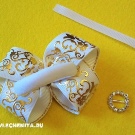
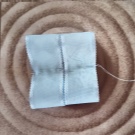
First you need to prepare the following things:
- two white rep stripes with golden lurex measuring 2.5x20 cm;
- two white rep stripes with golden monograms measuring 2.5x20 cm;
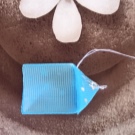
- white piece of tape 0.6x10 cm;
- seamless hair tie 4 cm.
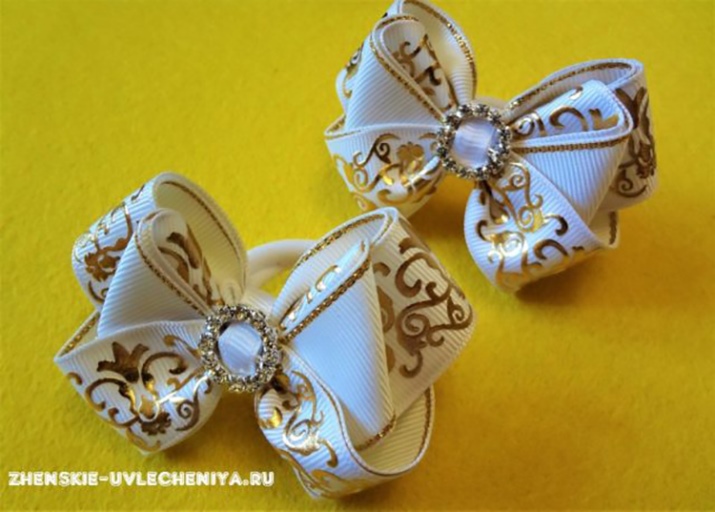
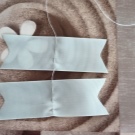
- Two different types of tape are connected to each other over the entire surface from the seamy side. The same is done with the other two segments. After that, take one pair of connected strips, measure 7.5 cm on both sides. The marked areas should be fixed with needles or pins. The workpiece is then folded into a V-shape so that the pins do not touch each other.
- With the second pair, they do everything the same, but in the opposite direction. Next, the pins are pulled out. With the help of a needle, the places of the folds on the workpieces made are fixed.
- Later, a kanzashi petal is made. To do this, the workpiece should be placed in such a way that the rep tape with monograms is exactly vertically.The other part of the segment is bent under the lower part, as a result, a right angle should be obtained.
- The upper part goes down from itself. The right side of the product will need to be bent away from you to the wrong side and secured with the top. At the same time, the left side is neatly folded onto the front side.
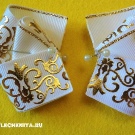
- The second workpiece is made in the same way. After that, the resulting elements are connected with each other using a thread and a needle. They need to be pulled together as tight as possible. The finished bow is turned over to the reverse side, a seamless elastic is fixed in the central part with hot glue.
- Next, a narrow white rep tape is taken. It is wound in the middle of the bow. In this case, one side of it must be well greased with an adhesive composition. Such a beautiful bow can also be made for small elastic bands of 2 cm, but you should take less material.
A similar decoration is perfect for girls on school holidays.


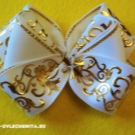
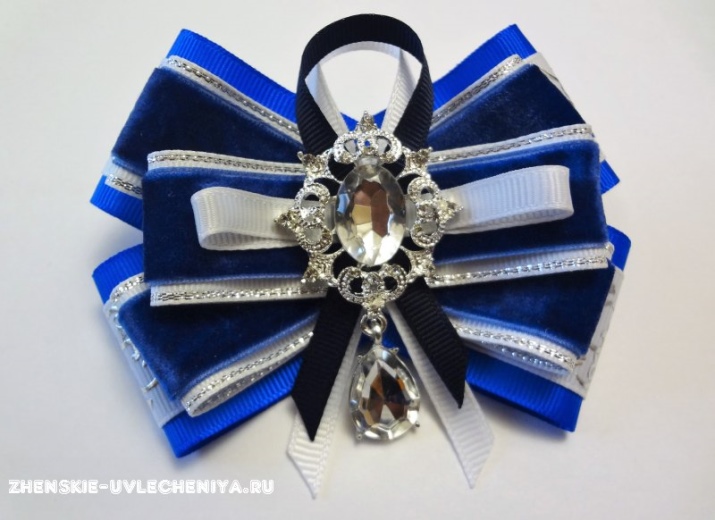
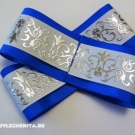
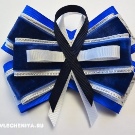
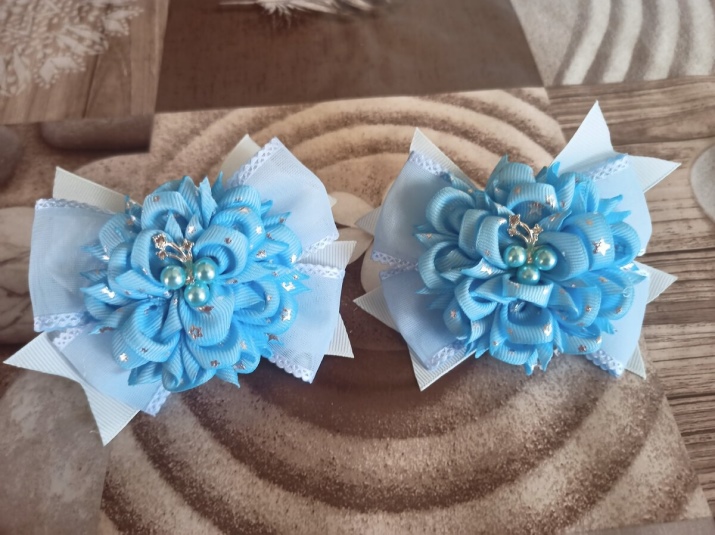
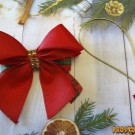
Bow brooch
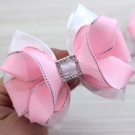
Next, we will look at how to independently make a beautiful bow-brooch from rep ribbons. To do this, you need to prepare the following materials:
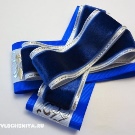
- two blue stripes 4 by 21 cm;
- two pieces of white material with silver monograms 2.5 x 21 cm;
- two pieces of white tape with silver lurex 2.5 x 19 cm;
- one piece of white material with silver lurex - 2.5 x 17 cm;
- a white strip measuring 0.7x15 cm;
- a narrow white strip measuring 0.7x20 cm;
- a piece of narrow dark blue tape 0.7 by 18 cm;
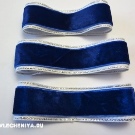
Also, during the manufacture, you will need a blue velvet ribbon, while you need to make two pieces of such material: the first with a size of 2x19 cm, the second - 2x17 cm.
To design such a brooch, you need to prepare a base to match the material.
- Manufacturing should start from the bottom layers. First, take a blue ribbon and a white ribbon with patterns. It is recommended to immediately process their edges with a lighter or a candle so that there are no protruding villi at the ends. After that, a light strip is applied to the blue one in the center, the edges must be soldered.
- The elements of the future brooch are neatly folded in half and squeezed with your fingers. The product is turned over to the wrong side. Next, hot glue is taken, it is applied to one edge, it will need to be glued to the middle. Do the same with the other side.
- Two blanks are glued to each other crosswise.
- To make the 2nd and 3rd tier brooches, you need to take blue velvet and a rep white ribbon with silver lurex (two stripes 19 cm and one stripe 17 cm). The edges of velvet fabric and rep ribbons must be tied together.
- After that, blanks are created, as for the first tier of the brooch. Then two identical blanks are connected to each other crosswise. A part made of smaller strips is glued into the middle of the first tier.
- Later, a narrow rep ribbon of two colors is taken: dark blue and white. A narrow white strip of 15 cm must be carefully bent in half. Both edges are glued to the middle. In this form, the resulting element is fixed on a brooch over the velvet. The next two parts are made in the same way, only they take strips of different lengths (20 and 18 cm). The strips are folded with a loop, in the middle the junction is glued with hot glue. It is better to cut the edges of such blanks immediately and process them with a candle or a lighter. The finished loops are attached with an adhesive to the middle of the brooch (first a light ribbon, and then a dark blue one).
- After that, you will need to arrange the wrong side of the product. To do this, it is turned over to the wrong side. At the same time, felt is taken, a small rectangle is cut out of it. Next, a pin is attached to it. The felt element is glued to the brooch made.
- At the final stage, the products are decorated with a beautiful center with sparkling stones, beads or rhinestones. It is glued directly to the brooch.
If the decorative element is made of metal, then first it is fixed on a piece of felt, and then the felt is glued to the bow.
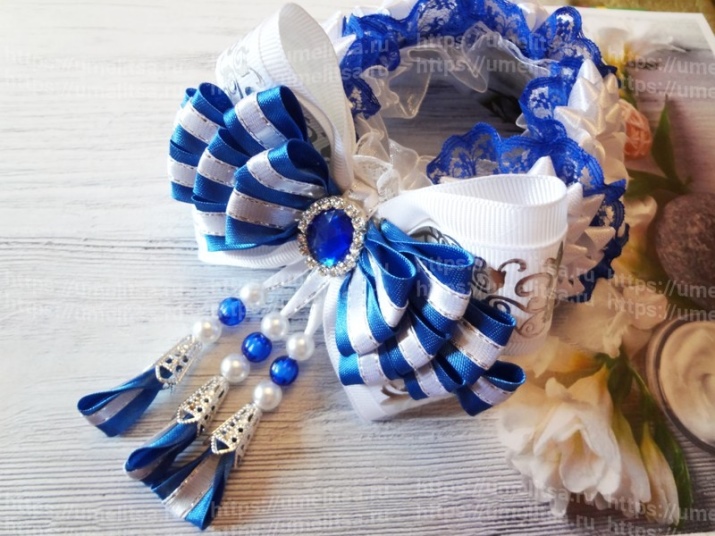
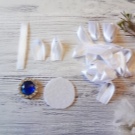
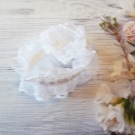
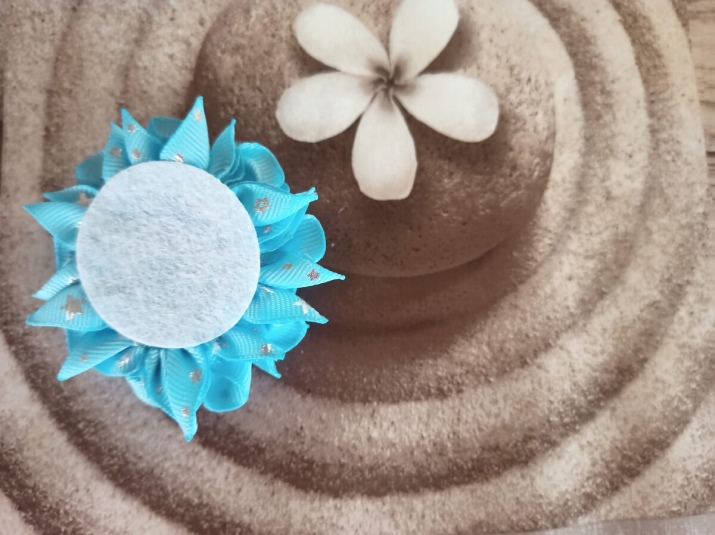
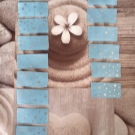
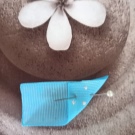
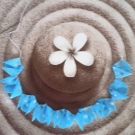
Bulky bow on a bunch
To make such a beautiful product, you first need to make beautiful small flowers, which will later be combined with a bow in one bandage for a bundle.
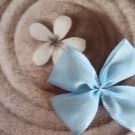
- A thin satin ribbon is taken, on the edges of which there should be lurex. It is cut into small strips of equal size. Each such detail is neatly folded in the form of a loop. The joints are glued together, resulting in petals for future flowers. It is better to make a large number of such details right away.
- At the same time, the felt of the same color as the ribbon is taken. A small circle is cut out of it. Alternately ready-made petals are glued onto it. Then the second layer of the same petals is fixed from above in a checkerboard pattern. To make the flower more magnificent and beautiful, the third tier should be made in the same way.
- Next, you need to prepare decorative details for decorating flowers. You can take a sparkling bright round stone with rhinestones. It is glued to the central part of the resulting products. Four more buds are made in the same way.
- We master the basis of the product. To do this, you need to take a lace ribbon, collect it on a thread. Sections of the same size are cut from one strip, and circles are formed from them. They are glued to felt circles. Then the flowers made earlier are fixed there.
- To make the wings of a bow, you need to take a thick inlay and a ribbon with lurex. These details can be of any color, the main thing is that they go well with each other. A rep tape with lurex is applied to the binding. All this must be fixed with glue. As a result, you get the upper part of the product.
- After that, the ends of the workpiece are aligned and glued. At the base, you need to press down a small fold. The edges should be singed so that the fibers of the fabric do not stick out. In total, you need 16 such elements (8 for each side of the bow).
- Next, you need to collect two bow wings. To do this, the resulting parts are glued in the form of a pyramid onto felt strips. The rows of each wing will have to consist of 1, 2, 3 and again 2 parts.
- To make the lower part of the bow, you also need to prepare rep ribbons (simple and with a beautiful pattern). All of them are cut into 4 equal lengths. Then, pieces of a decorated ribbon are glued to the sections of a simple ribbon on top.
- A neat loop is formed from each workpiece. All of them are connected to each other with glue. You can pre-stick them on a piece of felt. Later, the bow wings made earlier are glued to the resulting blank. If desired, the product can be additionally decorated with thin ribbons with beads.
- Next, a strong elastic band is taken for the beam. First, flowers made earlier are attached to it. Then a fluffy bow is fixed in the central part.
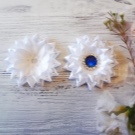
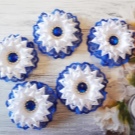

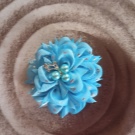
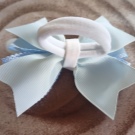
Hair bows with camellias
To make such a beautiful product, you need to prepare the following:
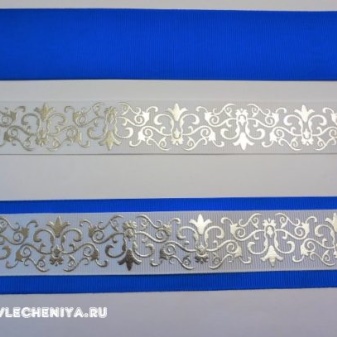
- rep tape 2.5 cm wide;
- rep tape 4 cm wide;
- organza ribbon 4 cm wide;
- two elastic bands for hair (you can use small "crabs", hairpins);
- two felt circles, their diameter should be 3 cm;
- glue gun with glue;
- ruler;
- scissors;
- threads;
- a needle.
First you need to make the camellias themselves.
- For this, a piece of rep ribbon with a width of 2.5 cm is used. It is cut into 18 pieces, 5 cm for each flower (there will be two hair ornaments in total). The edges of the strips must be treated with a lighter.
- First, one piece of tape is taken, its right corner is folded up. After that, the upper edge is bent down, while you need to connect the corners.
- The upper part is sewn from top to bottom, it is necessary to sew all layers of material. Later, the left corner is bent upward. The left side also folds down, the corners are connected. The left side is stitched. The needle and thread should come out at the top.
- All petals are sewn in the same way.For the lower tier, 9 petals are collected per thread. The thread is gradually pulled. The workpiece is connected in a circle. The thread is secured and cut.
- The second workpiece is made in the same way, but with 6 petals. The smallest center section should have three petals. The result is three separate pieces of different diameters.
- First, the two lower blanks are glued together with hot glue. The smallest part is fixed at the top. Additional decor (small beads or seed beads) can be glued to the center.
- A felt circle is glued to the bottom of the flower.
- To make the base of the bow, a rep ribbon is taken, as well as an organza ribbon (sometimes tulle is used instead). For each bow, you need two 20 cm pieces of transparent material and two 12 cm pieces of rep strips. The organza is stitched in the middle, while the edges of the tape should be overlapped. The thread is pulled together, wrapping around the center several times. The thread is fastened, the excess part is cut off.
- Then small flags are made from the rep tape. To do this, fold each edge of the material in half lengthwise, after which the strip is cut diagonally, while you need to step back a little from the edge. The product unfolds, its ends are processed with a lighter.
- The workpieces are also stitched in the middle. The thread is pulled tight, wrapped around the center, secured, the excess part is cut off. A bow made of organza is glued on top of the resulting blank. In this case, the adhesive should be applied in the center of the lower side.
- From below, an elastic for hair is fixed (you can take an elastic 5 cm wide), a "crab" or a clip. At the end, a narrow rep strip is taken. She will have to wrap the center of the bow along with the elastic. Next, a little hot glue is applied to the middle from above, camellias are fixed there.
The resulting products are perfect for girls to school on September 1, for another festive event.
More ideas
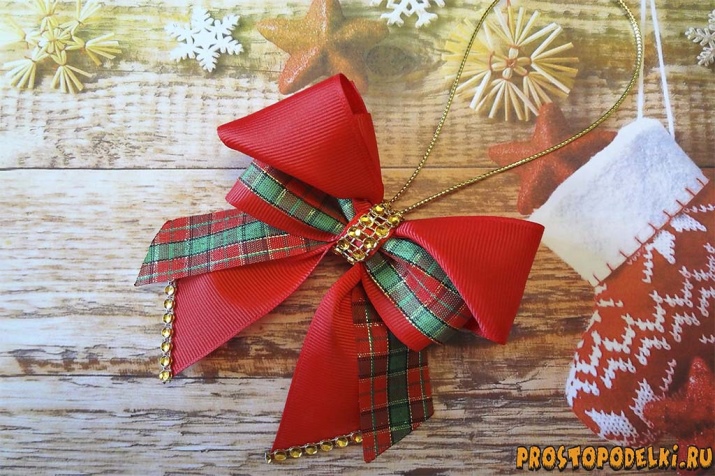
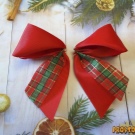
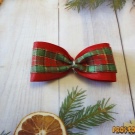
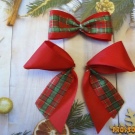
There are many more interesting step-by-step master classes on making beautiful bows from rep ribbons. Let's take a closer look at how to make such a bow for decorating a Christmas tree. In this case, you will need the following:
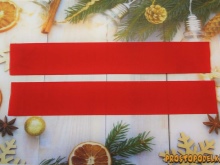
- two pieces of red rep tape 4 by 21 cm;
- two pieces of red rep tape 4 by 9 cm;
- two pieces of decorative New Year's tape 2.5 by 8 cm;
- a piece of red rep strip 4 by 18 cm;
- a piece of decorative New Year's strip 2.5 by 18 cm;
- a piece of satin red ribbon 1.2 by 7 cm;
- tire of golden colors;
- golden lace (length about 30 cm);
- felt red rectangle measuring 1 by 1.5 cm;
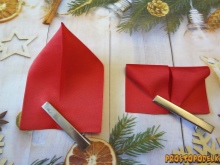
First, the top of the bow is formed.
- To do this, take two pieces of red rep tape 21 cm long. Their edges must be immediately processed with a lighter.
- After that, one strip is folded in half, while marking the middle.
- Further, from the middle, you need to bend one edge of the material down, then the second edge is also folded. As a result, a triangular top is formed, it is lowered down. The part flips to the other side.
- The inverted product is bent in half and secured with invisible clips or clamps. The same is done with the second workpiece.
Next, make bow tails.
- In this case, two pieces of rep tape are taken, each 9 cm long, as well as 2 pieces of decorative tape, each 8 cm.
- The red strip is soldered to the New Year's ribbon using a lighter, and one edge of the red material should remain free. The same is carried out with other segments, only in a mirror form.
- Then the other free edge of the material is cut off at a slight slope. The ends of the strip are processed with fire.
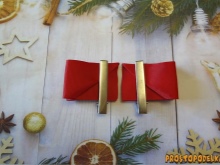
Now you can start assembling the bow.
- A thread is taken, one tail and one element from a red ribbon are collected on it. All this is tightly tightened and fixed. The same is done with the two remaining parts.
- Next, the top bow is created. Two strips of red and a decorative ribbon 18 cm long are used.The segments are soldered to each other in such a way that the New Year's ribbon is in the middle of the rep material.
- The tape is folded in half, the central part is outlined. Both sides are folded towards the center, while the edges should be overlapped.
- Later, a needle and thread is taken. With their help, the central part is stitched, the thread is tightened. As a result, you get three blanks.
- Using a glue gun, two parts of the bow are fastened together, and the last part made is attached to them on top.
- Next, a piece of red tape with a size of 1.2x7 centimeters is taken. She will have to wrap the middle of the bow several times.
- Then you need to take a golden tire, cut off two rows. They are also attached to the middle.
- At the end, a small felt rectangle is cut off. A golden lace is glued to it.
The resulting blank is fixed on the back of the bow.
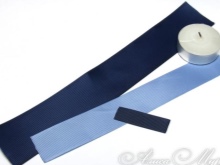
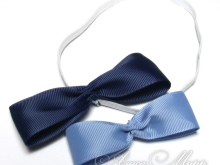
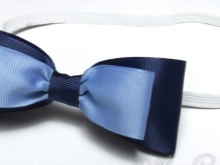
You can make a nice little bow tie out of this material. In this case, you need to prepare the following:
- rep tape (strips with a width of 4, 2.5 and 1 cm);
- gum;
- scissors;
- thread;
- a needle;
- glue.
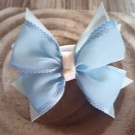
Take the widest ribbon and a slightly smaller ribbon (they should be of different colors, it is best to take dark blue and light blue material). The ends of the blanks are folded to the center and sewn, while the threads are pulled as tight as possible.
After that, an elastic band is taken. It needs to be sewn into a circle of the desired length. Then, using a few stitches, the previously made parts are attached to the elastic. First, a large element is attached, and a smaller element is attached to it.
At the final stage, you need to take the narrowest rep strip. With the help of it, they wrap the middle of the bow. One side of this segment is preliminarily well greased with glue.
Even a beginner handmade master can make this option.
For information on how to make bows from a rep ribbon, see the next video.


