Halloween manicure options
Halloween is one of those holidays that in recent years has rapidly burst into our lives and from something that we see only in movies has turned into a part of the reality around us. One of the reasons for this is the bright, recognizable style and symbols of the holiday. She is everywhere: in shop windows, party costumes and home decorations. And, of course, in makeup and manicure. We will talk about the latter. Let's think about what you can do on your own for the holiday on your nails, so that it looks not only frightening, but also fashionable.
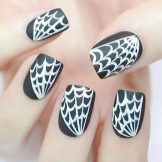
Cobweb Ideas
You don't have to be a nail art pro to get themed manicure. Even if you don’t have time to do the drawing yourself, it’s not a problem. Now there are enough different stencils, decals and stickers on nails, allowing you to acquire a festive manicure with a minimum amount of time. And if you still have time, here are some simple drawings that a beginner can do.
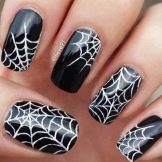

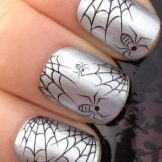
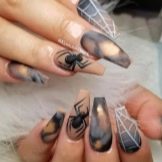
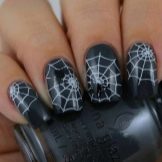
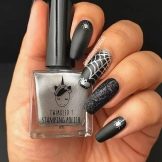
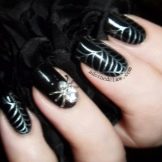
If you're not an arachnophobe, then spiders and webs are a great idea for a Halloween manicure. With spiders there is where to turn around - you can decorate their "carcasses" with rhinestones, glue small voluminous spiders on the nails, and just draw a spider web.
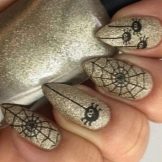
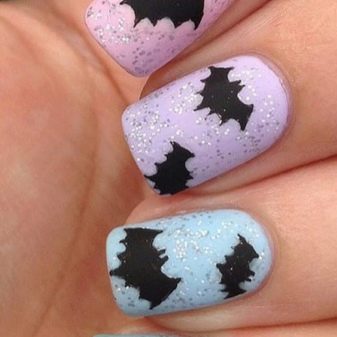
It is not necessary to be limited to the usual red and black colors - a gentle pastel or calm nude background will be appropriate.
The choice of design is limited only by your skills and the length of your nails.

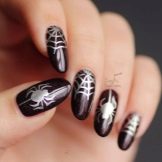
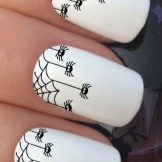
Here is the easiest option for beginners.
Materials:
- black varnish (or any other dark);
- white or silver varnish;
- a fine-bristled brush.
Progress:
- cover the nails with dark varnish and wait until it hardens;
- draw a diagonal line from the lower left edge of the nail with a light varnish;
- from the same point we derive 2 more "cobwebs";
- we connect 3 main lines with short semicircular "threads" - it is best to start from the bottom, from the cuticle, and go up.
Everything. You can complement the design with a sticker with a bright spider. The option is good not only for its simplicity, but also because it is suitable for both long and short nails.
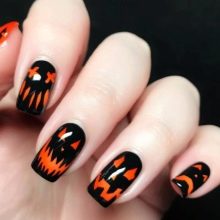
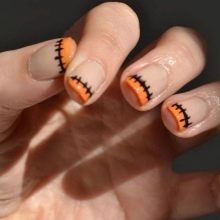
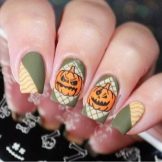
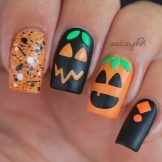
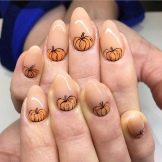
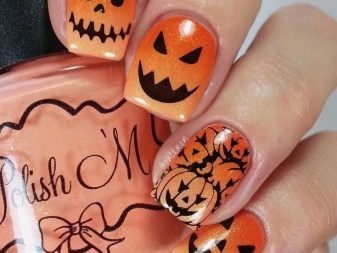
Pumpkin design options
No Halloween is complete without Pumpkin Jack. This also applies to manicure. A bright orange pumpkin will look great on matte black varnish, green background, nude or even transparent base.
The latter option is, by the way, an excellent solution for children's manicure.
A pumpkin may be realistic, but a schematic image is much more common. - it is easier to perform, and it sends even more to Halloween.
And here is a simple but interesting option to start with.
Materials:
- orange varnish;
- black varnish;
- yellow varnish (optional);
- white varnish;
- orange cuticle sticks.
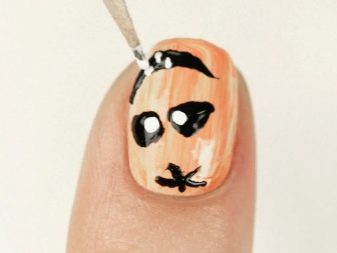
The procedure consists of 5 steps.
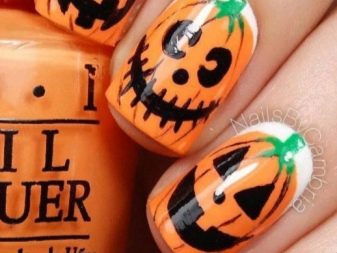
- The first step is optional and depends entirely on the coverage density of your orange polish. If it is translucent, then first apply a layer of yellow varnish - this will make the color more voluminous and more interesting. If the varnish is dense, we apply it immediately, the yellow substrate will simply not be visible.
- When the top layer dries up, dip the cuticle stick with its wide part in black varnish. We remove the excess and draw eyes with our pumpkin.
- With the narrow part of the stick, add a mouth with teeth to the pumpkin.
- Draw a stalk of a pumpkin near the cuticle.
- When everything hardens well, add white lacquer to the pumpkin of the whites of the eyes and a few accents on the teeth.
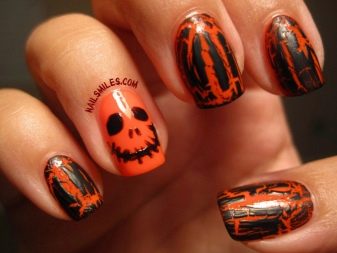
You can make 1-2 such drawings, and on the rest of the nails it will be limited to an orange-black moon manicure.

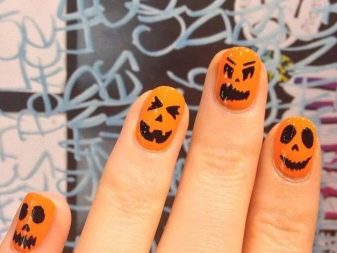
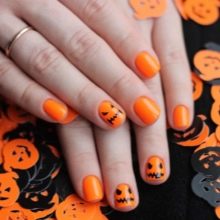
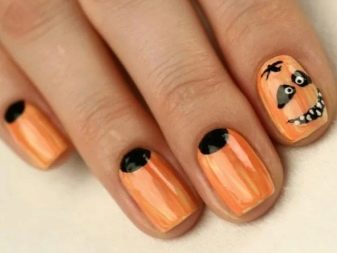
There is an even simpler option.
- We cover the nails with orange varnish and wait until it dries.
- Draw 2 triangles (eyes), an inverted triangle (nose) and an arc (mouth) with black varnish. To make the pumpkin look even more ominous, we add a few vertical lines to its smile.
Such a manicure takes no more time than an ordinary one, and gives a festive mood by 100%.
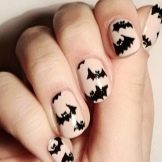
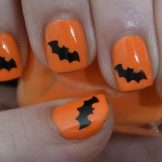
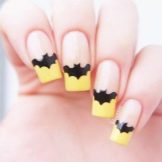
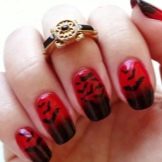
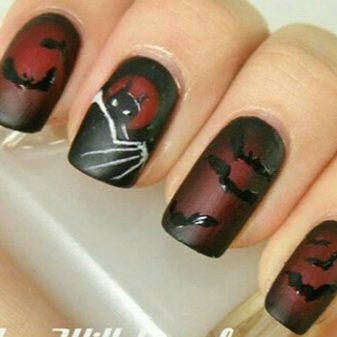
Beautiful options with a bat
Cute little bloodsuckers are as popular as pumpkins and spiders. Batman's relatives can be as sketchy or detailed as possible, scary or cute - whatever you want. By the way, the Batman emblem is a great source for the bat. Yellow, on a black background - this in itself is a great idea for a festive manicure.
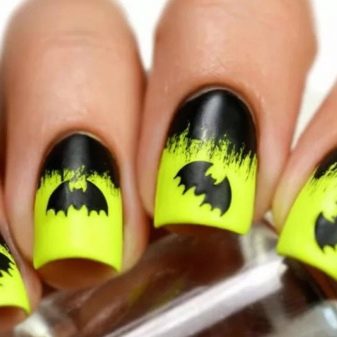
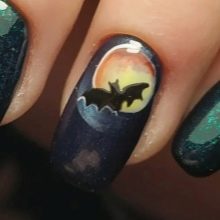
Let's describe a rather simple, but very nice option.
Materials:
- background varnish;
- black varnish;
- white varnish;
- thin brush;
- toothpick.
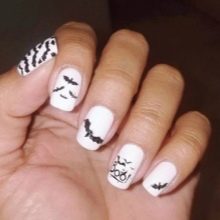
Progress:
- cover the nails with the main color and wait until it dries;
- with a thin brush, draw on the tip of each nail with black varnish the head and the upper part of the wings of the mouse;
- when everything dries up, add 2 white dots - eyes;
- after they have hardened, we put black dots with a toothpick - the pupils.
Ready! This bat is suitable for both adults and children.
If you have gel polish equipment and enough experience, you can make the mouse a little more complicated.
Materials:
- basic coverage;
- top coating;
- gel varnishes of white, brown, blue, yellow, black and pink colors;
- thin brush;
- lamp for gel polish.
Progress:
- apply the base and dry it for 30 seconds under the lamp;
- cover the nails with white varnish, repeat the drying;
- we dilute the brown varnish with the top coating, draw the oval carcass of the mouse and its ears, dry it;
- draw the wings with brown varnish, it is better to move from the edge to the middle;
- fill the ears with pink varnish and dry the nails;
- we use yellow varnish for the eyes, blue for the nose, again we resort to the help of a lamp;
- with a thin brush we work out all the contours and hair of the mouse with black varnish;
- dry, cover with top, dry again.
The drawing is complex, a beginner is unlikely to cope with it the first time, but the result is so charming that you should definitely try it.

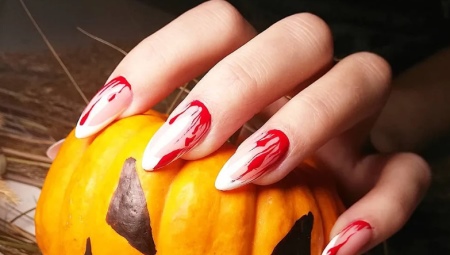
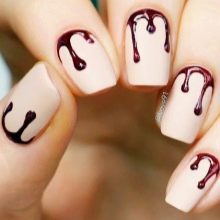
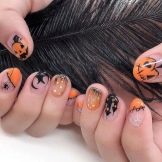
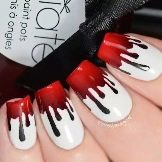
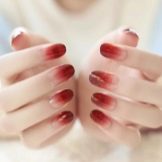
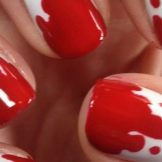
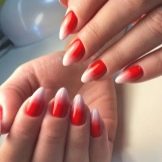
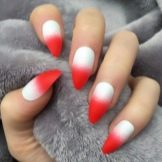
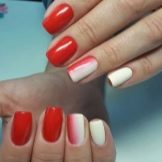
Simple bloody gradient
Black and red or red and white ombre on nails is a suitable manicure option for those who do not like drawings. True, you will have to tinker with the black and red version - it is considered one of the most difficult. So let's start with red and white. How to make a gradient manicure with your own hands, we will tell you in the step-by-step instructions below.

Materials:
- fine-grained sponge;
- base for manicure;
- white varnish;
- red varnish;
- intermediate shade varnish (optional).
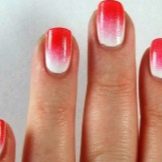
Progress:
- apply the base, wait until it hardens;
- cover the nails with white varnish;
- prepare a sponge, apply stripes of white and red varnishes of the desired width on the sponge joint to joint;
- we check on paper or a nail if the sponge forms bubbles;
- we apply a sponge to the nail several times until the desired effect is achieved;
- we remove the varnish from the skin.
Everything. It may not work the first time, but the result will be worth the time spent. Instead of a sponge, you can use foil or apply varnishes directly to the nail plate and mix with a sponge on it.
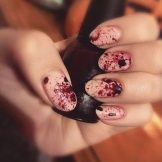
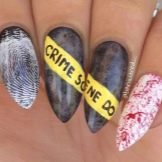
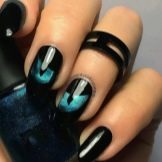
More ideas
The options described are not limited to. If you want "blood", but do not want to mess with the gradient - just put a few crimson spots on your white nails. It will look interesting green neon cat's eye on a black matte background. In the end, you don't have to draw, you can write. Slogans and names of your favorite horror games on nails are an original and not boring idea. The main thing is that the inscription is neatly executed, and the font is suitable for the theme of the holiday.
Here are a few more step-by-step manicure designs that you can easily do at home.
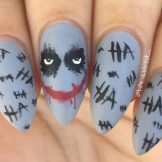
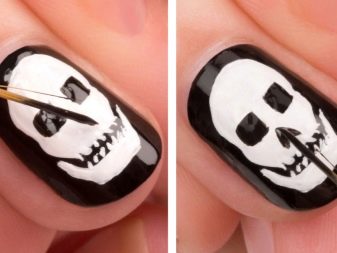
With skulls
One of the easiest options in the collection is a funny skull.
Materials:
- black varnish:
- white varnish;
- toothpick;
- brush.
Progress:
- first we need to paint the nails with the main color, in this case black;
- when it dries up, draw a circle approximately in the middle of the nail plate;
- add a small rectangular element to the bottom of the circle - it turns out a kind of light bulb, leave it to dry;
- with a toothpick or a thin brush, add black stripes on the rectangular part - the gaps between the teeth of the skull;
- we draw the eye sockets and the place where the nose once was.
Ready! And if you add stickers with bright colors to such a skull, you get a manicure with a light Mexican flavor.


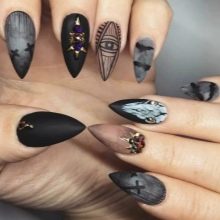
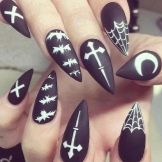
With crosses
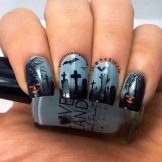
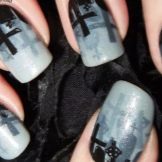
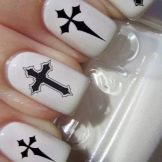
An ambiguous option that will suit fans of the gothic style.
The drawing itself here can be both extremely simple and serve as one of the elements of the whole picture, for example, a night cemetery in purple, blue and yellow tones.
Minimalistic crosses of thin, clear lines will look good on long, pointed nails.
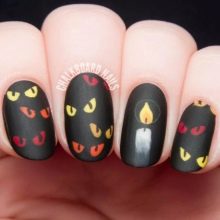
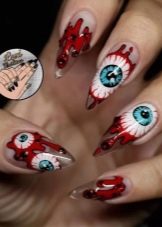
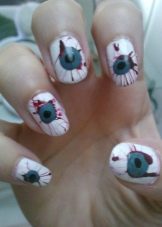
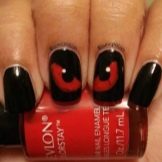
With eyes
We have already mentioned the bright cat's eyes, now let's remember the human ones. Eyes on nails - it even sounds creepy, and it looks just right for Halloween. The main thing is to practice in advance to draw on plain paper or find a stencil.
Materials:
- white, blue, black, red varnishes;
- toothpick;
- thin brush.
Progress:
- the main color will be white, cover the nails with it and let it dry;
- put a spot of blue varnish in the middle - it doesn't have to be absolutely even;
- after everything has solidified, draw the pupil;
- draw red wavy lines from our eye to the edges of the nail plate using a thin brush.
Now a creepy eye is watching everything around!

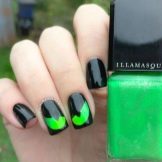
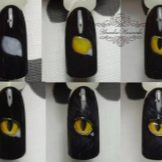
If you still got the idea with cat eyes, then they are also easy to make.
Materials:
- matte black varnish;
- bright green varnish;
- thin brush.
Progress:
- cover the nails with black varnish, wait for it to dry;
- we draw a cat's eye - unlike the last master class, it is important here that the lines are even, so it is better to use a stencil;
- when the green varnish dries up, draw a vertical pupil with a thin brush.
The cat's manicure is ready, it remains to supplement it with arrows before your own eyes.

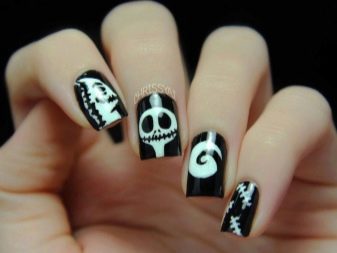
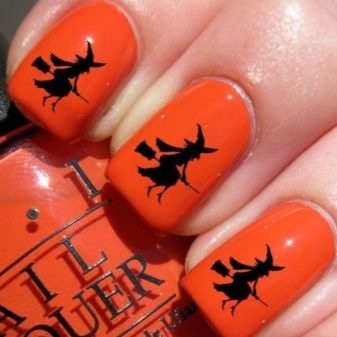
Clowns and witches
Well, how can we do without all sorts of monsters: ghosts, sinister clowns and witches.
The main clown of Halloween is undoubtedly King's Pennywise. It will be difficult to draw it for a beginner in nail art. You can look for stickers that match, or refer to It by painting the famous red balloon or paper boat on your nails. The main colors for it style manicure are black, white, red, yellow and orange.
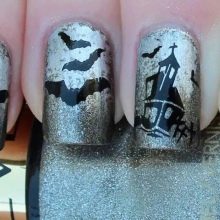
The witch is also not easy to draw, but stencils for manicure come to the rescue. The black silhouette of a witch will look great against a purple-orange gradient.

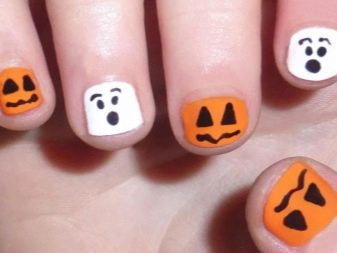
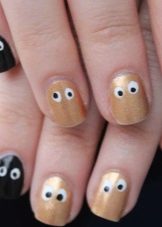
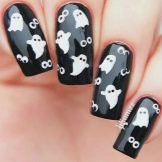
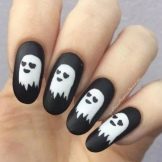
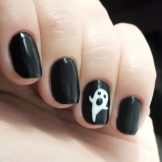
It's easier to plant a small ghost on your nails.
Materials:
- black or purple and white varnishes;
- cuticle sticks.
Progress:
- cover the nails with dark varnish;
- when it dries, draw the outline of the ghost with white varnish;
- after waiting for this layer to dry, dip an orange stick in black varnish and draw several uneven vertical lines at the tip of the nail;
- add eyes and mouth to the cast, put 3 black dots on a white background;
- after the black layer has solidified, add expressiveness to the eyes by placing them on a white point.
Everything. Little poltergeists are ready to scare.

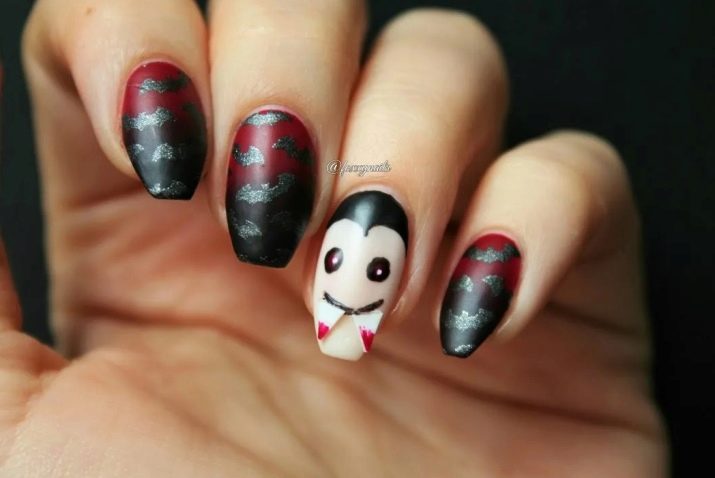
It will not be difficult to draw Count Dracula. We will need:
- white, black, red varnishes;
- brush.
Progress:
- we cover the nails with a white tone, and then we make a black "moon" manicure with one nuance - the central part should sharpen upward;
- with black varnish we draw the contour of the vampire's eyes and the mouth with sharp fangs;
- add an ominous red shine to the eyes, and make the teeth whiter.
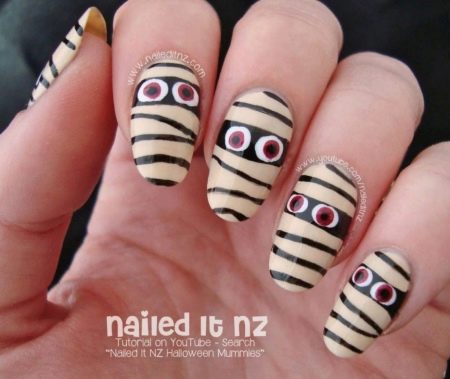
The mummy is quite easy to draw - you just need to make several intersecting black stripes on a beige background and complement them with eerie yellow eyes.
A festive manicure is always good precisely because the only thing that limits us is fantasy and how much it fits the image as a whole. Even with minimal nail art skills, you can create beautiful designs using simple drawings and various decorative elements. The most difficult thing here is to decide: choose a pretty design and go to the master with a photo, or do an original manicure yourself.


