How to use nail stickers at home correctly?
The possibilities of decorating nails are endless today. Therefore, it is not uncommon for modern women who perform manicure at home on their own to resort to using all kinds of stickers for design. However, not everyone uses the stickers correctly, given the material of their manufacture. Let's take a closer look at this issue and answer what the secrets of the technology of professional craftsmen are and what you need to know in order for the stickers to stay on the nails for a long time.

Varieties of material
Today, nail stickers are divided into several varieties. The offers of trading companies are so diverse that they are able to satisfy even the most demanding requests. The richest assortment allows you not to limit yourself in the flight of creative thought and set up experiments one after another, changing the design depending on your mood. All known types of material differ from each other in the method of fastening.
In fact, in this regard, stickers can be divided into 2 groups. The first of them is based on glue, due to which the picture is held. The second type requires ordinary water to work. Craftsmen do not soak such stickers in water, but prefer to moisturize them by applying them to wet wipes.
Slider design
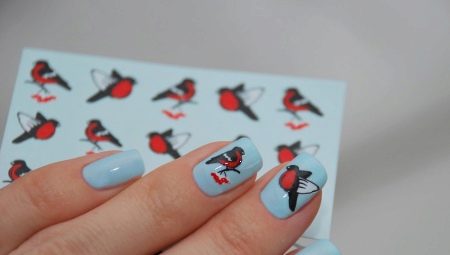
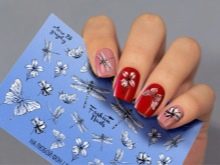
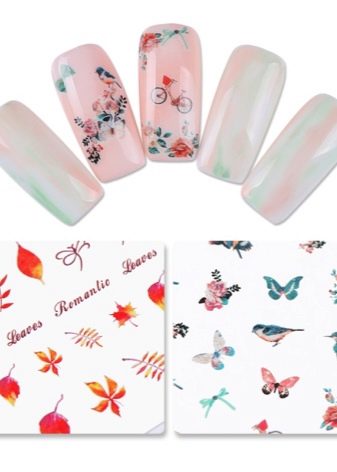
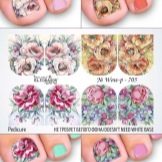
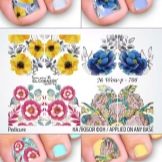
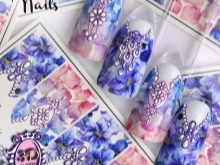
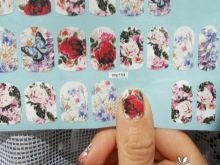
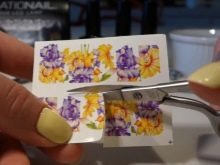
Water stickers are called slider designs. Today, such translations are overgrown with variations, which significantly increased the possibilities of decorating nails.For example, they are made not only for hands: while studying the offers of brands, you can also find options for a pedicure among the bulk. And if analogs for hands often consist of 10 or more pictures, then sets for feet are designed to decorate the nails of the thumbs.
Such pictures differ in thickness, which determines the complexity of the work and the type of substrate for the sticker. The slider itself is nothing more than a film with a pattern applied to it. Its texture can be elastic, which is good for correcting the slider at the time of adhesion to the working nail.

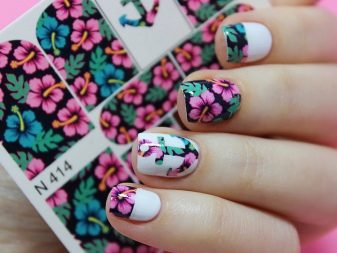
The film can have a colored or transparent background. Here, one of the important points is its thickness: for a thin film with a colored background, you have to make a light (usually white) substrate. A thick film is enough as a base for a regular base.
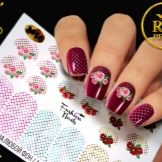
In terms of volume, sliders are available covering the entire surface of the nail or application options. The second products of this type always have a transparent background. Such pictures can be white, black, colored, metallized, three-dimensional (with a visual illusion of volume or 3D). Also, the line of water stickers includes small volumetric stickers. However, all varieties are united by the slider's paper backing, which must be removed by moistening the material.
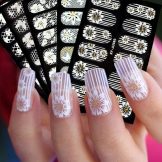
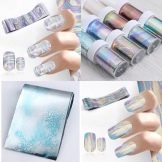
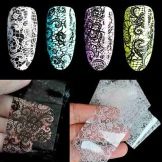
ribbon
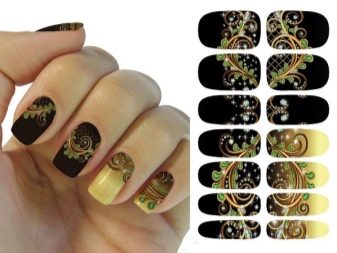
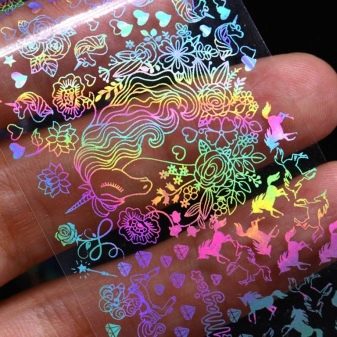
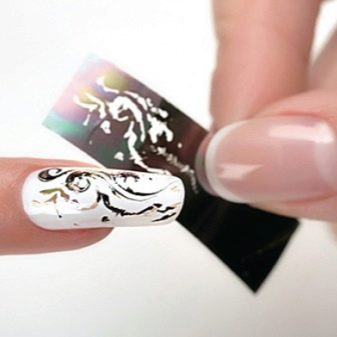
An interesting material is the tape-type transfer foil. In fact, this is a pattern applied to a meter tape, which involves transferring the pattern from the film to the working surface of the painted nail using a special glue. Without it, trying to translate the pattern is useless.
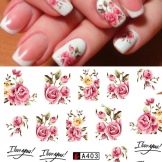
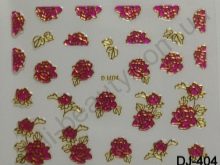
The glue is interesting in that it signals the master about drying by changing the color from white to transparent. The assortment of such goods includes prints of a wide variety of topics. Some of the most delicate solutions are lace patterns and floral weaves. The color solutions of this material are endless.

Thermal Stickers
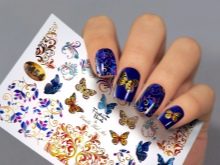
One of the most extraordinary decor options are the so-called thermal stickers. In fact, these are metallized decorative elements that need to be preheated by means of a hair dryer or near an incandescent lamp. Only after that it becomes possible to fix them. The heating process is necessary for strengthening, because poorly prepared decor can go in streaks, which is why the general appearance of the manicure will lose its accuracy.
The texture of metallized stickers can be different: today it is not only glossy, manufacturers have begun to produce matte options. Due to this, manicurists manage to refine even the most laconic design. By the way, quite often they use a contrast technique in design, decorating accent nails with both matte and glossy thermal stickers at the same time.
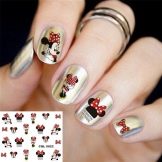
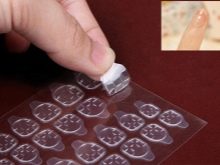
On a sticky backing
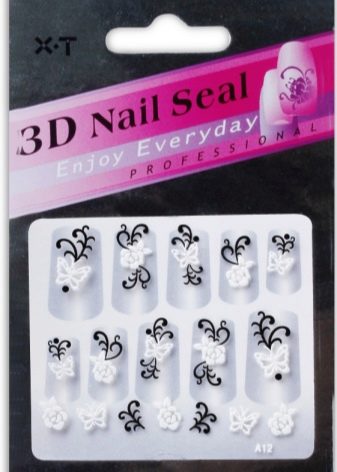
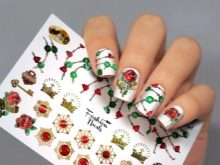
There are also stickers with a sticky backing layer. In fact, these are stickers we are used to, because they are made according to the same principle as ordinary children's adhesive pictures. These products can be flat or embossed, they also have a 3D effect.
Today, this decor can have a different type of backing. If earlier it was mainly paper, now manufacturers also produce film versions. This is useful for easier separation of the decal from the base.
The sizes of such stickers, as well as their subject matter, can be very diverse. However, often even a small decorative element seems prohibitively problematic to work with. That is why women often pass by such stickers, although professional craftsmen consider this decor simple and very effective.
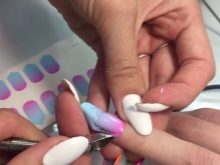
Preparing nails
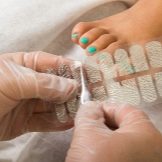
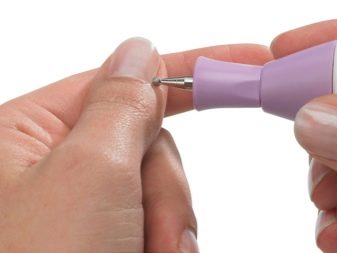
Regardless of what type of sticker is chosen for the design, you cannot do without correct and high-quality preparation of the nail plates. To do this, you need to do a hygienic manicure. There can be two options here: edged or unedged.In the case of the edging technique, the nails are soaked, the cuticles and pterygium are removed, trying to be as careful as possible with the skin around the plates themselves.
If unedged technique is preferred, the cuticle is pushed back and sealed. Today, this technique is gaining popularity among professionals in the field of nail art. It is believed that it not only minimizes skin irritation, but also with regular care is a measure to prevent burrs. Salon and studio masters are confident that this technique ensures the best grooming of the hands.
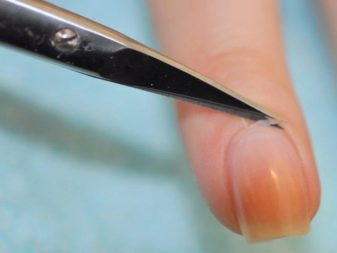
After the nails are given the desired shape, the length is leveled, it is necessary to remove the gloss from the surface of the plates. This stage is important, because it will determine how firmly the manicure with the design will hold. You cannot rub your nails for a long time, this leads to their thinning. After the buff has been passed over all the marigolds, with the help of a brush, and then with a dehydrator, the remains of sawdust are removed. The nails are now ready for staining.

How to glue stickers correctly?
All pictures that offer brands are glued in different ways. Therefore, we will dwell on this point in a little more detail in order to understand the essence of the process and the sequence of actions. But first, let's note the difference between the techniques for gel polish and the usual type of coating, which does not require a special drying lamp.
On gel polish
Hybrid coatings, combining the properties of both gel and varnish at the same time, have a number of features, which is reflected in the technique of fixing the sticker. For example, without a lamp, they do not dry at all, and if it is chosen incorrectly, then such a coating may be short-lived. When the technique is followed and the lamp has the required power, the decor lasts without the need for correction for about two to four weeks. Stickers have to be glued on top of several layers of special products provided by the technology for working with hybrid varnishes. In addition, this procedure, from a hygienic manicure to the very end of the work, is very lengthy.
On regular varnish
Conventional coatings, which have been used by women for a long time, have less wear. They are inferior in color solutions to hybrid analogs. However, stickers can be glued to them much faster, which is very convenient in the fast paced pace of modern life. Yes, and there are much fewer layers of material here, although, as in the version with gel polish, the process will require sealing the picture to increase its wear. However, it is not uncommon for ordinary varnish to start chipping off the surface of the nail on the second day, and therefore many women prefer not to waste time on permanent correction, but to use stickers and gel polish.
Aquatic
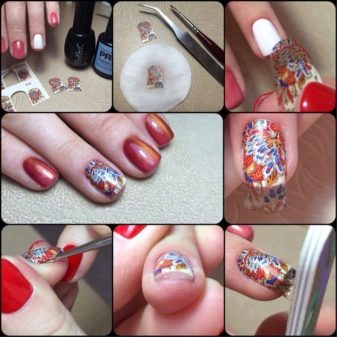
When working with gel polish, decals are cut to fit the shape of the nail. You should not adjust the sticker at the top: it is important that it lies flat at the base, in the cuticle area. The top edge can then be removed, and if cut off, it may not be long enough.
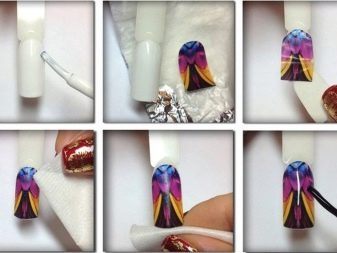
- A base layer is applied to the prepared nail, which is then dried in a lamp. After that, a pigmented white gel polish is applied on top of the base and the coating is dried again.
- Now they take a little more base on the brush and again cover the nail with it, not forgetting about its end. This time the coating is not dried.
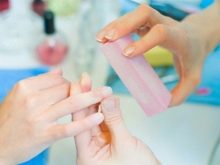
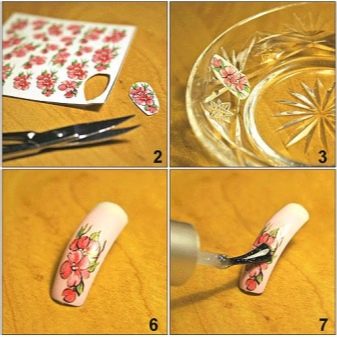
- Take the picture, put it face up on a wet napkin, wait about 30 seconds.
- After that, use tweezers to remove the film from the paper backing and place it on the nail, straighten it.
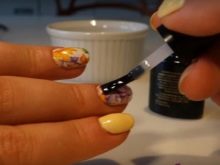
- Next, the decor is dried, after which it is sealed with layers of base and top, drying each of them for 2 minutes in a lamp. Instead of a base, you can use a top as a backing for a sticker.
Foil
Work with the tape is performed on the basis of gel polish.
- After the nail is prepared for a decorative manicure, the base is applied, dried, then the nail is covered with the selected pigmented varnish. The coating is dried again.If the varnish has poor pigmentation, it is applied not once, but twice, while each layer is dried until the material is completely dry.
- After that, they take a special glue with a white viscous mass, designed specifically for such transfers. The entire surface of the nail is covered with glue.
- To prevent the mass from flowing over the side ridges and cuticle, a special protective silicone agent is applied to the skin around the nail before the very beginning of staining. It dries up and forms a thin film that can be removed at the very end of the job.
- You do not need to dry the glue in a lamp, it will dry quickly itself.
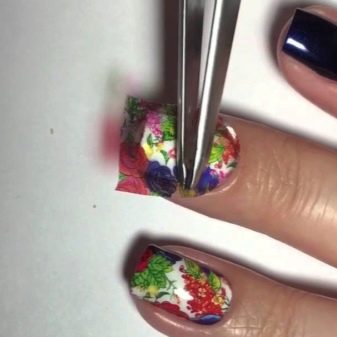
- As soon as it becomes transparent, they take a cut piece of film and translate the picture, pressing it tightly to the surface of the nail.
- After that, the design is sealed with a layer of top with its obligatory drying in a lamp.
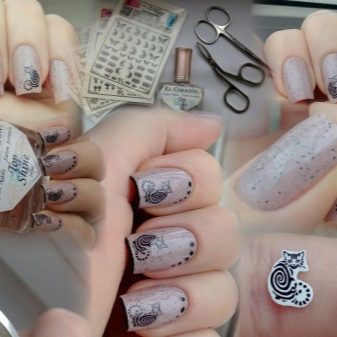
Self-adhesive
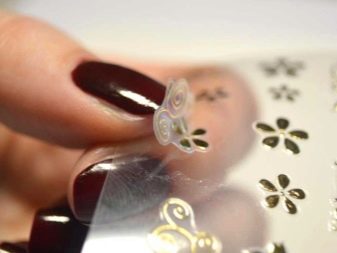
Self-adhesive pictures provide for work with both gel polish and conventional coatings. To stick them correctly, a dry work surface is important. You should not experiment with an undried top, it is useless. The sticky layer of such a sticker needs to grab onto something. The whole point of the work is to separate the picture from the substrate and glue it to the nail painted with colored varnish, pressing it well against it.
However, this technology has one caveat. Many women complain that the translation quickly breaks off the base. Masters note that after the substrate for the sticker is completely ready and dried, it is necessary not only to glue the sticker with high quality, but also give it two to three minutes so that it takes the rounded shape of the nail. Only after that, the sticker can be sealed with a layer of top with drying or transparent varnish (when working with ordinary pigment).
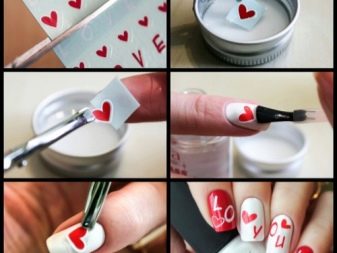
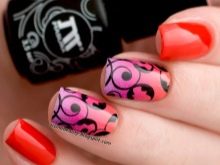
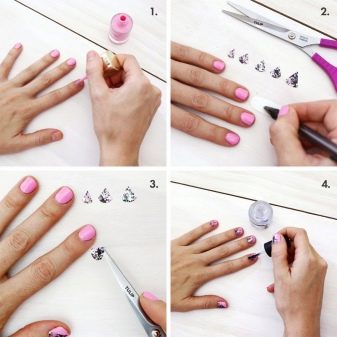
How to make DIY stickers?
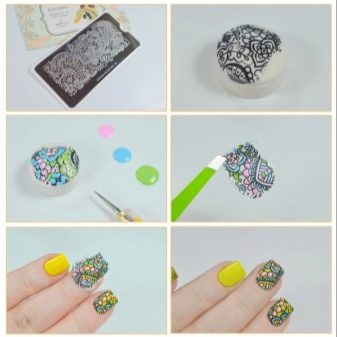
If you don't want to use ready-made pictures for manicure design, you can create your own at home. This process does not take much time and effort. You will need stamping or disposable stencils.
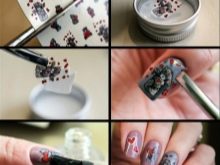
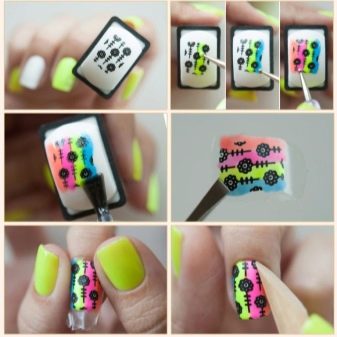
They take a silicone nail mat and make several strips of thin layer varnish on it. It is left to dry out a little. After that, using, for example, stamping, various patterns are applied to the varnishes.
Such stickers can be cut to shape or even cut into regular strips, which is also fashionable today. The design technology will consist in gluing the pictures onto an undried layer of pigment after applying and drying the base. After the sticker is placed on the nail and distributed, removing folds and cutting off excess, it is sealed on top with a layer of top.
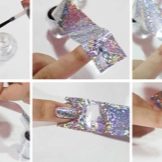
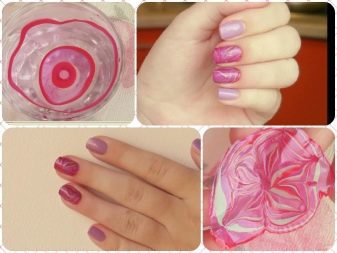
You can also take the water technique as a basis, which allows you to create unique stickers with abstract stains. Different pigments are alternately dripping into a glass of water, trying to ensure that each drop falls strictly into the center of the previous one. The number of drops can be 7 or more. After the required amount is reached, take a wooden stick or toothpick and draw a pattern either from the center to the edges, or vice versa.
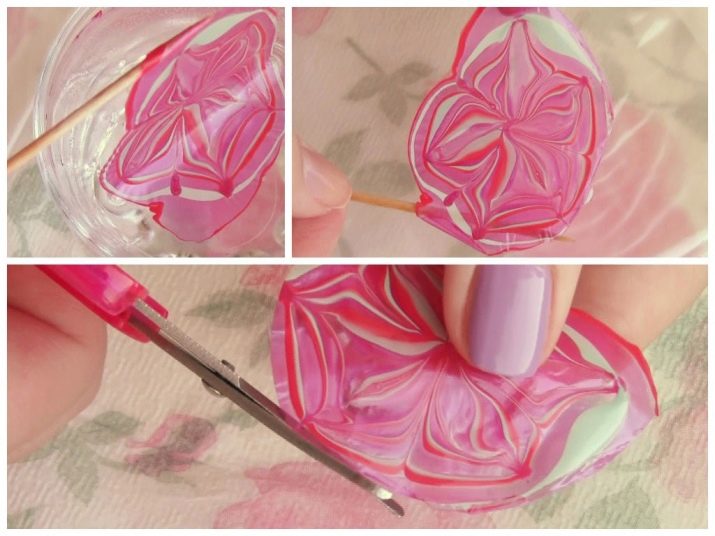
A protective silicone agent is applied to the selected nail. After it is taken with a thin film, the finger is immersed in water and all unnecessary is removed with a toothpick so as not to damage the pattern. The finger is taken out of the water and immediately passed around the nail plate with a toothpick, getting rid of the excess.
If you want to do some magic with a water sticker, then after the desired pattern has been created, it is left in a glass for about 20 minutes. After that, the film is taken out and decorating is continued. In addition, such a sticker can be cut into several pieces, so that it is enough for all accent nails of the manicure.

Professional advice
There are times when the stickers flake off, which not only spoils the look of the manicure, but also affects the woman's mood. You should not blame the poor quality of the stickers, because often the cause of the detachment is an error in the implementation of the technique or simply non-observance of the standard instructions.In general, it does not matter if they are Chinese or other cheap options, they often hold on quite firmly and for a long time. The masters have a few tips on this.
- If the sticker peels off, this indicates that the drying time has not been adhered to. The fact is that the coating on which it is glued when working with gel polish should be dried together with the picture for longer. Therefore, the standard two minutes need to be turned into four. In addition, when performing any technique, it is imperative to walk with a brush along the end of the nail.
- It is impossible not to take into account the fact that chips and detachments of the picture can occur due to the presence of air pockets. It is necessary to immediately glue the sticker tightly, leveling it and avoiding the formation of wrinkles. To be sure of the result, it is important to seal the design well. In other words, the layer of material overlapping the sticker should be at least half a millimeter larger.

- If the picture was cut out large and wrapped under the base of the nail, and the top or transparent varnish did not get there, detachments will not take long.
- An acid-free primer can be used to get rid of wrinkles if they come up with the water sliders. However, this tool can dissolve the picture completely, and therefore must be used with extreme caution. The primer is used up to the sealing layer.
For information on how to stick water stickers on your nails, see the video below.


