How to make a beautiful beaded manicure?
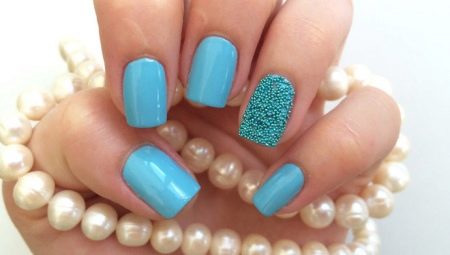
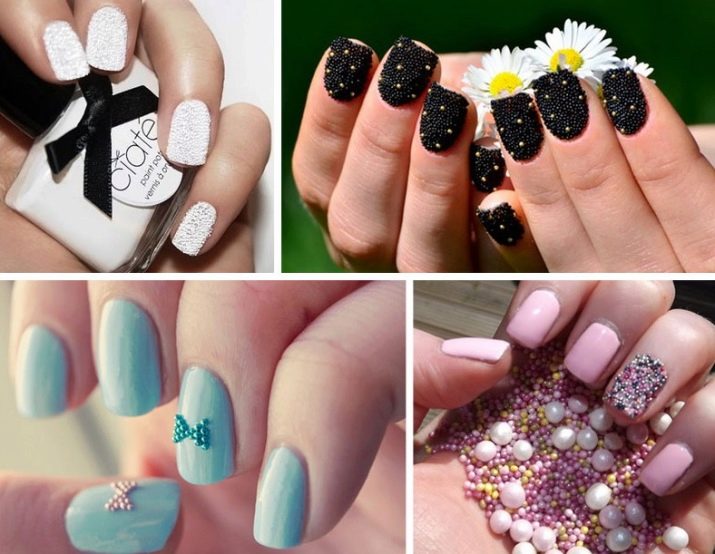
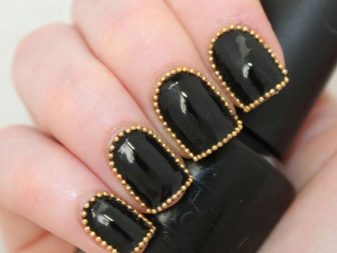
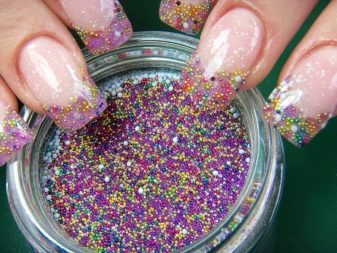
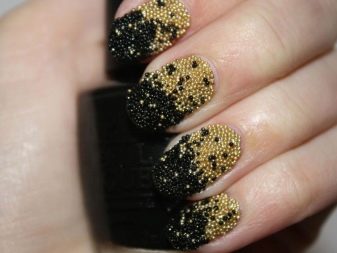
A beaded manicure is the decoration of the nail plates with small balls (broths) that turn a monochromatic varnish into a real work of art. The size of the products ranges from tiny caviar beads to larger ones - rhinestones. This type of manicure is called caviar.
Its peculiarity lies in the fact that when using it, the style of the marigold can change: from daring sporty to elegant strict. Ease of implementation allows you to use caviar manicure at home.
Preparation
Beads for nails can be of different sizes, colors and shapes. But they will look beautiful on their hands only after preliminary processing of the nail plates.
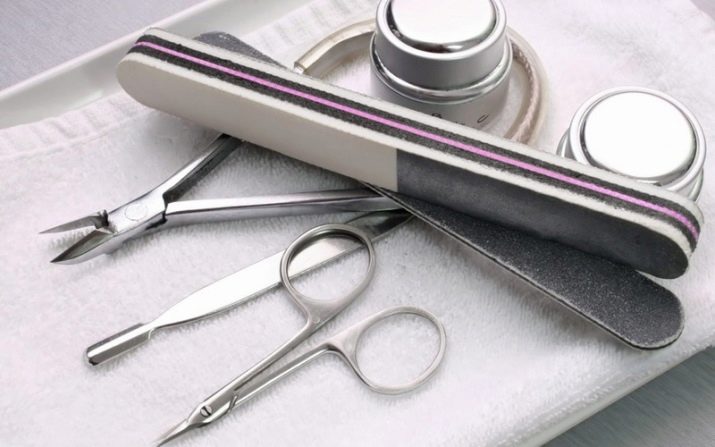
To do this, you need the following tools:
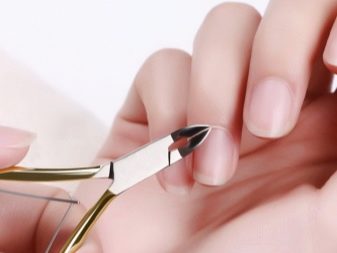
- tweezers;
- a manicure spatula or orange stick (a blunt flat end is used);
- scissors;
- file.
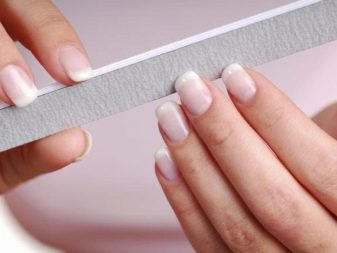
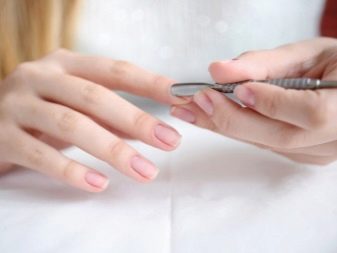
The shape and length of the nails is adjusted with scissors and a file. The cuticle is removed after softening. For this, hands are dipped into a salt bath (1 tsp of salt per 1 glass of warm water) or the nail plates at the base are lubricated with olive or other vegetable oil. After 5-10 minutes, the softened cuticle is carefully removed with tweezers, pushing it back with an orange stick or spatula.

Choice of design
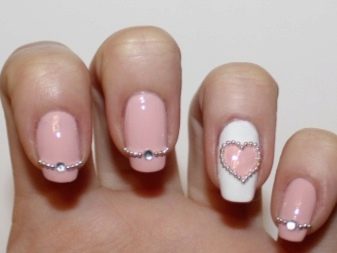
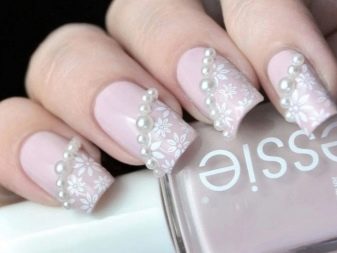
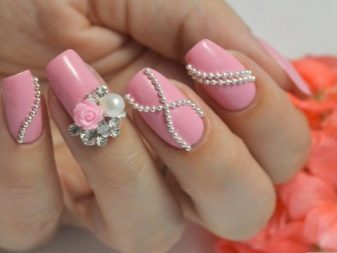
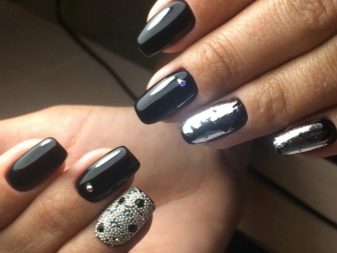
Caviar manicure involves the use of tonal varnish, and when it is harmoniously combined with broths, a beautiful and complete composition is obtained. It can be beads of different colors or monochromatic broths. It must be remembered that the larger the product, the more carefully they are attached to the nail plates. Therefore, for this type of manicure, you will need a fixer or special colorless glue.The second option is preferable because the outside of the beads remains intact and they look very smart and stylish.
The formation of the picture begins with the selection of the sketch. You can come up with a pattern yourself and draw it on paper with colored felt-tip pens or use ready-made drawings. The broths are selected exactly in accordance with the selected compositions.
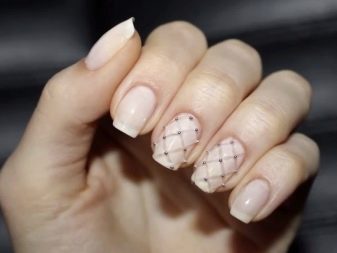
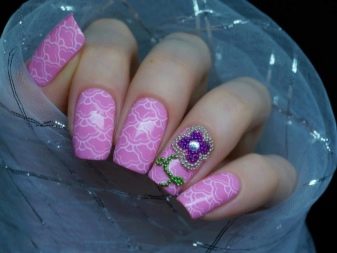
A very beautiful combination is obtained by combining large rhinestone beads with smaller ones. These can be strict straight or curved lines, dots, flowers, petals, necklaces, branches or abstraction drawings.
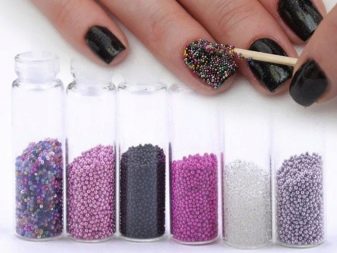
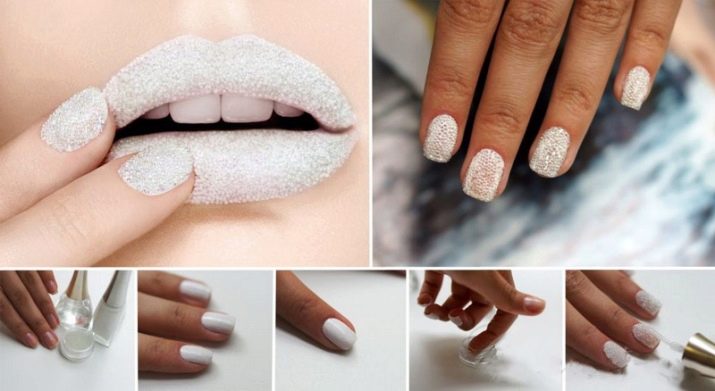
It must be remembered that the decoration should be made out before the varnish or glue has dried. If the broths are very small in size, while they will completely cover the nail plate, then it is not necessary to use an adhesive base, but all actions should be carried out quickly so that the beads have time to "imprint" into the coating before it dries completely. Beads are laid out in advance on a light napkin or white sheet of paper. If the coating is monochromatic, then it is better to pour the broth into a container with high edges.
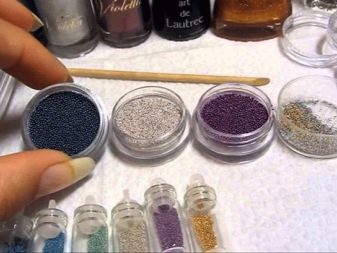
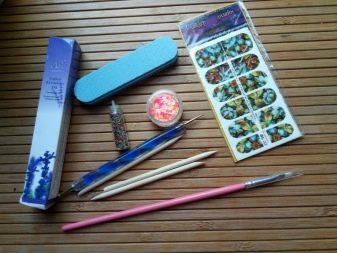
Tools and materials
At the initial stage, it is better to make compositions of beads from a monochromatic small material.
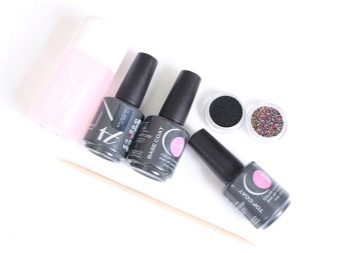
For caviar manicure, you will need the following tools and materials:
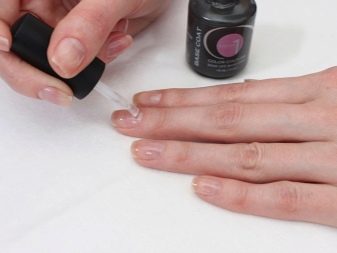
- base coat (base varnish);
- colored varnish;
- broths of one or more colors, the same or different sizes;
- dots (manicure stick with a metal ball at the end) or orange stick;
- glue or fixer.
Actions are carried out in stages, the quality of the coating depends on their accuracy, which, with skillful manicure, will firmly adhere to the nail plates for up to 1-2 weeks. The broths constantly "strive" to cling to the edges of clothes, hair and objects, so it is not possible to keep the composition in its original form for a long time. If the beads are torn off in large quantities, while the pattern loses its original shape, then the coating is completely removed from the nails. The decoration is done again or a different type of manicure is used to “rest” the hands.

How to do it?
After preparing the nail plates, it is time to apply the beads.
Caviar manicure is performed in stages:
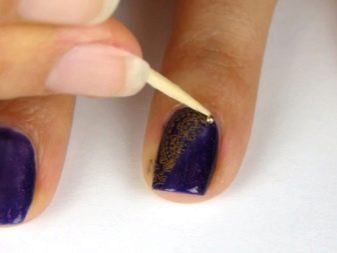
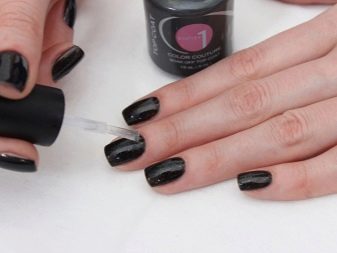
- a base coat is applied to the cleaned nail plates;
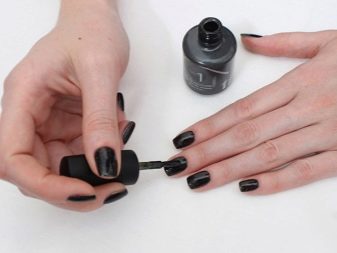
- when the base varnish is completely dry, the nails are covered with colored varnish;
- you need to wait until the tonal coating dries, if you need to glue beads of different sizes;
- a layer of colorless varnish is applied to the dried colored varnish;
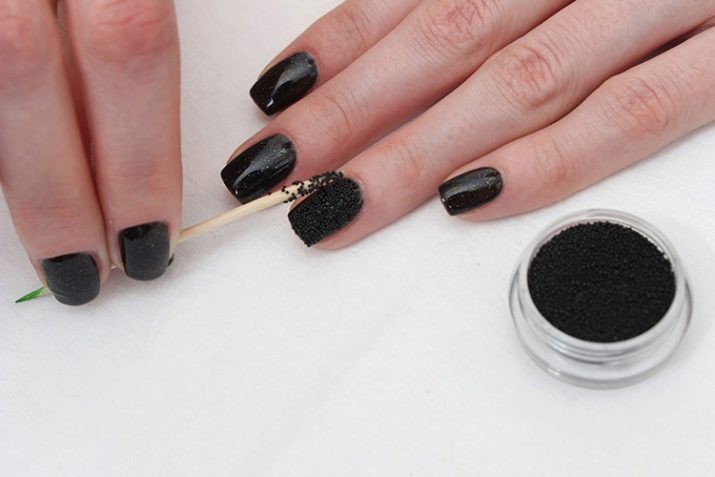
- until the adhesive base is dry, quickly draw up the pattern, distributing the beads in the right places with an orange stick or dots.
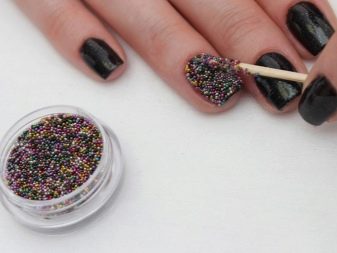
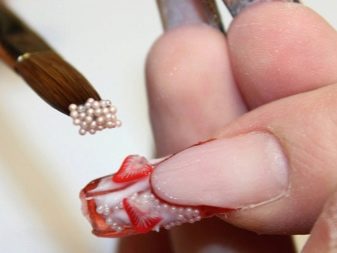
With solid broths that will completely cover the nail plate, the process is greatly simplified.
- A base varnish is applied to the nails.
- As soon as it dries, the nails are covered with colored varnish, which harmoniously sets off the broth.
- While the varnish has not dried, fingers are immersed in a container with beads.
- Excess broths adhering to the edges of the nail plates are quickly and accurately removed using an orange stick or dots.
- You can add fixer to the beads to help them hold better. But they acquire a glossy shine, and the original effect is lost. Therefore, manicurists prefer to use it as little as possible.
A beautifully and correctly designed caviar manicure favorably complements the accessories and outfit of a woman. It is important to follow the chosen style so that the clothes and decorations on the nails are successfully combined with each other. Sports and nautical themes suggest bolder and more vivid designs, business style requires strict, discreet lines, and the romantic mood is successfully reflected by patterns in the form of necklaces and flowers.

To apply complex drawings, it is better to visit a nail salon and watch the actions of the master.At home, you should start with simple patterns or a monochromatic coating with small broths, and with the acquisition of the necessary skills, you can begin to design more complex compositions, while it is advisable to use no more than 3-4 colors of beads.
For information on how to design bead nails, see the next video.


