Geometry on nails: stylish design options and ways to create it
Fashion trends in recent years are changing with lightning speed. New ideas, improved materials and equipment appear, manicure technologies are updated. At the same time, the design in the style of geometry remains at the peak of popularity, except that the patterns and colors become more complex.

New items and fashion trends
Consider why geometric manicure is so attractive.
- The geometry on the nails compares favorably with the simple classic manicure by the unusual pattern.
- Laconic lines and clear shapes are the exact opposite of monograms and elaborate elaborate designs.
- In addition, the geometric pattern is versatile, suitable for both a business office style and for special occasions and friendly parties.
- The geometry can be successfully combined with any nail length.
- Fashion trends are interesting, but easy to reproduce on their own, which makes geometry even more popular and in demand.
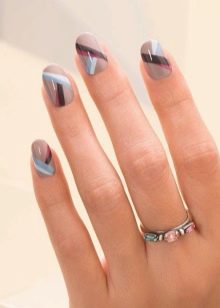
- Geometric patterns are made in any colors, they can serve as a background base, or they can play the role of an accent in a monochromatic version of manicure.
- Neat lines and clearness of the picture will make the image stylish, and its owner will be recommended as the owner of good taste.


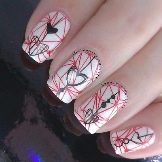
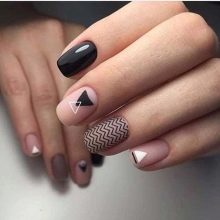
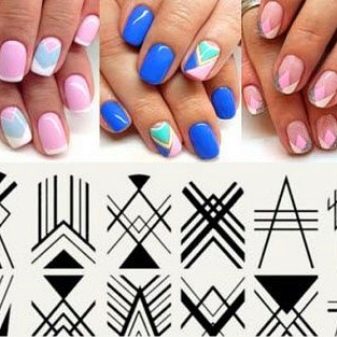
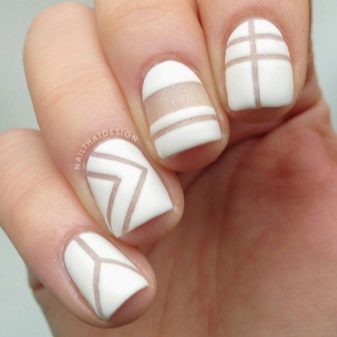
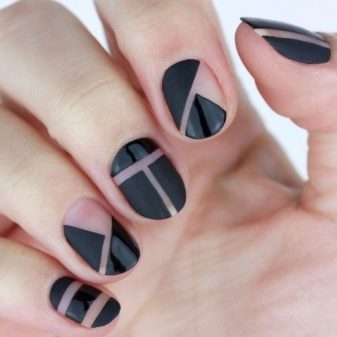
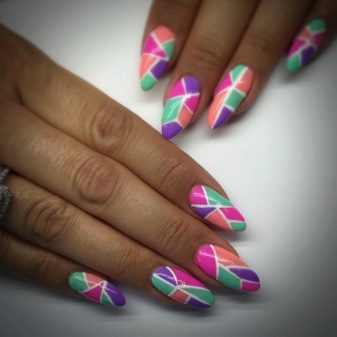
Minimalism is considered the current trend. In manicure, it is expressed in a simple pattern, consisting of chaotic or strict lines, small figures such as squares, triangles and rectangles.
Among the most famous trends, several of the most popular should be highlighted.
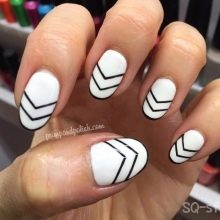
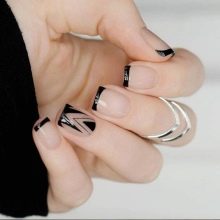
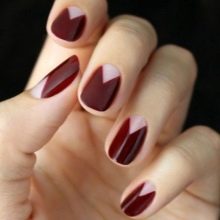
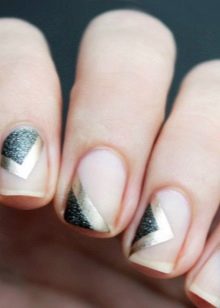
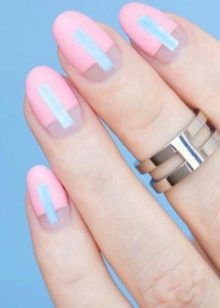
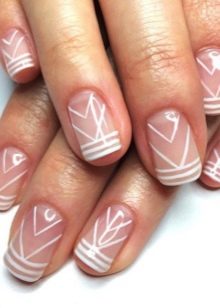
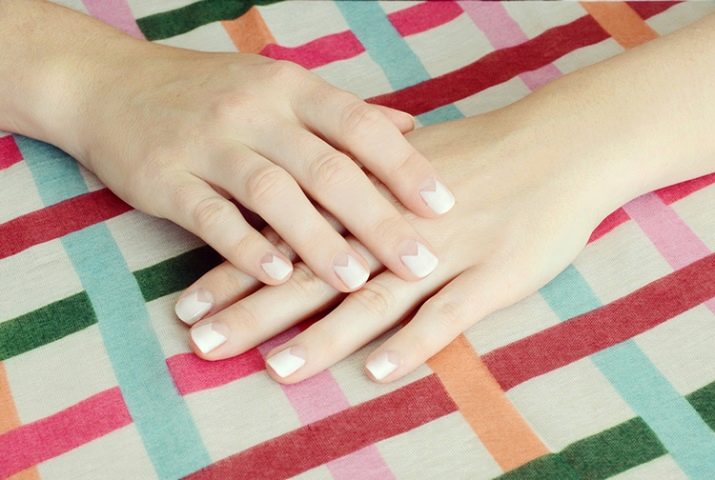
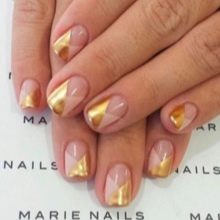
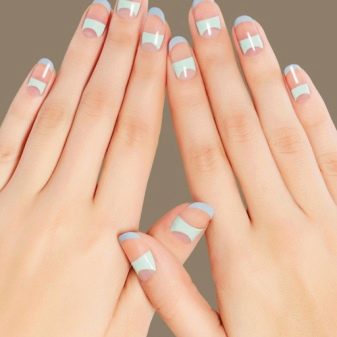
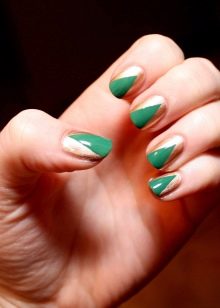
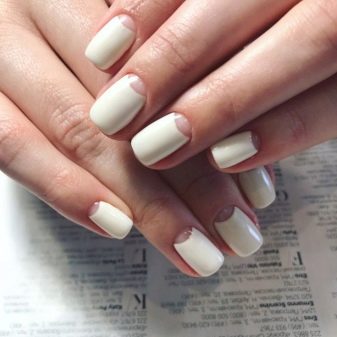
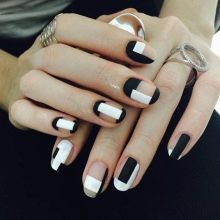
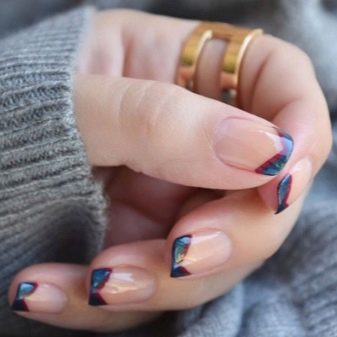
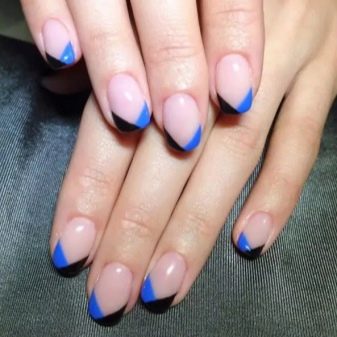
- French with an accent. French manicure looks unexpected and tender with three white horizontal stripes parallel to each other from the edge of the nail down. The top of the first corner is in the middle of the last strip, the sides almost reach the root zone; the second corner is located symmetrically just below the first, resting on the hole. The basis of nail art is a transparent base, so the effect is amazingly touching. Looks good on short nails.
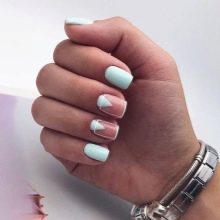
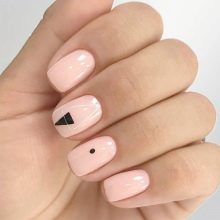
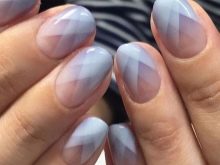
- Triangular moon manicure. The originality lies in the unusual coloring of the hole of the nail plate. Instead of rounded shapes, they depict clear isosceles triangles. If we use pastel colors as a background, and make the root geometry coal-black, we get a minimalist manicure. Such nail art looks quite modest, but at the same time it is original. Stylists suggest diversifying the pattern with rhinestones at the vertices of the triangle.
- Longitudinal strip on one of the fingers. The element is made using various materials: rhinestones, small beads, sand, manicure tape of different shades, or simply painted with varnish.
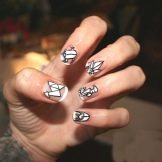
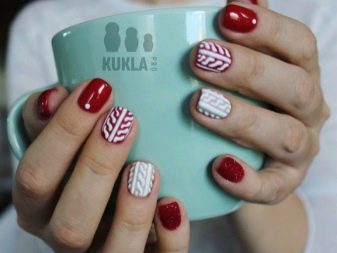
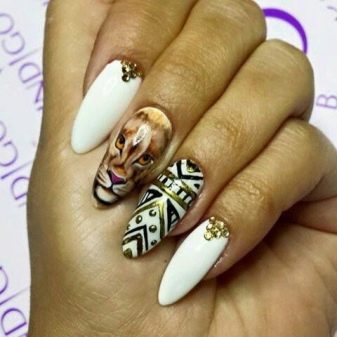
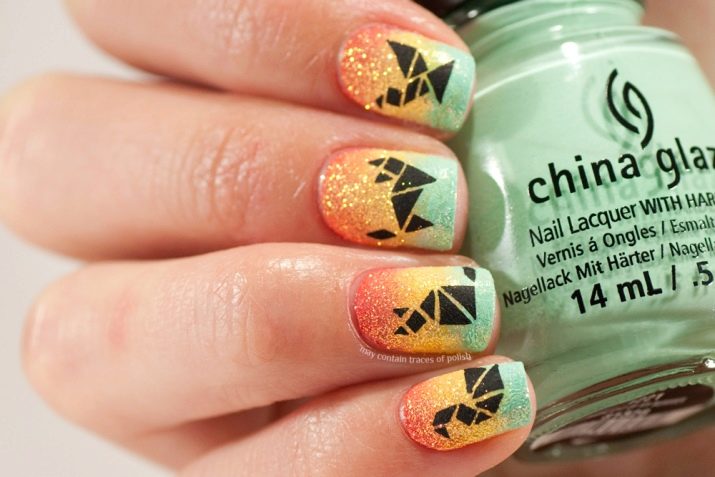
- Origami image technique. For the base, in this case, four colors are used: black, gray, white and beige. A drawing is applied to the selected background with a thin brush. Usually this is an image of an animal, as if it were folded from paper in Japanese technique. The manicure fits well on short nails, looks neat and stylish. Masters advise to decorate only one nail with such a pattern. If it seems that the manicure is boring, then you can add a simple geometric ornament for 1-2 more nails. For those who do not yet have much experience in applying such patterns, it is suggested to use stickers or stencils.
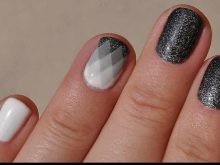
- Another basic but popular technology is gradient in the form of rhombuses. A simple but non-standard approach to design is the use of ombre technology when applying varnish in diagonal directions. The gradient is formed by painting it up diagonally. As the layers are indented one on top of the other, the color gets darker with each step.
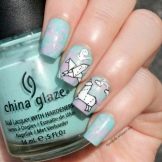
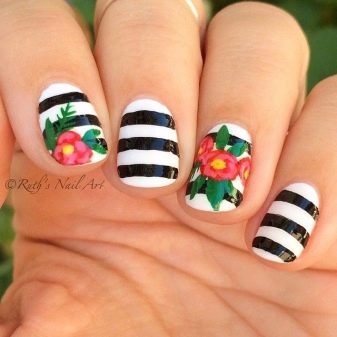
The black and white drawing in the style of a botanist is a topical novelty. Individual branches are drawn using lines and combined with greenery on other nails. Birch nail art is especially popular and fresh.

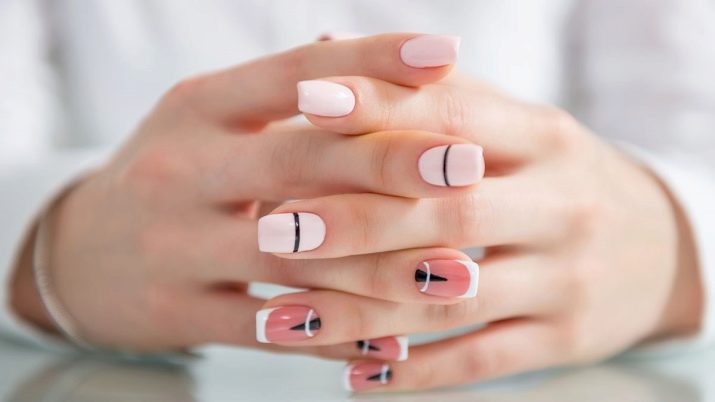
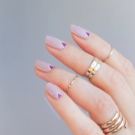
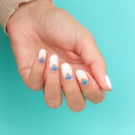
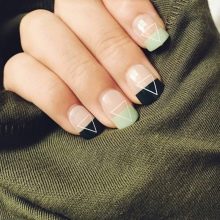
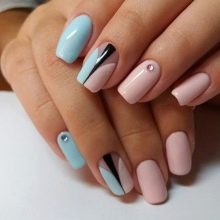
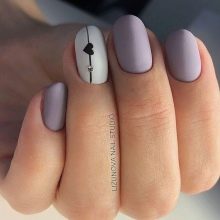
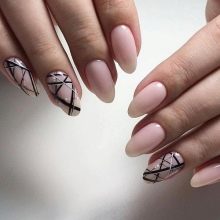
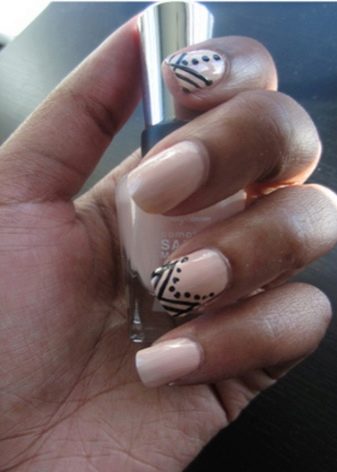
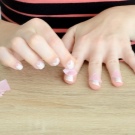
And also nude geometry is in demand. In this case, pastel colors are used for the background, and the patterns are depicted in white, black, gray, gold, silver or brown. Such a manicure on short nails looks very good.
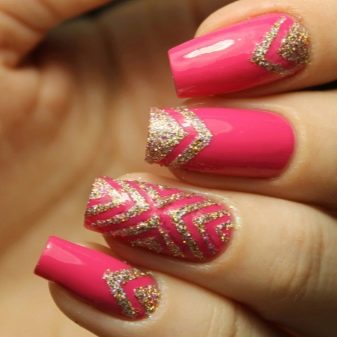
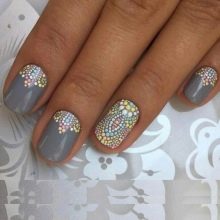
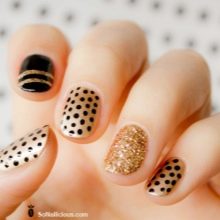
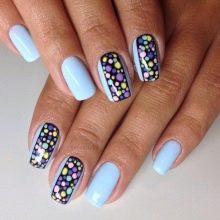
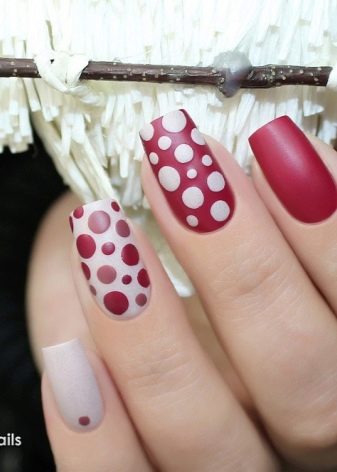
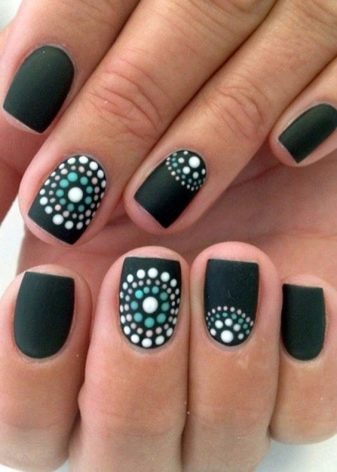
Another type of geometry is point. It has been used for a long time, but thanks to the emergence of new materials and tools, it is constantly being updated and improved. The patterns become more complex, the tones are brighter. The dots are made not only with multi-colored varnishes, but also with textured decorative elements: sequins, acrylic powder of different textures, stickers.

Methods for creating geometric designs
The geometry of nails is one of the directions of nail art.
Among the features of the process of creating a geometric manicure, the following can be distinguished.
- Complex geometry is applied only to 1-2 nails, it is better to leave the rest solid. Otherwise, nail art will be lurid and tasteless.
- The process of applying a picture in different colors is step-by-step, therefore, rather lengthy, since each subsequent layer must be applied to the already dried previous one.
- To obtain clear lines, it is better to use a dense structure coating, otherwise the borders of the drawings will be blurred.
- It is imperative to choose the correct consistency of varnish, it should not run out during application, but it should also not be used overly thick.
- Geometry abhors thick brushes.For graceful and precise lines, professional craftsmen recommend having only fine tools.
The technology for applying patterns is not static, that is, it involves the use of various tools, materials and improvised means. To help beginners, various "helpers" are offered, which can facilitate the laborious process of drawing.
Scotch
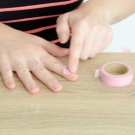
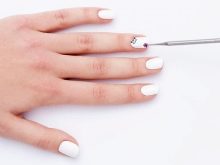
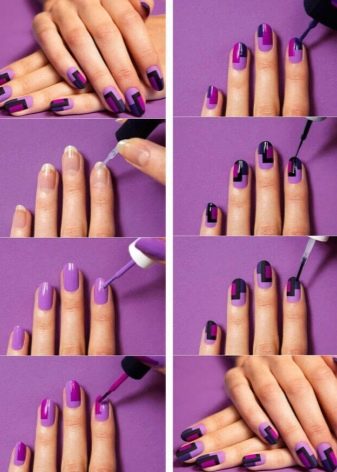
Scotch tape is one such tool. We will consider the technology of the process of reproducing a geometric pattern with its help on the simplest version of a manicure.
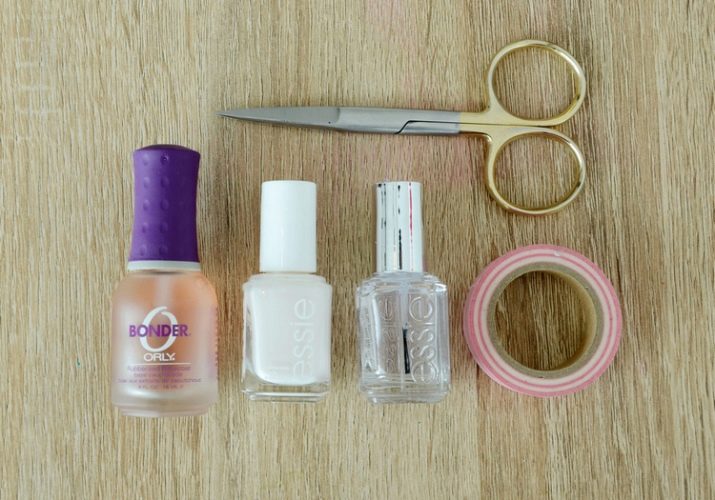
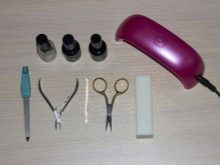
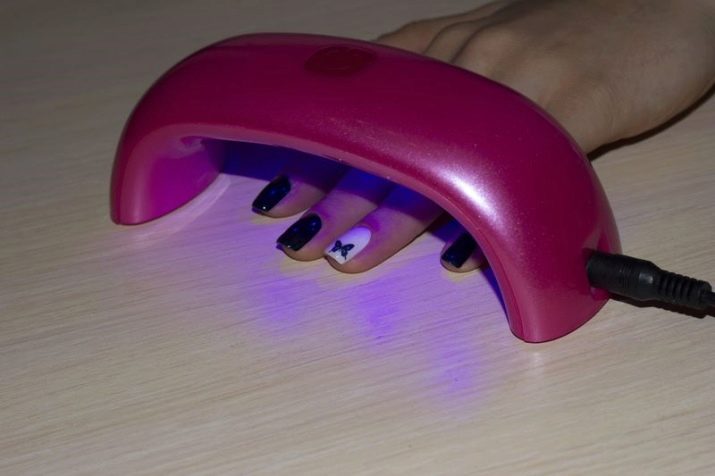
To get started, you will need a special thin tape, gel base, top coat and white varnish, nail scissors, tweezers and a UV lamp.
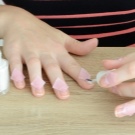
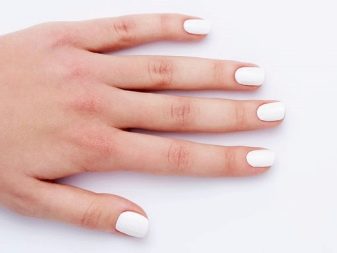
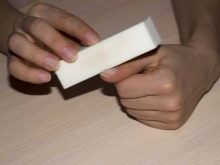
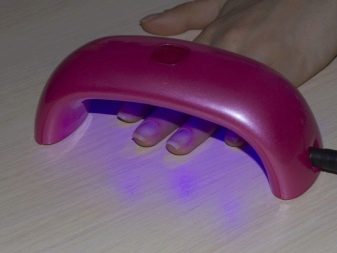
At the first stage, as usual, you should prepare the nail plate: clean and shape. It is better if the nail is short or medium in length, round in shape. Next, its surface should be polished.
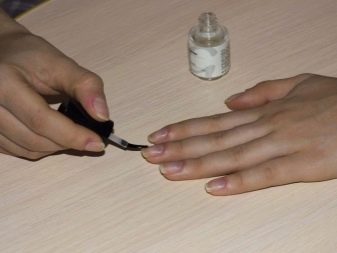
- In the second step, a base coat is applied and thoroughly dried.
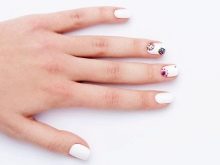
- Then, pieces of scotch tape are glued onto the nail according to the selected pattern, for example, with a herringbone, starting from the middle of the nail. The surface of the tape should be thoroughly ironed, all air bubbles should be expelled, especially near the cuticle and on the side. If this is not done, then the varnish will flow under the ribbons, and the drawing will be smeared. It is better to leave the ponytails longer, so that later it will be convenient to remove them.
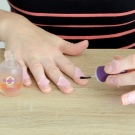
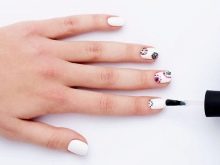
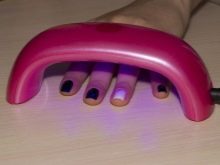
- The fourth stage is the staining of the nail plate with a white coating right on top of the tape. Then the tape is carefully removed, the manicure is dried in a UV lamp.
- At the end of the process, the top is applied, again drying and degreasing. The result is an original and at the same time simple geometric pattern.
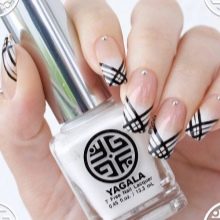
You can create different variations with decorative ribbons in different colors. It is glued onto a finished manicure, on top of which a transparent top coat is applied.

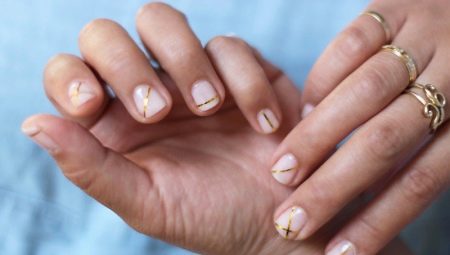
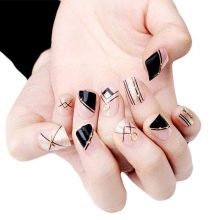
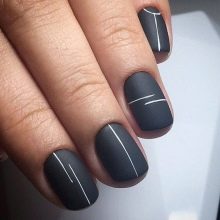
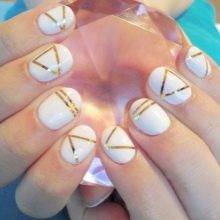
For example, golden lines on a nude background look exquisite. Minimalistic black and white geometric patterns are a stylish option for the office. Gold and silver straight lines on a black background are elegant and versatile.
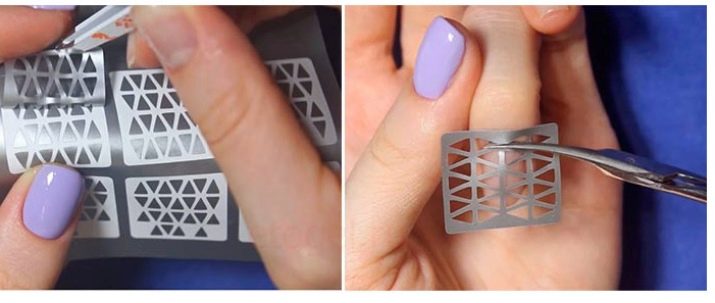
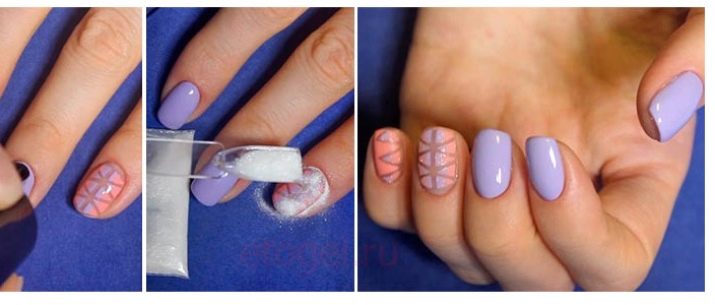
Stencils
Stencils make life much easier for craftsmen, especially when creating a geometric pattern. They can be purchased at nail shops, or you can make your own using tape or adhesive paper.
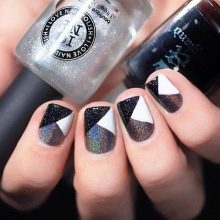
With the help of stencil technique, amazing patchwork compositions are obtained.
Let's consider the algorithm of such a technology on the simplest version of a three-color manicure. This will require the following materials and tools:
- basic framework;
- finishing top;
- varnish in three shades;
- scissors;
- regular stationery tape with little adhesive power.
Here are the stages of the work.
- Preparing the nail plate. Cleaning and shaping.
- Base application.
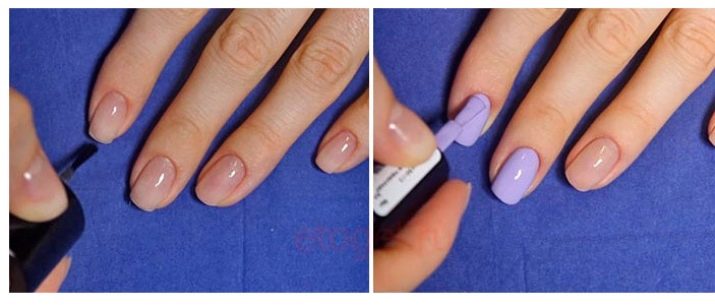
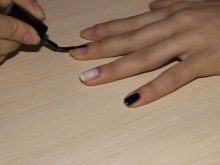
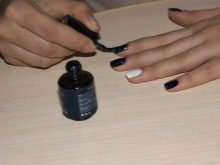
- Covering nails with a first color, such as deep pink. Then it should be thoroughly dried.
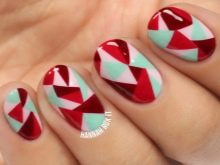
- After that, the reproduction of the "patchwork" pattern begins, for which the part that should not be stained is glued with a piece of scotch tape. For example, let's create a beveled corner at the cuticle. The area left behind is filled with a second color, for example, black. By the way, so that the tape is not too sticky, it should be glued several times and peeled off to the back of the hand.
- Wait until the second layer is completely dry.
- Next, we glue the pieces of tape so that a lateral triangle is formed with a base equal to the side of the nail from the beginning of the black color to the protruding upper part of the nail plate. This triangle is painted over with a third color, for example, pale pink pearlescent. Wait until it is completely dry again.
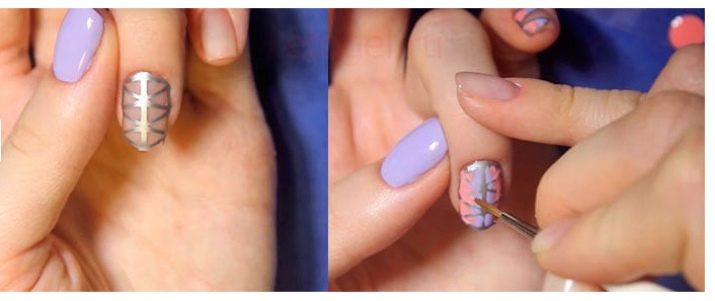
- The application technology is repeated on all subsequent nails. The arrangement of colors can be changed.
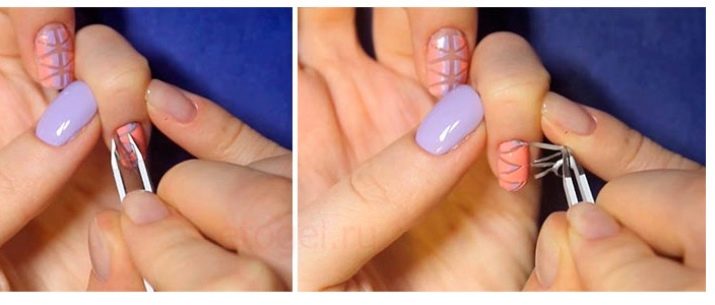
- At the last stage, all nails are covered with a transparent top. The result is three-color patches.
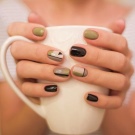
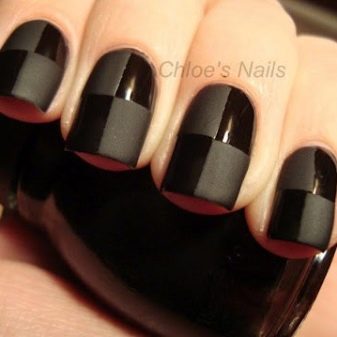
Another option for using stencils is to get a textured manicure. For example, when alternating between matte and glossy areas. In monochrome, such nail art looks stylish.
For another version of geometric manicure using stencils, see the video below.
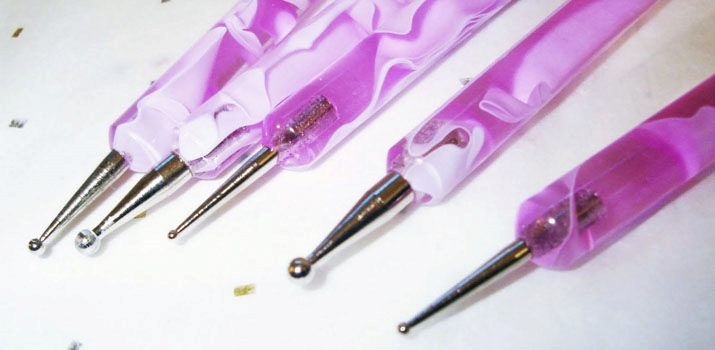
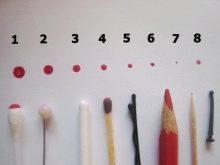
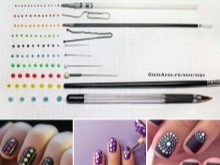
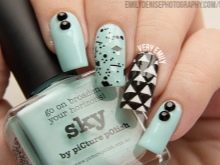
Dots
Dots is a special manicure tool, which is a metal rod with a ball at the end. Tip sizes vary. This fixture is used to reproduce a bitmap.
In geometric nail art, dots are necessary, since with its help circles and rings of the desired diameter and exact shape are obtained.
For example, when creating a monochrome black manicure on a matte background, glossy round drops of different sizes made by dots look original. The design is simple and uncomplicated, but it looks impressive.
And also the design in "peas" is popular now. It can be multi-colored on a bright background or black on a colored base coat.
The algorithm of standard actions when working with dots is quite simple.
- Hygienic cleaning of the nail plate from burrs, cuticles and other defects.
- Correction of the shape of the nails.
- Polishing nail plates, preparing them for applying gel polish.
- Coated with an acid-free primer.
- Base coat application and drying under LED lamp for curing.
- Painting nails in the color of the selected background. Fixation under the lamp.
- The drawing is done with acrylic. Foil is often used as a palette. Dots dipped in paint. Next, points are put on the nail plate with a spherical tip according to the diagram. The diameter of the dots can be changed by alternating dots of different sizes.
- At the end of the work, the drawing must be dried.
- A finishing transparent top is applied over the pattern. It can be glossy or matte.
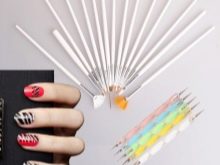
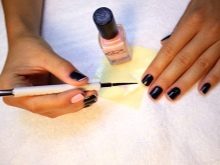
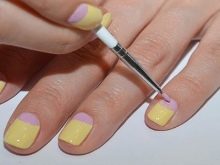
Brush
With the help of a brush, any patterns are created on a whim, none of them will be repeated. It allows the master to create using fantasy and imagination.
For geometry, you need a few thin brushes.
It should be warned that to create a geometric manicure with this tool, you must have a "firm hand", otherwise the drawing will turn out to be blurry, inaccurate. Therefore, the masters improve, "fill" their hand, hone their skills on special simulators.
Other tools
Professional craftsmen with extensive experience can create geometry using any available means. Toothpicks, paper clips, strips of plain paper are used. Of course, any girl at home can take advantage of this, but practice is needed.
Stylish color combinations
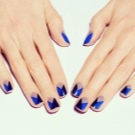
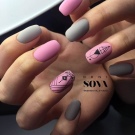
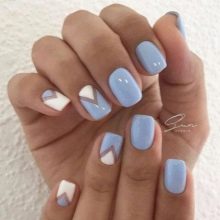
Most often, shades of red, white and black, as well as pink, green and blue are used for geometric manicure.
Of course, gentle, pastel colors are more suitable for summer and spring outfits, which is why they are most popular at this time of year. In winter and autumn, women prefer darker, richer shades.
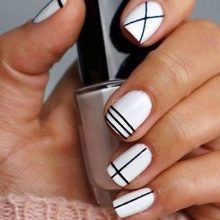
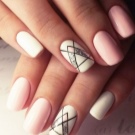
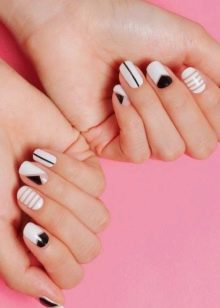
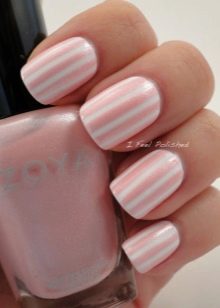
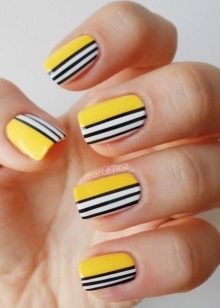
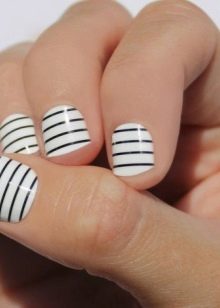
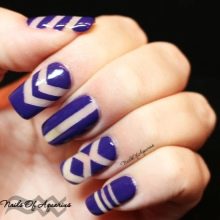
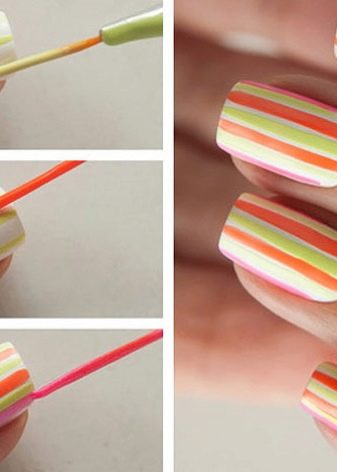
Striped pattern
Stripes are appropriate for any style. As a rule, no more than three shades are used for drawing a picture. Two-tone and monochrome options are more common.
The stripes can be combined with other types of manicure, for example, with floral patterns or monograms. In restrained colors, it looks stylish and elegant.
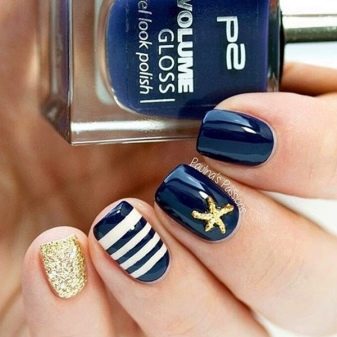
The sea version is very much in demand in summer: blue stripes on a white background. Sometimes red is added to them.
Business style perfectly combines striped manicure. Everyone's favorite jacket is decorated with stripes. Moreover, you can use any matching colors: both contrasting and nude. Effective white chaotic lines on a black background or, conversely, black on white. And also popular are clear parallel and perpendicular stripes, slightly offset from the center to the side. For example, gold on a beige or pink base.
Moreover, such a manicure looks good on short nails.
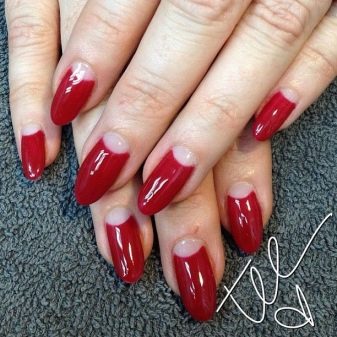
Moon manicure
Moon manicure refers to a special kind of design. It can be done in any style, including geometric. A fresh solution is a design with negative space, where the colored areas alternate with the natural color of the nail plate.
In addition, the hole can be designed as a geometric shape. Fashionistas often use combinations of red with black, white with black, gray with pink, gold or silver with black, pink with burgundy.
In fact, all base colors are suitable for this technology.
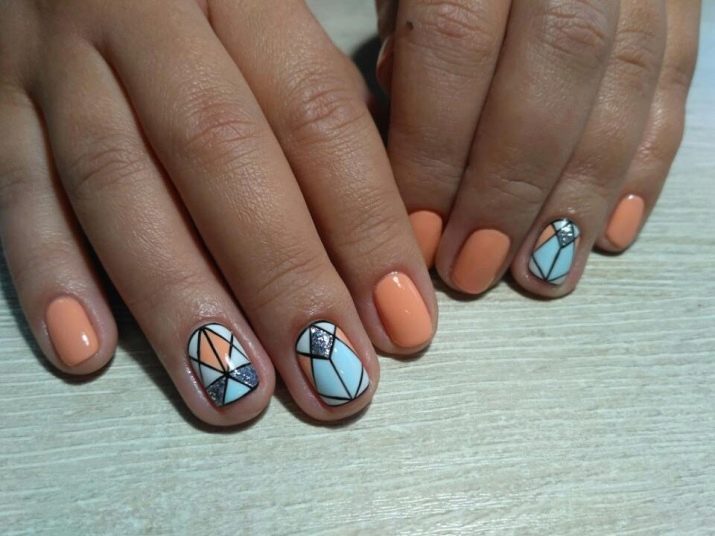
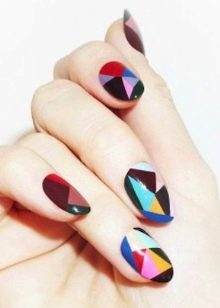
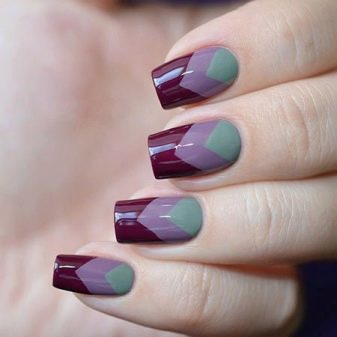
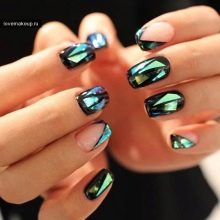
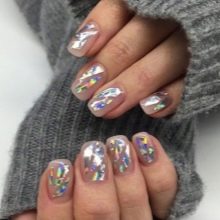
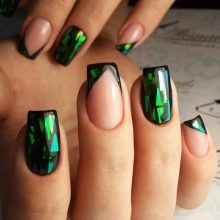
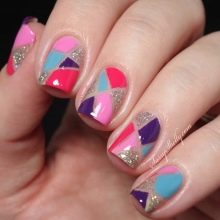
Broken glass
The technology is most appropriate for special occasions. With its help, you can create a futuristic design that is unique in its kind. Triangular mirrored "shards" will add shine and make the owner stand out from the crowd with their magical overflows.
The color scheme is diverse. Any bright, deep shades will be appropriate here. For example, fuchsia, eggplant, purple, raspberry, dark green, aquamarine, aquamarine, cherry, chocolate.
The space between the pieces of the geometric mosaic can be left colored, or textured with acrylic sand.
Textured geometry
Geometric design can be created not only with varnish, but also using other decorative elements.
- Glitters will help to add volume and shine to geometric shapes.
- Sand. Velvety shapes and stripes on a matte or glossy surface are unique and effective, especially in monochrome.
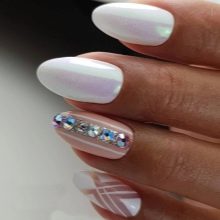
- Rhinestones. You can also draw shapes with pebbles, the main thing is to glue them according to the drawing. More often this design is used as an evening one. You need to apply rhinestones carefully, thinking over all the details in advance. A large number of elements can overload a manicure, so at best, striped patterns are allowed. More often, rhinestones are used to decorate the corners of geometric shapes.
Textured geometry looks organically in monochromatic variations. It looks especially elegant in dark, deep colors.
Step-by-step technique for performing manicure
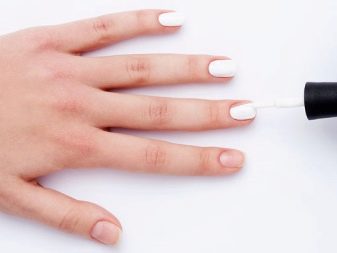
The basis of any manicure is beautiful, well-groomed nails. The correct classic shape is the key to success, since almost all types of design are suitable for it.
The standard technique of geometric design with gel polish includes several steps step by step.
- At the first stage, hands are prepared for the procedure:
- hygienic treatment of the skin of the brushes;
- if necessary (no more than once a week), strengthening procedures are necessary, for example, warm baths with essential additives and other health-improving agents;
- polishing nail plates;
- degreasing the surface of the nails.
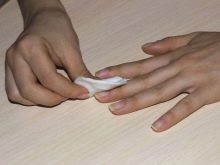
- In the second stage, the nails are covered with a base. It is necessary to protect them from varnish, and also helps to strengthen the structure, seal and prevent delamination. The coating is dried using an LED lamp for a minute. Some craftsmen use a UV lamp for these purposes.
- In the third step, a background is applied, for which any color gel polish is suitable. If it is necessary to deepen the color, then it should be covered in several layers. At the end, the base is thoroughly dried.
- The fourth stage is creative. This is where the patterns begin to be drawn. For these purposes, it is allowed to use any means. For more complex abstract compositions, it is better to use shape stencils, narrow tape, or thin brushes. Each newly applied layer must be well dried so that the next one does not spread over the previous one, the lines are clear and the borders are neat.
- After all the nails are decorated, a transparent top is applied to them. This is necessary because the finish coat visually aligns the nail plates, making them uniform, neat and gives a finished look.

This algorithm is the basis for creating an individual nail art. It is especially important for beginners to observe it.
The following is the technique of textured geometry on the nails.
The first two stages are appropriate for any design and do not depend on the type of manicure technique.
The third stage differs only in that when using textured ornaments, it should be remembered that the natural color of the nail can become the background. Then you get a negative space design.
Let's consider in more detail the stages of obtaining a geometric pattern.
- First of all, you should outline the boundaries of the picture. This can be done with contour lines. They are applied with a thin brush. If there is no proper experience, then points are preliminarily applied, which are then connected by small segments. But you can also use scotch tape as borders.
- After the boundaries of the figures are determined, they begin to lay out the drawing. Any decorative elements are glued with a special compound or gel varnish of a suitable color, so this is a painstaking work.
- It should be remembered that each next layer is laid after thoroughly drying the previous one. Otherwise, there is a risk of lubrication of the circuits.
- And also do not forget that a large number of elements look cumbersome on the nail, so follow a sense of proportion.
When working with velvet sand, it is applied to a completely finished manicure. The pattern is covered with varnish or a special agent such as glue, and sand is poured onto it in a thick layer. After drying, the excess is shaken off with a fan brush.

Stylish design ideas
In recent years, geometric nail art has gained a lot of popularity.
French and any of its derivatives are still in vogue. Simple shapes - lines, circles, triangles and squares - are universal in nature, so they fit well into any style and image. It is because of this that modern designers love to use geometric manicure in their shows.
One of the trends is the negative space style. It takes a certain amount of courage to apply it, because it looks unusual and bold. From the outside it seems that not the entire nail is covered with varnish, some area remains, as it were, “naked”, of a natural color. This design looks like on nails of any length. The geometric pattern is applied to the transparent base with glitter or any colored varnish.
When performing geometry on nails, you must adhere to common sense and not copy fashionable nail art from the catwalks. The fact is that runway options are not always appropriate in everyday life. If the pattern is overloaded with details, the result will be bad taste. Moderation is best in geometry. For example, stylists offer options in the style of "dominoes" or "checkers". It is very effective if it is not performed on all nails, but selectively on several.
"Winter" manicure in the form of separately traced snowflakes from segments or snowfall from points will look interesting at a certain time of the year. This style is combined with any office or casual wear.
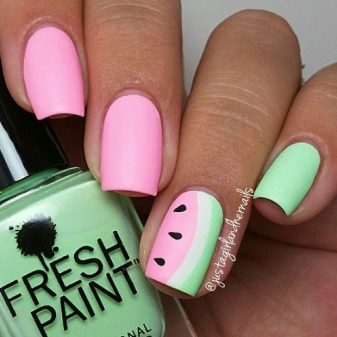
"Summer" nail art pleases the eye with rich colors and simple patterns. For example, drawing in watermelon flowers, in the style of a ladybug or sunbeams is popular.
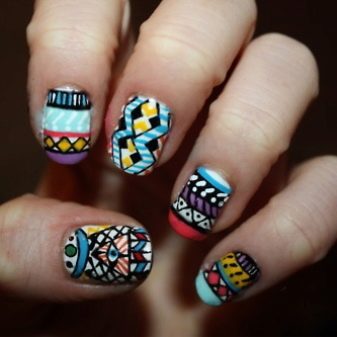
Ethnic drawings are gaining great popularity. It is important that they overlap with the general image, that is, match the outfit and even the hairstyle.
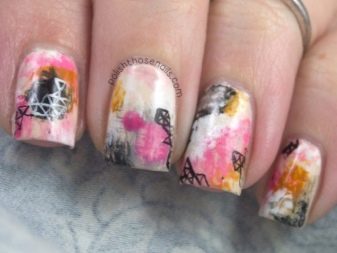
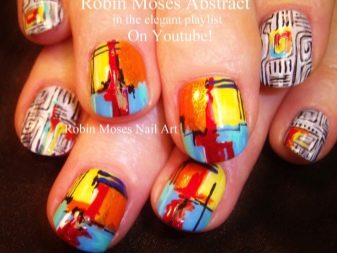
Abstraction is considered one of the most difficult techniques. To reproduce it requires a certain experience and a "steady hand".
Mosaic style manicure looks very impressive and unusual. It can be made in different colors, textures or using the broken glass technique.

Origami manicure looks unique and impressive. In Japanese, simple and laconic means stylish.
A dot design made with dots can be mastered even by a novice master. And if you improve your skills, you can achieve high skill in this style.
The simplest geometry does not mean the poorest. Absolute style, elegance and chic can be seen in the manicure, made only in straight lines.