Selection and technology of application of forms for nail extension
According to statistics, only one in five women can boast of naturally strong nails. Given this circumstance, one should not be surprised at the growing popularity of building-up forms: special templates that make it possible to bring to life a lot of original ideas. This is explained not only by a large selection of such devices, but also by the technology of their application, which contributes to the achievement of an optimal result.
What it is?
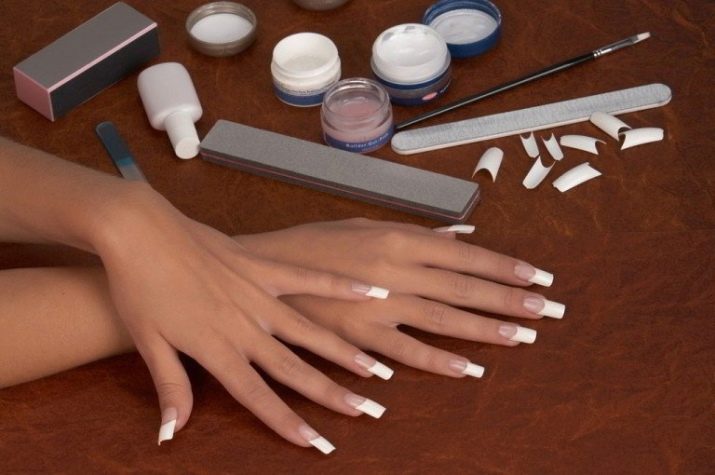
As noted above, shapes are templates used to give the nails the characteristics the client needs: first of all, length and shape. The solution to this problem involves the use of one of two modeling materials: gel or acrylic, each of which has its own set of advantages. Also noteworthy is the simplicity of caring for nails extended by this method, which implies correction at least once a month.
Using the extension technique using templates, nails can be given a wide variety of shapes: oval, rectangular or pointed. Another advantage of the described technology is the natural appearance of the plates, achieved due to the smooth transitions and the absence of noticeable thickenings. The only drawback of such a build-up is the complexity, which requires a sufficient level of competence from the performer. For this reason, many novice craftsmen prefer tips - plastic blanks attached to the nails, which are much easier to use.A tangible disadvantage of this solution is a less natural appearance, which does not suit every woman.

Varieties
There are two main types of extension forms, each of which assumes its own mounting option: lower or upper. Practice shows that both varieties have their obvious advantages, which justify their more detailed consideration.
Lower
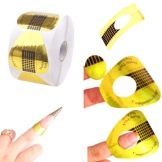
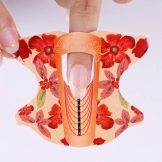
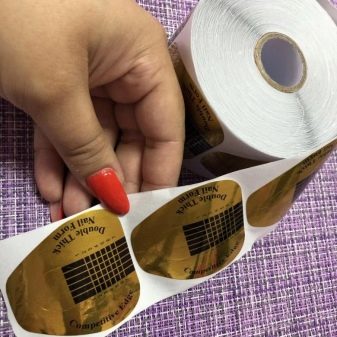
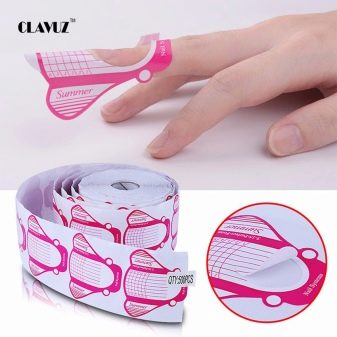
The first templates of this type appeared a long time ago: several decades ago. The material of such devices was paper, which naturally affected the quality of the procedures performed. Being very soft, such forms often crumpled, because of which the building had to be started anew. Gradually, primitive paper templates were abandoned in favor of more advanced products, the material of which made it possible to model the tips of a variety of shapes and reduce the likelihood of creasing to a minimum.
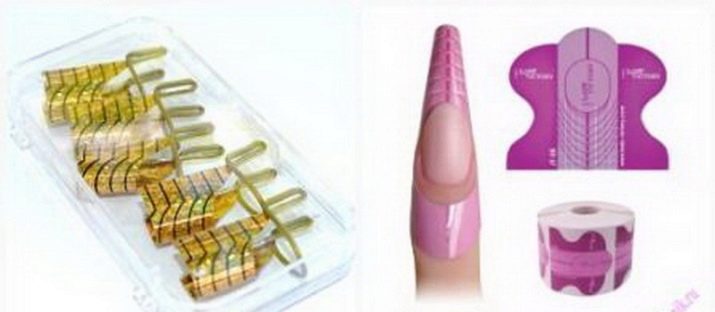
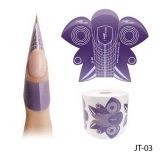
Depending on the characteristics of the application, the lower forms are single and reusable. The first ones, also called soft, are distinguished by a democratic price and do not provide for the possibility of reuse. Such templates are very popular, and the materials used to make them can be:
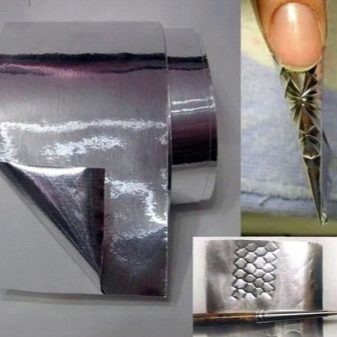
- paper with polymer or metal, which is applied to the contact layer;
- high molecular weight compounds or plastic (such forms are often transparent, which is especially important for masters of modeling and design);
- the thinnest metal sheets (foil);
- combinations of the above options.

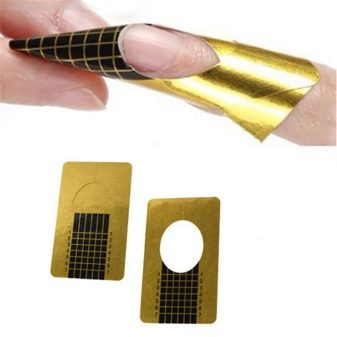
Another advantage of the considered type of extension templates is their flexibility, which allows them to be easily and accurately adjusted to fit a wide variety of nails.
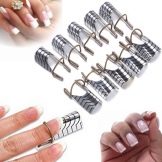
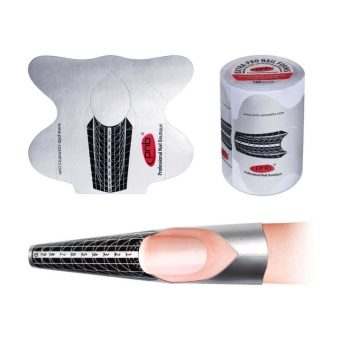
In the case of reusable bottom molds, in most cases metal or Teflon (a polymer also known as fluoroplastic-4) is used for their manufacture, while plastic is used much less often. Such products are ten times more expensive than disposable templates, however, due to their durability, they quickly pay off the money invested in them.
Another tangible advantage of reusable molds is that there is no tendency to deform, the appearance of gaps and the penetration of the modeling material into the formed "gaps". To achieve an optimal result, the master just needs to choose a template that perfectly matches the client's nail. Reusable extension forms are used in the same way as disposable ones. Their only difference is the need for disinfection, carried out after each completed procedure.
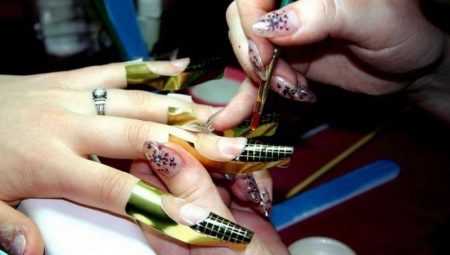
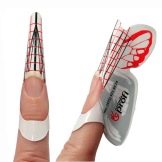
Upper
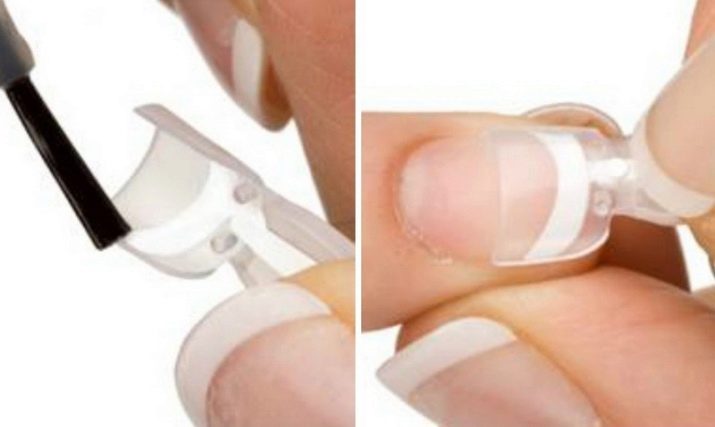
Outwardly, such templates are similar to tips and are blanks made of silicone. They began to be used relatively recently, and their main advantage is the simplicity of the extension performed. These devices are especially appreciated by novice masters who want to get nails of the same shape and reduce the amount of consumable materials. Using the upper templates is extremely simple: just apply gel or acrylic on them, and then press them tightly to the nail plate. After waiting for the modeling material to solidify, the mold remains to be removed, spending ¾ hour for the entire procedure.
Considering the speed of execution, which differs the considered method, many experts call it "express-build-up". In addition, it is very profitable to work with the upper forms: being several times more expensive than disposable templates, they can easily withstand up to 40 uses. While top molds are very similar to liquid tips, there is one key difference in how they are used. The former is used to model the finished nail with a glossy surface, while the latter only form the substrate to be coated with the gel.
How to choose?
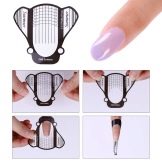
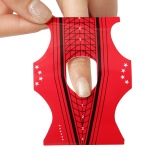
One of the main criteria that determines the choice of the lower template for extension is the shape of the planned nail.To solve this problem, just look at the markup of the products used: divisions that allow you to lay out the material with maximum convenience. When choosing the most suitable option, experts recommend taking into account the following rules.
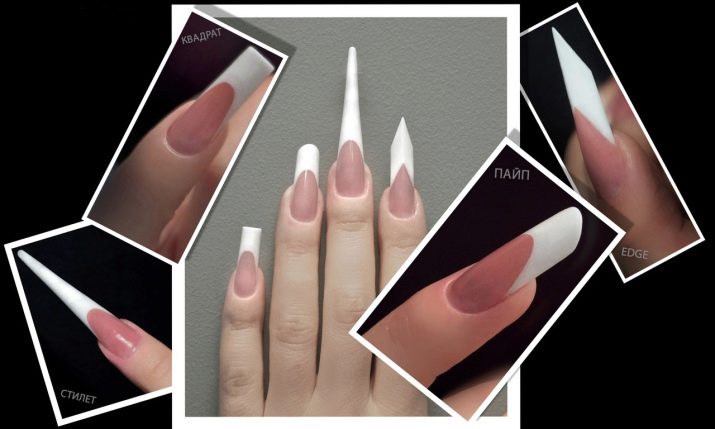
- If you need to make nails that have a square shape, it is most rational to give preference to templates with lines intersecting at right angles.
- In a situation where square nails need to be given a "softened" shape, it is justified to use templates with slightly curved transverse lines.
- In order to build up almond-shaped or oval-shaped nails, it is advisable to use templates, the transverse lines of which are distinguished by a strong bend.
- Creating nails in the form of a stiletto involves the use of templates, the marking lines of which converge at an acute angle. Experience shows that such attachments are also suitable for other types of extended nails, for example, sharp or oval.
As for the bottom templates, which can be called universal, these are oval shapes. They can be used in the vast majority of situations, allowing you to create nails of almost any architecture. To build on the legs, you need special bottom templates in the shape of a horseshoe. Such devices allow you to successfully perform both gel and acrylic modeling, but they will hardly be able to build up fingernails with their help.
How to build nails?
When choosing the upper forms, you should pay attention to their size. To avoid creases, the templates used should cover the sides of the plates without tension. It should also be borne in mind that such forms are not recommended for use with trapezoidal or overly wide nails. Choosing templates of the most suitable shape, professionals advise to be guided not only by taste preferences, but also by the convenience of wearing extended nails. The latter depends on the woman's lifestyle and the characteristics of her work: circumstances, ignoring which can cause many inconveniences.
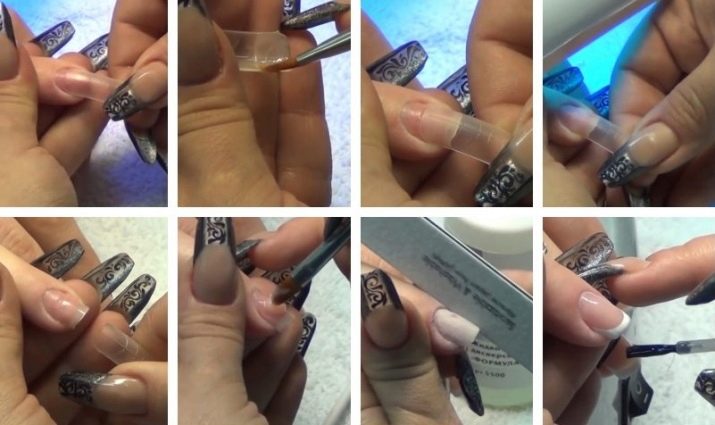
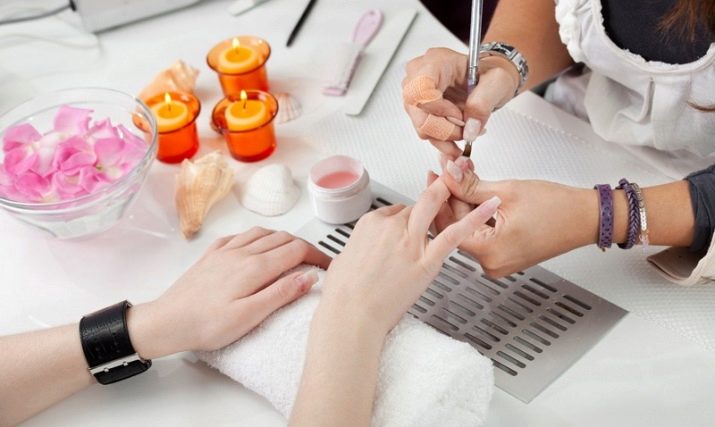
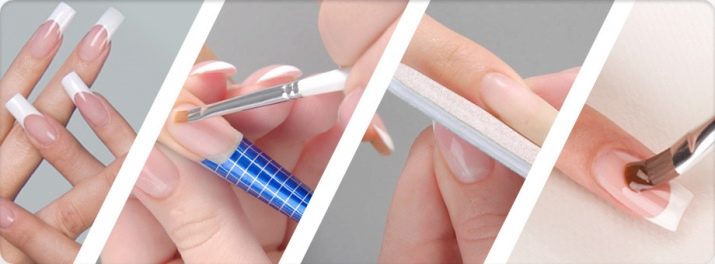
Having decided on the most suitable forms, you can proceed to the extension procedure. For the lower templates, it assumes the following sequence of actions.
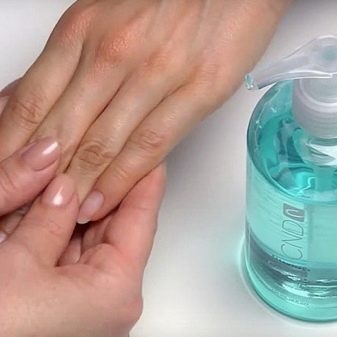
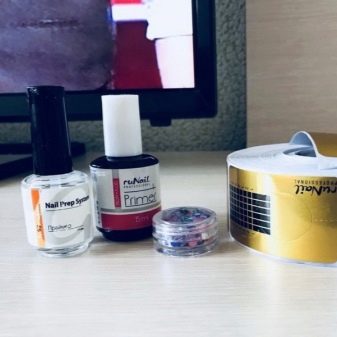
- The use of an antiseptic. Hand treatment with such a tool allows you to avoid the development of infection that penetrates through microscopic damage to surface tissues.
- Preliminary manicure. This action involves moving the cuticle, cutting the free edge of the nail to a length of 1–2 mm and grinding the plate for optimal contact with the modeling material.
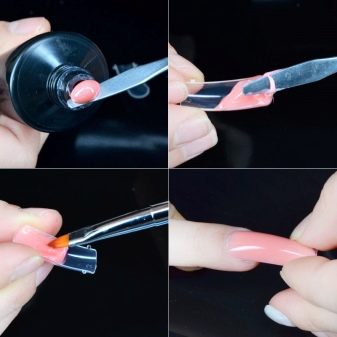
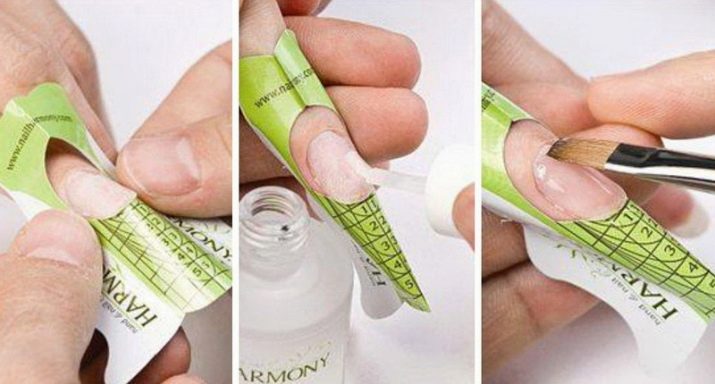
- Adherence base to the nail: a liquid agent, also called a primer.
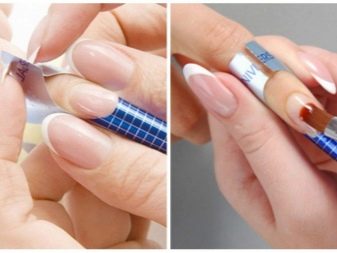
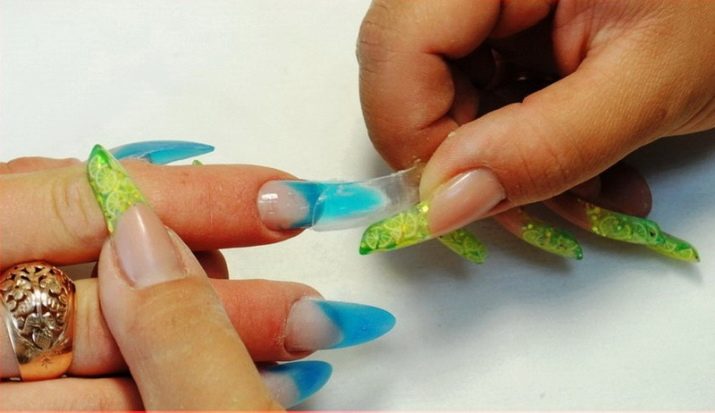
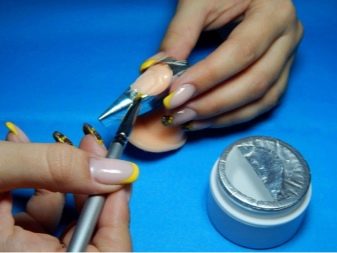
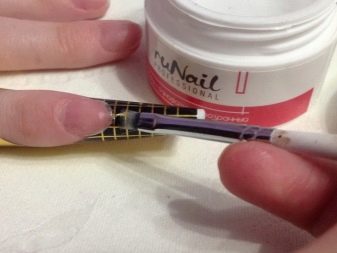
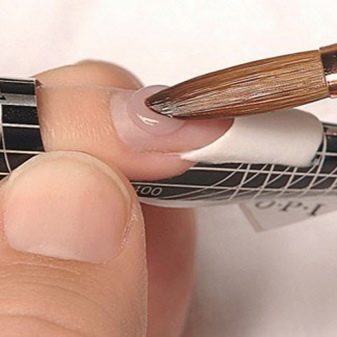
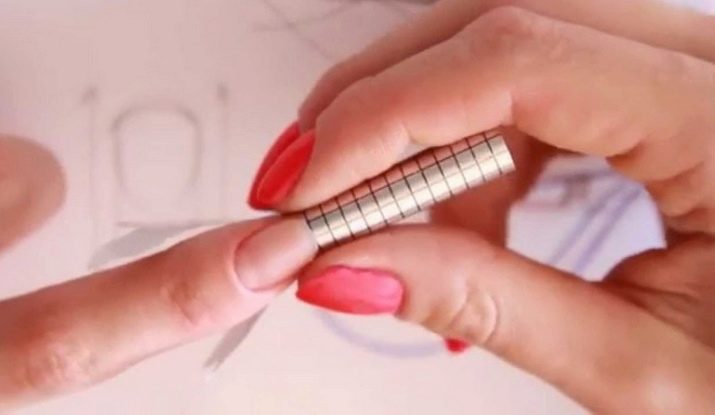
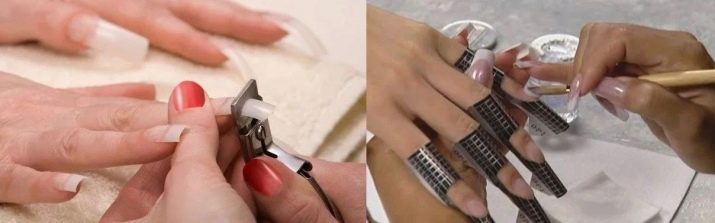
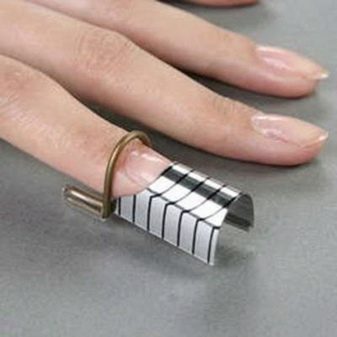
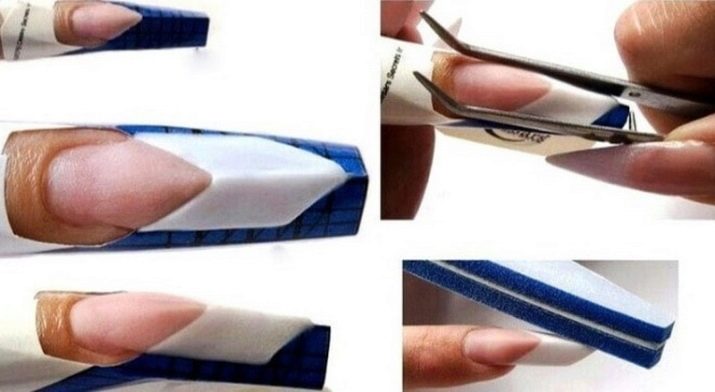
- Attaching a template. The latter must be squeezed until it becomes oval and put on the finger so that it looks like an extension of the nail plate. To achieve the best fit in size and shape, the template can be carefully trimmed using scissors (provided it is not reusable).
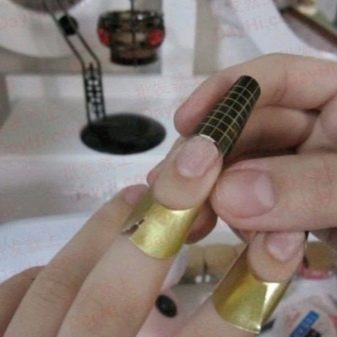
- If on the first attempt it was not possible to achieve the correct formulation, the operation must be repeated until the desired result is obtained. Once the template is in perfect alignment with the nail, it must be firmly fastened to avoid spreading of the modeling material.
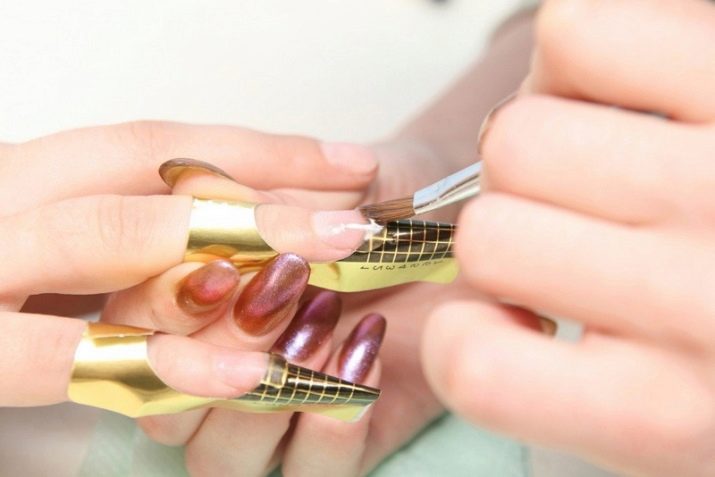
- Application to the mold of gel or acrylic with an appropriate brush. In order to give the extended nail symmetry and the required length, the master should use the special divisions applied to the template he uses.
- If the extended nail is long, experts advise to apply the material in 2 layers.
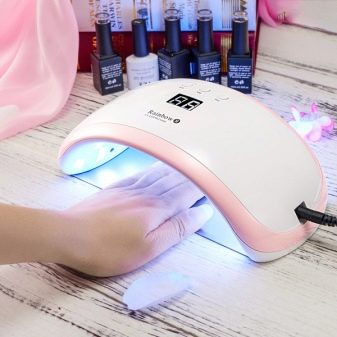
- Treatment of the nail with a UV lamp. This step allows you to reduce the setting time of the modeling material.
- Removing the form. This operation must be carried out carefully and only after the nail has completely hardened. If the shape does not lag behind, it is necessary to dry the material in a UV lamp.
- Elimination of minor defects. To give the extended nail an ideal look, you need to carry out its final processing, performed with a buff.
Provided that the master has sufficient skills, the procedure for extending nails according to the described scheme lasts 1.5-2 hours.
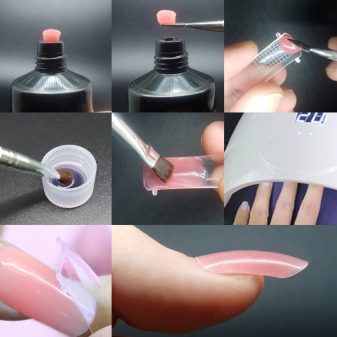
Noteworthy is the second option for solving the described problem, which involves the use of upper templates. Extension of nails with their help is performed according to the algorithm presented below.
- Preliminary preparation. It is carried out in the same way as in the case of the lower forms.
- Selection of suitable templates. The main criterion to consider is the width of the nail plate. It is also worth remembering that between the last and the applied form there should be a place for laying out the modeling material.
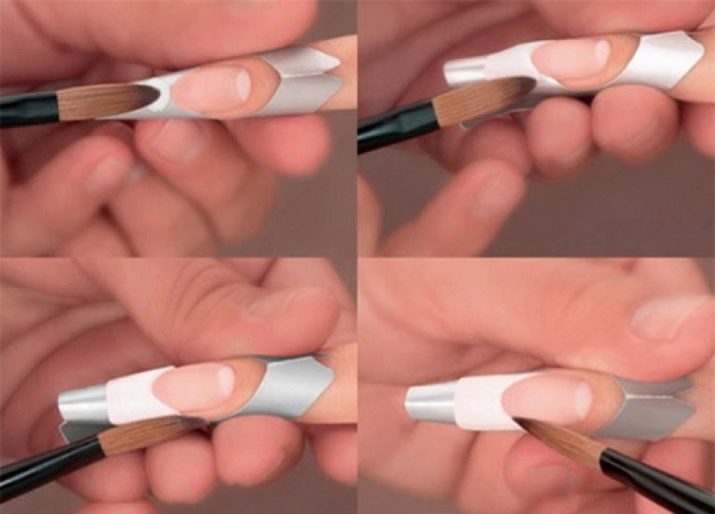
- Applying the base to the nail. This material should cover the entire surface of the plate with an even thin layer (it should not be dried).
- Laying out the modeling material on the template. To ensure intermediate polymerization, it is necessary to place the nail under a UV or LED lamp.
- Applying the mold to the nail plate. Experts recommend performing this procedure so that the edge of the template approaches the cuticle area at an angle of 45 °. Further, it remains to carefully press the device used to evenly distribute the material.
- Treatment of the nail with a UV lamp. If the latter has a high power, the final solidification of the gel occurs after 3 minutes.
Next, the master needs to remove the upper template and perform the final correction of the free edge of the nail. As for the surface of the extended plate, it turns out to be very smooth and does not need to be processed. In the end, it remains to cover the nail with a finishing layer (to give it an effective glossy shine) and treat the cuticle with a small amount of cosmetic oil.
Rules of procedure
Professionals identify several basic rules for nail extension using forms, the list of which looks like this:
- before the start of the procedure, it is necessary to disinfect not only the instruments, but also the hands;
- during and after building up, the room should be thoroughly ventilated;
- the use of materials whose expiration date has expired must be abandoned;
- performing build-up, the master must clearly adhere to the technology, not ignoring the procedure provided for by it;
- carrying out the described procedure involves the mandatory use of gloves;
- to strengthen the health of the nail plates and skin of the fingers, it is worth treating them with nutrients.
In addition, it is worth considering the setting time of the product used for modeling. It is determined by the properties of the components of the selected material, which are indicated in the instructions for its use.

In addition, the client should be warned about the precautions to be taken during the first 24 hours after building. They provide for the protection of nails from high temperatures and prolonged contact with water. Also, when carrying out the procedure for extending nails with their own hands, experts advise adhering to the following recommendations:
- to make out subtle transitions and steps, the nail plate must be viewed from all possible angles;
- after processing with a nail file, it is necessary to get rid of the formed nail dust by removing it with a brush;
- Apply gel-based materials with the tip of a brush, from center to edge.
What can be replaced?
If it is necessary to perform nail extension, but the performer does not have ready-made forms, it is reasonable to use homemade templates. They can be made from dense foil, which almost every housewife has, or other material that is soft and smooth on the surface.At the same time, experts do not recommend using forms made of plain paper, oilcloth or cellophane instead of ready-made templates. Having decided on the suitable material, it remains to fold it in several layers, cut out the blanks and apply markings on them.
An alternative to the solution described above can be tips - finished plastic products, which are glued to the nail plates and cut to the length and shape required by the client. This technique involves the application of gel or acrylic over the structures used, and the final result of such a procedure can rarely boast of special elegance. Thus, it is permissible to use nail tips instead of forms, but it is extremely problematic to achieve a natural look of nails with their help.
Possible problems and solutions
Sometimes it happens that the materials built up on the nail plate flake off, change color, fall off or become covered with cracks. As a rule, the cause of such troubles is the violation of the rules of the procedure by the executor.
To avoid this, you must:
- prevent air from entering the areas affected by the simulation;
- refuse to use worn out and / or blunt instruments;
- select only those templates, the use of which cannot lead to the formation of gaps;
- clearly form the center of gravity of each nail extension;
- thoroughly clean the treated surfaces before starting the procedure.
Separately, it is worth mentioning situations when extended nails suffer from two misfortunes at once: yellowness and the appearance of cracks. Most often this becomes a consequence of sharp temperature changes, which should be avoided if possible. Summing up, we can confidently assert that the use of forms is rightfully considered one of the most progressive methods of nail extension. To master it is within the power of everyone who has patience and is ready to follow the rules for performing this procedure.
Watch a video on the topic.


