How to braid a French braid for yourself?

The French braid is one of the most popular hairstyles among women. This type of hairstyle is perfect for a romantic date, business meetings, or just for every day. It is especially popular with schoolgirls of the senior and junior grades. Such braiding can also be seen on foreign stars, models and even politicians.
A huge selection of types of braided braids will diversify the image and add zest to it. The length of the hair does not in any way matter, because braids can be braided for both long and short hair. You can learn how to braid a French braid on your own, without using the services of a hairdresser. It is necessary to strictly follow the patterns and rules of weaving.

Weaving rules
Follow a few simple rules to achieve the desired result.
- Any braid should be braided on freshly washed and well-dried hair; if you have them curly, when drying you need to use a round comb or smooth them with an iron.
- Apply additional hair care products such as balms, masks, serums and other products while washing to prevent tangling when braiding. To fix the hairstyle, use varnish, and so that the hair does not stick out and is not disheveled, apply foam or mousse to the hair before braiding.
- Comb your hair thoroughly - as an assistant, a thin plastic comb with a sharp handle will come in handy in order to pick up auxiliary strands from the total volume of hair.
- Follow the directions and patterns to avoid confusion and achieve the desired result.Do not forget to purchase hairpins, hairpins, "invisible" or small silicone rubber bands for securing.
- Various types of accessories will help you to emphasize the image and highlight the hairstyle. Even if you have chosen the usual weaving on two sides, it can be used both for going on a date and for the gym or for a regular walk - the only difference will be in the presence or absence of an accessory.

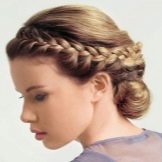

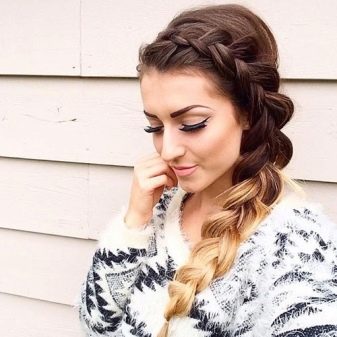
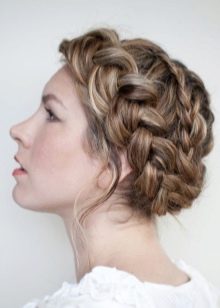
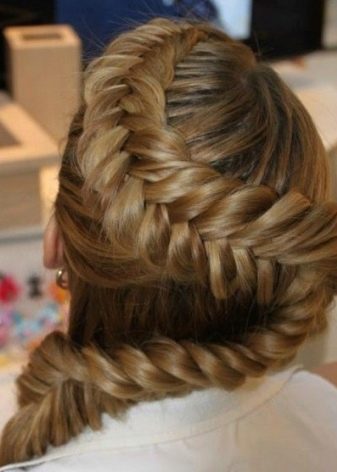
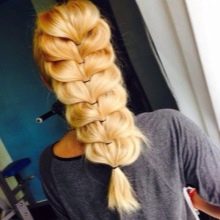
Classic French braid
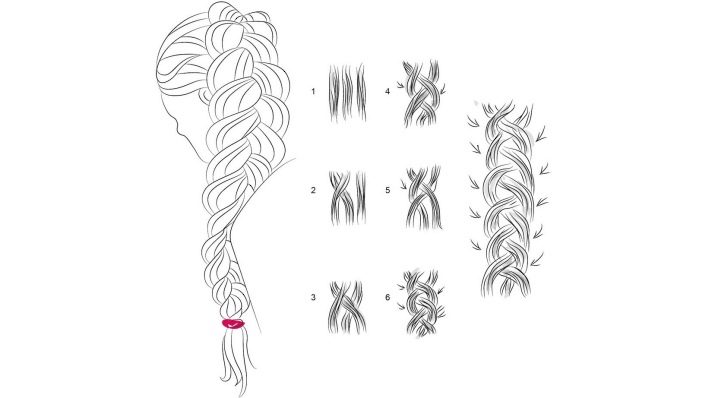
There are a lot of options for weaving a French braid. The simplest, it is also the main one, is the classic French braid.
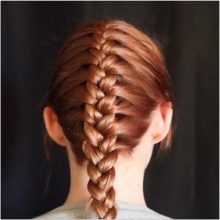

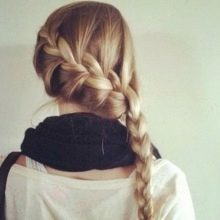
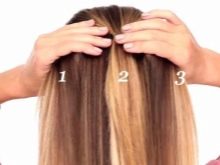
Before starting, comb your hair well and comb it back. Take a small section of hair from the forehead and divide it into three equal strands. Cross the divided three strands together, then add a bun of hair taken from the same side of the head to one of the side strands and cross with the central strand. Continuing the same sequence, reaching the back of the head, you can continue to weave the braid to the end, securing it with an elastic band, or fasten it immediately to the back of the head, leaving the tail.
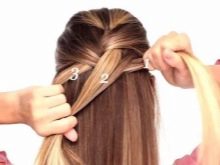
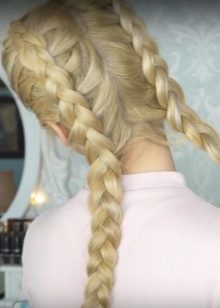
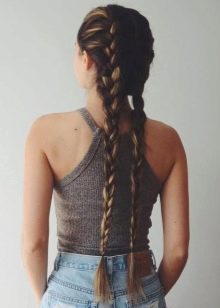
Following the same pattern, you can braid two identical braids. To do this, it is necessary to make a parting from the forehead to the back of the head, so that two equal parts are obtained. Secure one side with a rubber band or crab and start braiding the fluffed section of your hair in the same pattern as above. When finished braiding, secure with an elastic band and move to the remaining half. You can fasten two braids in different ways.
- When you reach the back of the head, continue to weave and secure at the end with elastic bands.
- When you get to the back of the head, immediately secure with elastic bands, while leaving the tails - then they can be curled with a curling iron or a hair straightener.
- At the back of your head, join two braids together: out of six, get three strands and weave a common regular braid, or you can weave a more complex braid from six strands.
- Before reaching the back of the head, secure the two tails with elastic bands or combine into one. Wind loose, fluffy hair or leave it that way.
Tighten the strands well so that the braid holds well. If you have fine hair, you can gently pull the bottom of the braid with your fingers to create a little volume, or comb the hair a little at the roots before braiding.
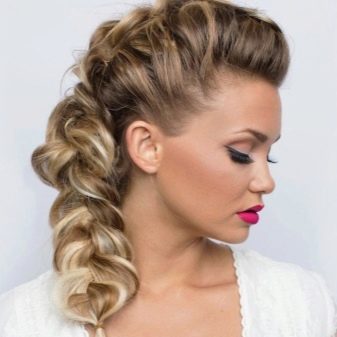
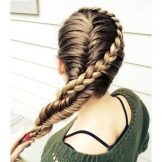
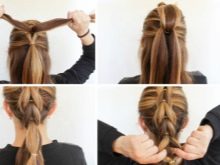
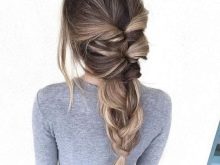
Reverse or inverted braid
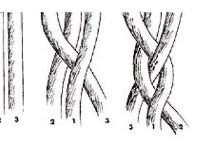
Let's take a step-by-step look at the second type of French braid: reverse or inverted braid. Many people consider it more difficult, but do not be so mistaken. The principle of weaving remains the same as that of the classical one, the only difference is that the strands must be crossed not on top of each other, but from below.


First, comb your hair back and separate a section of hair at the forehead line, which then needs to be divided into three strands. Following the diagram below, wind the left strand under the middle one, then put the right strand of hair under it. In the next step, do not forget to pick up identical bundles of hair to the left and right strands with the help of the tip of the comb or with your finger and cross them under the middle strand. Secure with an elastic band when finished.
Such weaving is characterized by stretching along the entire length of the braid, which will give the hairstyle an unrealistic volume and lightness. This braiding will look good on corrugated hair, your image will become more unusual and fabulous.
The back braid can be woven on two sides or to the side, starting from the right or left side of the temple, and ending on the opposite occipital side.


In addition to these options, there is a variant in the form of a zigzag. For this case, divide your hair into three sections (top, middle and bottom). When weaving the upper part and moving to the middle, do not forget to turn the braiding direction in the opposite direction and continue in the same way. When you reach the bottom, change direction again. When finished braiding your hair, secure with an elastic band and pull the strands a little.
This hairstyle can be decorated with hairpins with pebbles, placing them 2 or 3 on each of the divided parts.

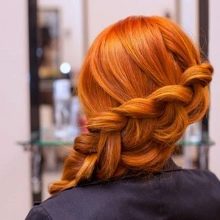
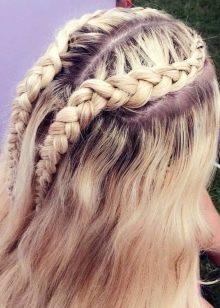
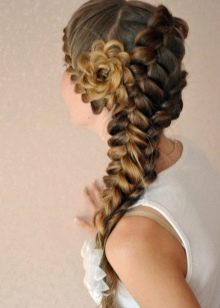
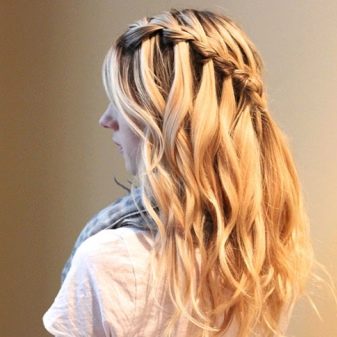
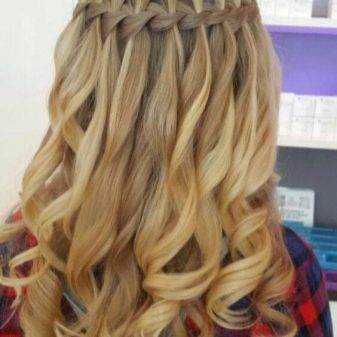
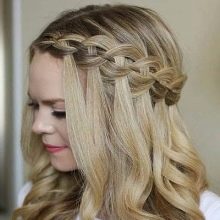
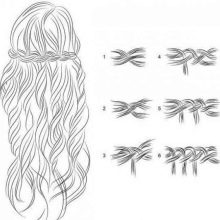
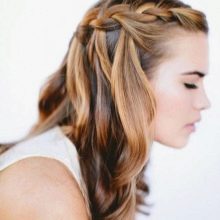
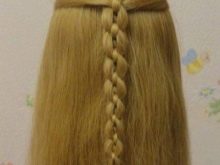
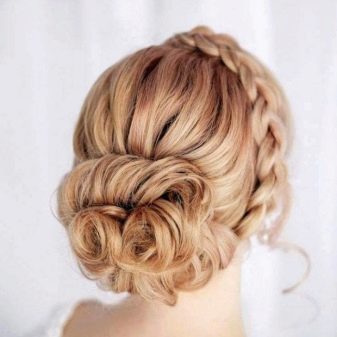
Spit "Waterfall"
An excellent hairstyle option for every day or even for special events. It got this name due to its resemblance to a waterfall.
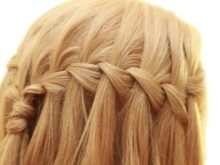
So, having combed your hair, divide it into a side parting, you can braid it from left to right, and vice versa. Take a strand from the temporal part of the head, divide it into three strands and start to weave like a regular braid, only the top strand after using it, release it down. Continuing the weaving pattern, do not forget to add the same bunches of hair only to the top strand, when finished - secure with an elastic band or some beautiful hairpin, "crab".
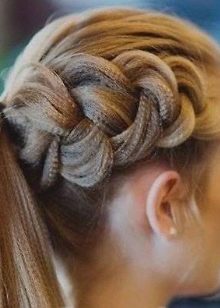
"Air spit"
It is also nicknamed "chain braid", it is suitable only for long or medium length hair.

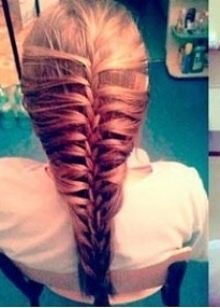
Comb your hair back and take a small bun of hair at the crown, divide it into three strands and cross it together, put the left strand on the central one, then the right one - in the same way. Then add a separated bun of hair at the temples to the left strand and put it on the central one, weave the right one without adding. In the next step, weave the left strand without adding, then to the right strand, adding a bunch at the right temporal part, put it on the central strand. Repeat this order until the end of the weave, secure with an elastic band.
Such a hairstyle can be braided not only with the classical method, but also according to the pattern of the braids to the contrary - then the pigtail in the middle will be convex and more voluminous, such weaving can also be applied on the tail.
Do not forget to use accessories as jewelry: a small brooch or pins with rhinestones will not be superfluous, most importantly, remember that you are not forty.


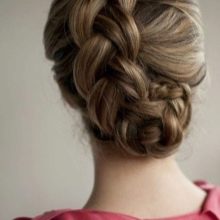
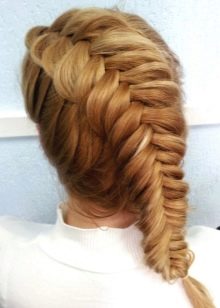
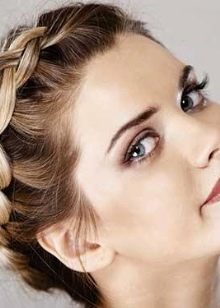
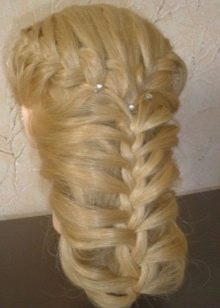
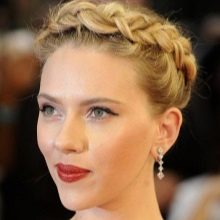
Braid "rim"
In turn, this type of braid is also gaining momentum in popularity. With this method, you can remove annoying or regrown bangs without much effort.
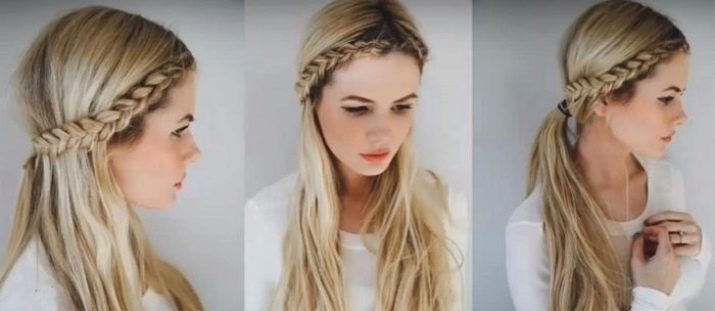
Weaving is very similar to the usual classic, the only difference is that we will add strands of hair only from the bottom. To do this, take a strand of hair from the bangs, divide it into three strands and begin to weave them in an already known way; then, to the bottom strand from the bottom, grab an additional bundle of hair from the bangs and put on top of the middle one, then weave the top strand without adding. You can finish braiding in the ear area and secure with an elastic band or invisibility.
You can continue weaving without adding strands - just weave a pigtail in the usual way, and make a tail from the remaining hair. Wrap the tail with a pigtail, securing it with invisibility, so you can hide the elastic.
Such weaving can be used both on one and on two sides, both for the entire length of the hair, and only for the bangs.


According to the same scheme, you can weave a slightly different headband with a slight difference: now you need to add strands of hair not from below, but from above. In turn, such weaving can be woven along the entire length, only on the bangs or to the middle of the head.

Weaving using elastic bands
Recently, braiding with elastic bands has become a common weaving. This is the fastest and easiest braiding option for both thick and thin hair. For weaving, we need elastic bands: usually they use silicone to match the hair color, to make it easier to hide them.
Consider a step-by-step instruction on a French braid inverted with elastic bands.
- Comb all your hair back.
- Take a small section of hair from the top and tie it with a rubber band.
- Separate a small tuft of hair from the ponytail and wrap it around it, tucking the end away and securing it with an invisibility pin.
- A little below the already tied ponytail, separate part of the hair and also tie it into a ponytail.
- Divide the upper tail into two equal parts and pass them under the second tail.
- For convenience, lift the second tail out of the way.
- Then pull off some of the hair from the head again and tie a third ponytail.
- Let go of the second tail, dividing it in half, and pass it under the third tail.
- Repeat with the third tail as with the second, moving it up.
- Repeat this until the end of the hair.When finished, secure with a rubber band, and then gently stretch the strands of hair to hide the elastic.
You can weave this way around your head on one side or on an oblique side - it all depends on your imagination.

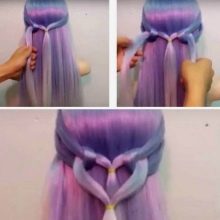
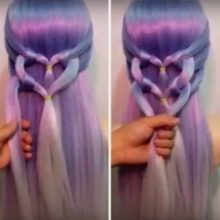
Braid "hearts" with elastic bands
There is a similar version of the French braid inverted - weaving with elastic bands in the form of hearts. Both types are similar in design, but with a slight difference.
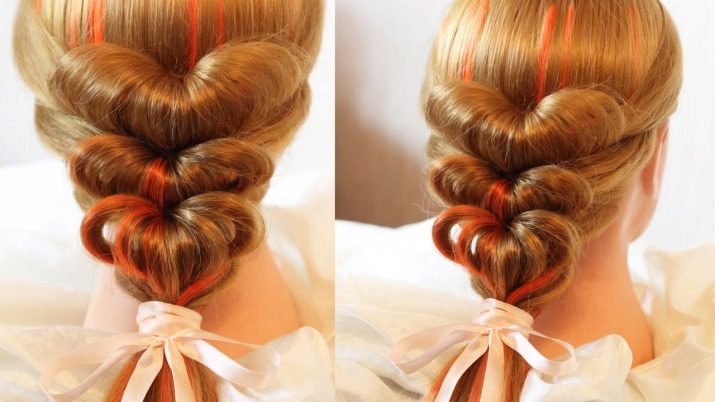
- Comb your hair back, then separate a small section and tie a ponytail.
- Divide the tied tail above the elastic in half and twist inward.
- Then, part the next section of hair on one side and the other, grabbing the hair from the first ponytail, and tie it with an elastic band.
- Again dividing part of the upper tail in half (a hole is formed), turn the entire tail into it.
- Continue this until the end. With the last ponytail twisted, use your fingers to pull the inner strands of hair into a heart shape.

For another interesting option for weaving braids with "hearts", see the next video.


