How to sew pants with your own hands and where to find a pattern?

Shopping, choosing a style and model that will fit and fit perfectly, unreasonably high prices in stores - these and many other problems are experienced by most girls. Some give up in search of exactly their model, others buy for a lot of money, and still others go and buy fabric to sew what is perfect.

What is a base pattern and where can I find it?
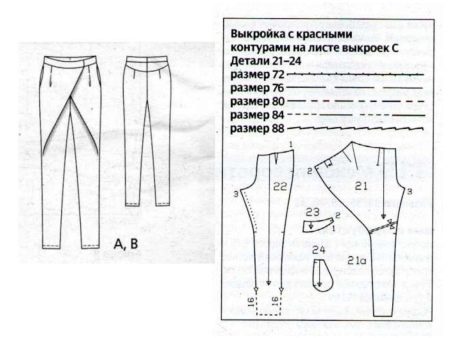
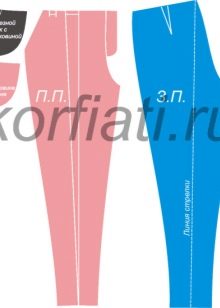
A sample is needed to sew the product. Such a layout is called a pattern.
Pattern - details of clothing, which are made on the basis of the drawing. It consists of several parts, the choice of which depends on what needs to be sewn. It is very convenient to use such a base for creating small details.
Several patterns are located on one sheet. You can find exactly your model along the specially marked lines.
The details that are indicated on the base may not always fit the figure perfectly, which is absolutely normal. In this case, the hostess herself adjusts the thing for herself. The main thing is to take the basis for what needs to be sewn.
Patterns can often be found in specialized magazines such as Burda, or on the Internet.
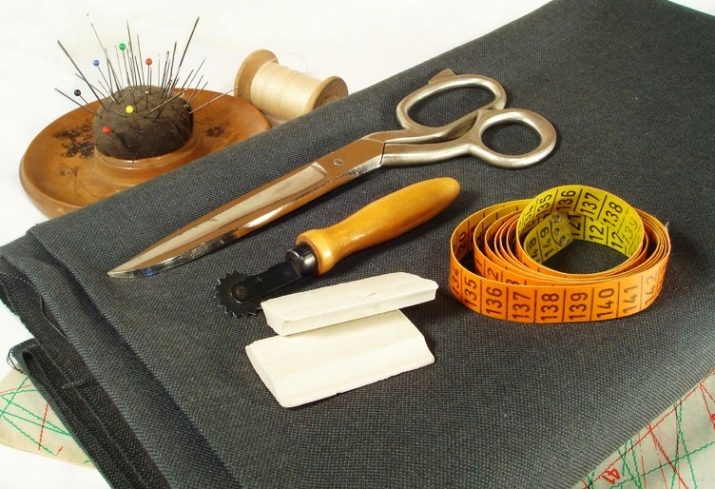
Required tools
To make the job easier, there are many craft items.
When creating trousers, use:
- paper for redrawing patterns;
- chalk or pencil;
- needles;
- threads of the desired color;
- tape centimeter;
- sewing machine;
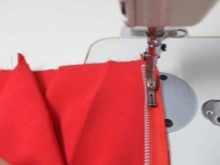
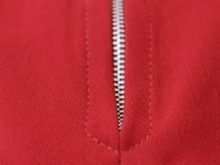
- bias tape or overlock to process the edges;
- other small details required for the design of the model: zipper, buttons, elastic band, etc.
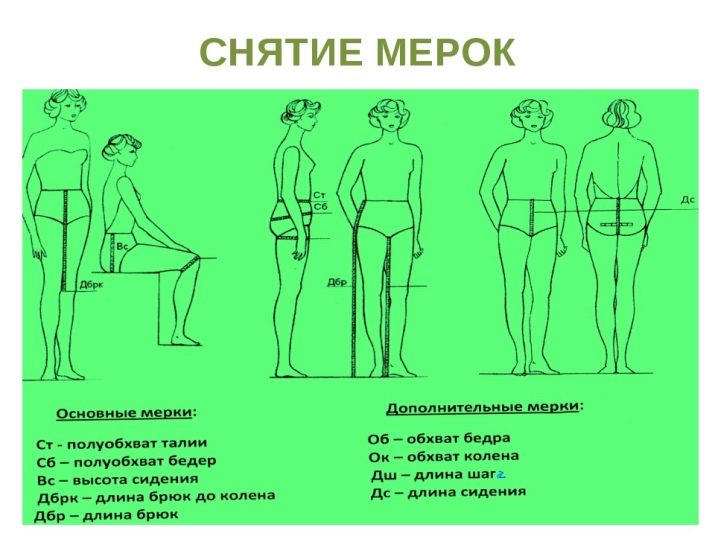
How to take measurements?
The first thing to start with is taking measurements.For measurements to be accurate, it is better to take them in underwear. The main tool at this stage will be a centimeter tape, with which you need to take measurements:
- waist circumference (at the waist in the narrowest part);
- hip girth (over a wide area);
- side length (interval along the side of the leg from the waist to the end of the leg);
- sitting height (measurements take place while sitting and look at the interval from the waist to the seat of the chair);
- knee height (along the side from the waist line to the middle of the kneecap);
- step length (with legs slightly apart, measured from the groin of the inner thigh to the floor).
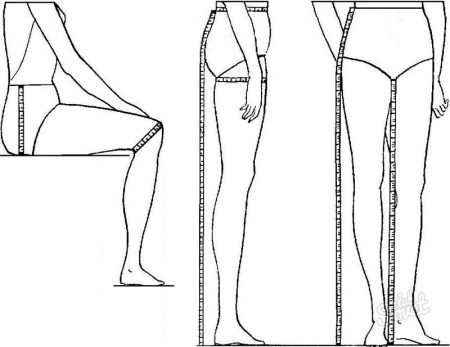
For information on how to take measurements correctly, see the next video.
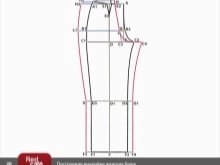
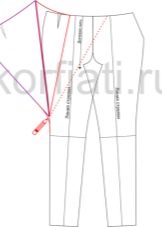
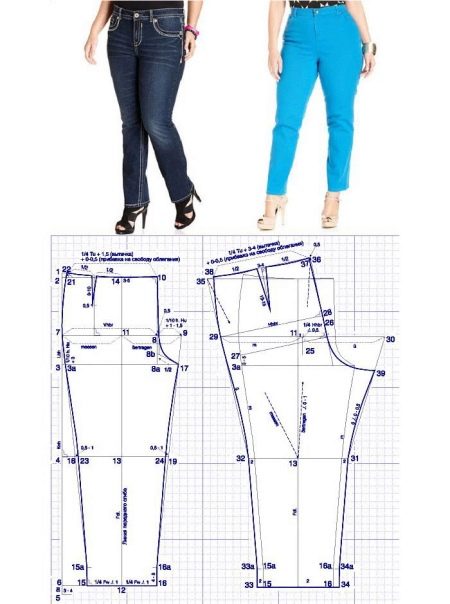
Drawing techniques
Italian
A step-by-step guide to sewing trousers is a great support for beginner seamstresses.
One of the most accessible is an instruction for drawing a basic pattern using Italian technology.
This technique is perfect for sewing trousers for women who have a strong back bend. This problem is solved by displacing the side seam to the center of the back area by 1 cm. Due to this, the model will sit in the waist and on the hips.
This technology deals with the production of straight trousers for women.
First you need to do - take measurements. In addition to the usual measurements, do:
- an increase in the waist;
- an increase in the hips. Their level depends on how the product will fit.
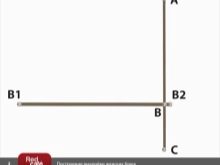
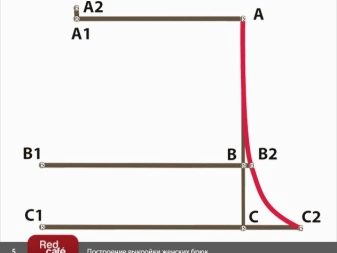
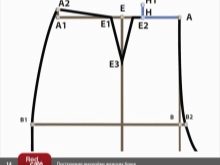
It is worth going from the front panel of the trousers:
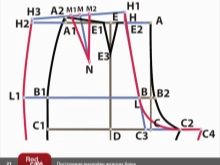
- At the top, in the right corner, mark A is fixed. From this point, two more marks are drawn one after another. From mark B to the left, a line is drawn equal to 1⁄4 (hip girth + PB) and mark B1 is made, and 0.5 from B is mark B2.
- To the left of C, a thread is drawn equal to BB1 - C1. And on the right 1/20 thigh circumference - C2.
- Now you need to connect A, B2 and C2. The middle seam will come out.
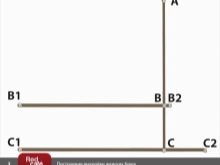
- From mark A, mark A1 is drawn and marked - 1/4 waist circumference + 3 centimeters. 1 centimeter is drawn from this mark and is designated A2.
- Next, A2, B1, C1 are connected.
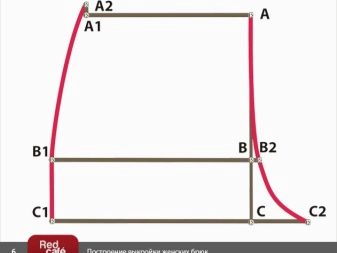
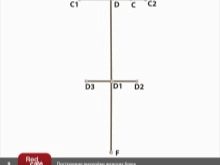
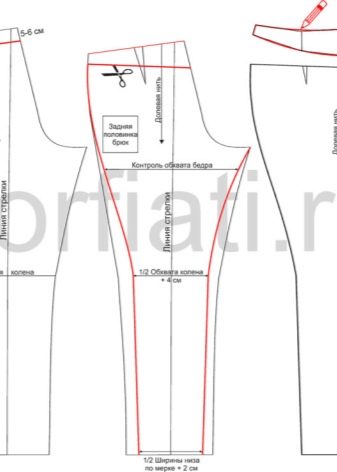
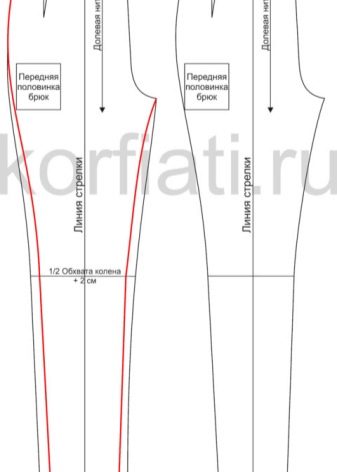
- In the middle of C1C2, mark D is placed. From it, a perpendicular to A1A is drawn to the upper section, and mark E. From this border, VC is calculated downward, a line is drawn and it is marked D1. The length of the leg is calculated from the marked mark. This will be the F.
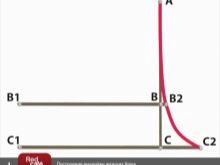
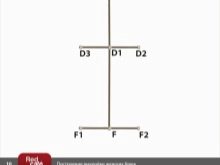
- In the right and left directions from D1, lines are drawn equal to 1/2 of the knee circumference. The right mark is D3, the left is D2.
- Points F1F2 are drawn to the sides of the F mark. They are equal to the distance of the D2D3 line.
- Now you need to connect the marks C2, D2, F2 - this is an internal seam. When C1, D3, F1 are connected, an external seam is formed. And the line D, D1, F made earlier will be the middle of these two seams.
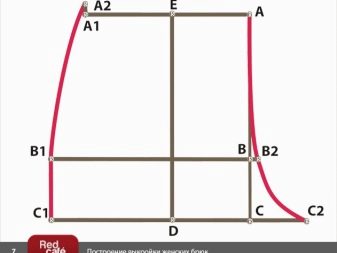
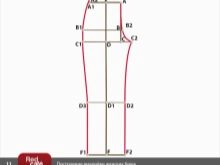
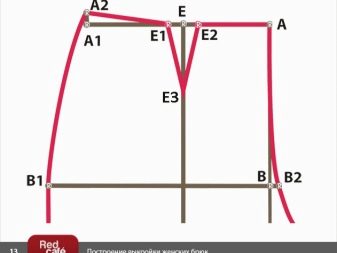
- To get a front dart, it is necessary to set aside 1 centimeter from mark E in both directions and mark these points E1, E2. From the main mark E, go down 10 centimeters and mark E3. Connect the constructed points.
- In order for the front to be ready, you need to draw lines from A2 to E1, from E1 to E3, from E3 to E2, from E2 to A.

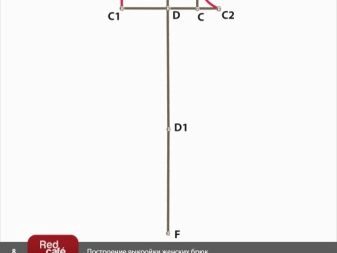
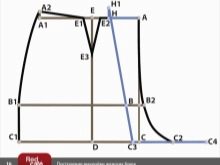
The back side is drawn from the front part drawing:
- In order not to confuse the lines, you should use chalk, pencil or marker of different colors.
- From line A on the left side, a segment of 1/2 AE + 2 centimeters is measured and marked with a mark H. From this mark, an indent of 2 centimeters is made and a line marked H1 is drawn.
- Now you need to measure 1/2 hip circumference and put C3 from point C to the left. Next, draw a straight line from this point to H1.
- From C3, make a line to the right, equal to 1/10 of the hips, and mark C4.
- Now you should return to line A. Make the Italian offset of the side seam: from H by 1/4 of the waist circumference - 1 centimeter + 2 centimeters and the H2 mark is made. From it, a perpendicular line is drawn up 1 cm and H3 is placed, connecting with H1.
- Next, draw the direction to L. It is obtained at the intersection of B1B2 and H1C3.
- In the left area from the L mark, a smooth guide 1/4 of the hip circumference is drawn to L1.
- To obtain an external seam, it is necessary to connect H3, L1. For the formation of the middle seam, you need to draw a segment from L to C4.
- Next, sections of the knee and bottom are made based on the back half.To do this, you need to set aside 1.5 cm from the marks D2, D3, F1, F2 in the direction of increase and designate them G, G1, F3, F4. For a purl and front seam, make a smooth line between L1, G, F3 and C4, G1, F4.
- When forming a groove on the back, refer to H1H3. In the middle, mark point M. From it, move 1 cm in both directions and parallel H1 L down to lay aside 14 cm.M1, M2, N are formed.
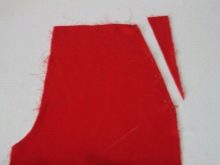
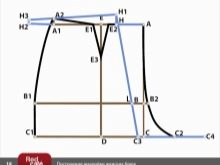
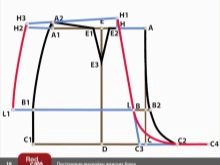
It is necessary to complete the pattern by checking the length on the inside and outside seams. If so, then you can start sewing directly.
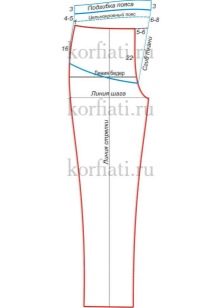
According to Müller
Among the simplest technologies, there is a Mueller construction scheme. This technique is a construction for beginners.
The pattern is based on the standard pants pattern.
- The main base of the drawing is a vertical line on which segments 1 and 2 are highlighted. The length of the segments depends on the shape of the hips. On average, you can measure 1.5 cm.
- BC is measured by boundaries 1 and 3. VC is marked with points 3, 4. The length from the side to the foot is indicated by marks 1-5.
- 5 and 6 will indicate a measurement that corrects the length, the choice of which is subordinate to the model and heel height.
- Marks 3-7 indicate the hip area. Next, build straight lines from marks 2, 7, 3, 4, 6 to the right.
- The width of the anterior leg portion is marked in points 7-8. SHSH of the front half, measured 1/10 of the half OB + 1 cm, is fixed at marks 8-9. To get marks 8a and 10 you need to draw a line through mark 8.
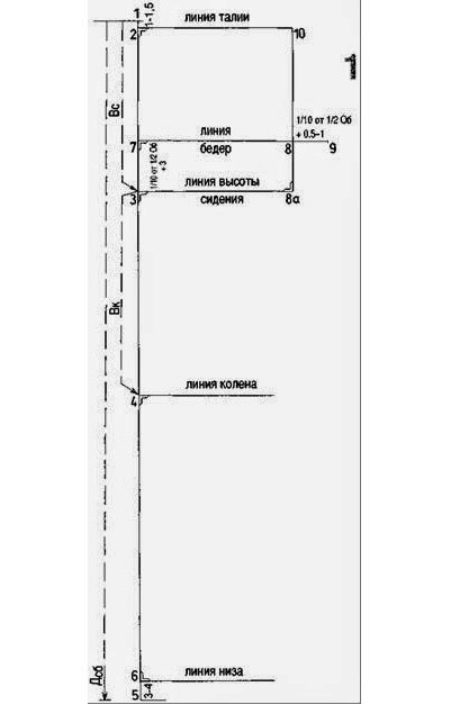
- On line 7-9, you need to find the middle and place the mark 11. Next, you need to mark the segment 6-12. It will be 7-11.
- To get the middle of the front half, form from the waist mark through marks 13 and 14 at the intersection with the knee and waist marks.
- From 15-16, make a straight line equal to 4-8 centimeters and mark points 15a and 16a. To align the corners at marks 15a and 16a, it is necessary to combine 7 and 15a, 9 and 16a. After that, marks 17, 18, 19 are obtained.
- Row 10-20, which determines the deviation of the cut paths of the bow of the anterior region of the legs, is equal to 1 cm.
- From mark 8, make a mark in the right direction, 0.5 centimeters long. Draw a straight line through this mark and border 20. 8a and 8b are equal to half of the segment 8a-17. Next, draw an additional segment 8b-17.
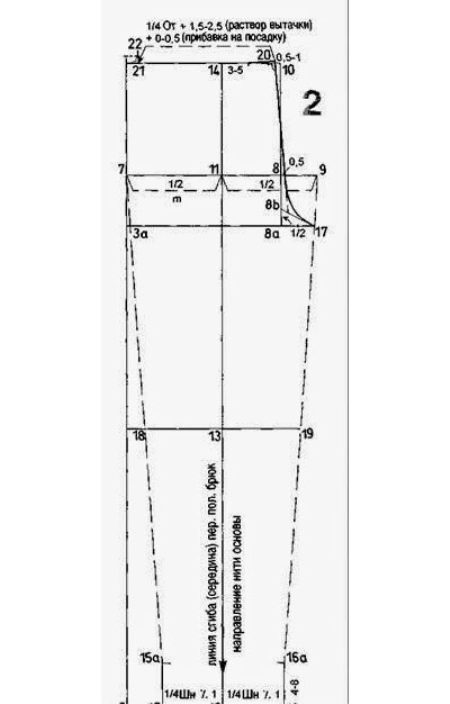
Now you need to make the front cut line:
- From it, make a short segment to the waist mark. The distance between the intersection of the straight line and the waist mark corresponds to 3-5 cm on the right side of the main vertical line. To achieve the desired shape at the knee border, it is worth varying the distance between marks 18 and 23 and marks 19 and 24 from 0 to 1 cm.
- The side cut line is formed by a curve using the connection 22, 7, 3a, 23, 15a, 15.
- A step cut line is made by connecting points 17, 24, 16a, 16.
- The segment 14-22 should be divided into two parts, for this you need to draw a straight line to the hip mark.
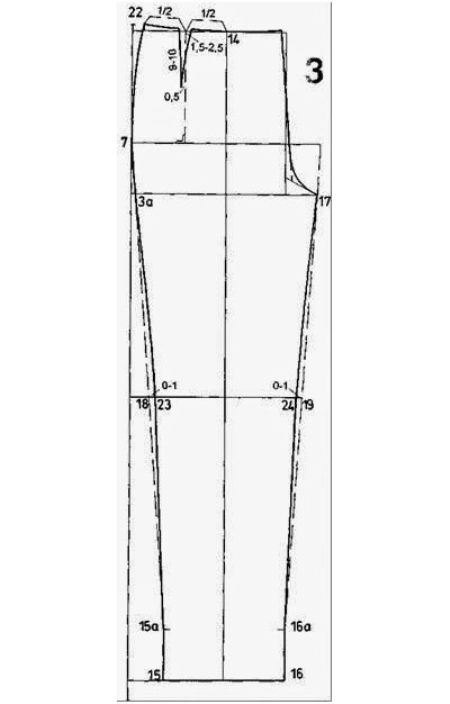
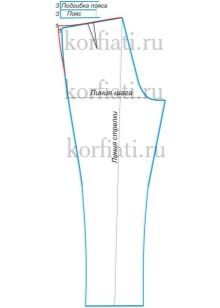
The back half of the leg is built on the basis of the front:
- From mark 11, point 25 should be made, for this you need to move to the right by 1-2 cm. Then make a straight line from 25. The distance from this point to the future mark will be 1/4 of the width of the rear. This point will be called 26. The mid-cut line of the back is determined by the interval between marks 3a and 27. This segment is 3-5 cm.
- Next, combine 26 and 27. From 26 make lines in the upper and lower directions.
- The waistline and hips need to be increased. At the waist, make a path to the left. At the hips to the right and to the left.
- Move segment 26-27 up until it touches the straight hips and mark the mark 28-29 there.
- Next, draw 2 straight lines from the bottom to the knee on both sides of the fold at a distance of 2 cm from each other. This is how points 31, 32, 33, 33a, 34, 34a are formed.
- For the formation of mark 35, it is necessary to draw a line from mark 32 through 29 to contact with the waist.
- Combine mark 31 with 30. Depending on the gluteal shapes, make the interval between marks 13 and 36 equal to 13-35 minus 0-1 cm. Merge 35-36 together.
- From mark 36 make a segment with a distance of 0.5-1 cm in the left direction to 36-35. Thus, the mark 37 is obtained. At this stage, you can proceed to the design of the upper border of the middle cut of the trousers. To do this, you need to combine 37 38. The distance between these marks will be equal to 1/4 of the waist circumference + 3-4 cm + 0.5 cm.
- Next, draw a straight line from 38 to the top. Here, draw out the border of the side cut of the rear. This length is equal to the length of the front area of the trousers.
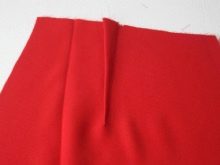
- It is necessary to issue a dart. It needs to be marked in the back section perpendicular to line 36-35. The length should be 13-15 centimeters.
- At this stage, it is necessary to form the stepping and waist threads. The lengths of the step cut of the back and front must be equal. You should proceed with the design of the middle cut.
In this case, a step is considered a comparison of the two parts, adjusting the border of the waist and darts.

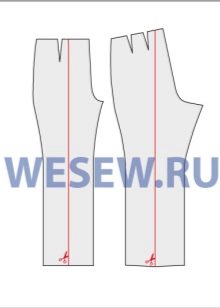
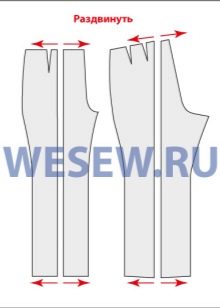
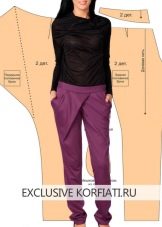
How to enlarge the pattern to the desired size, how to reduce it?
Ready-made patterns are always made in accordance with the standard shape. But do not be upset, because you can increase or decrease to a specific size.
You should carefully examine the back and front legs and cut along a vertical line in the middle and push apart by 0.5-1 cm for enlargement. To reduce, move the parts by 0.5-1 cm.

To increase the length in the pattern, you need to add 2-3 centimeters from the bottom. How to do this, see the video.
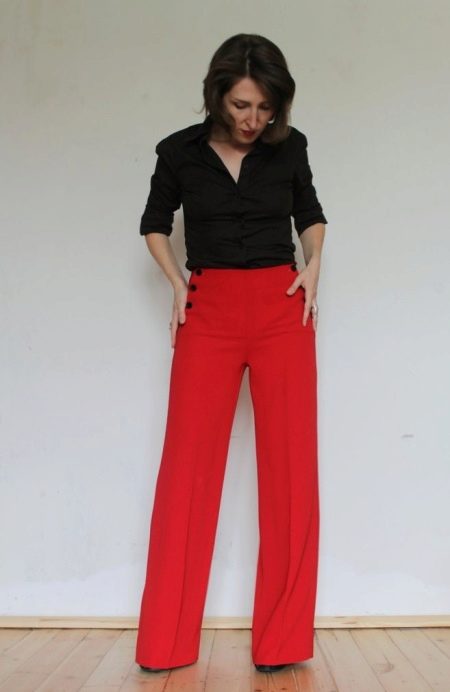
Perfect fit of trousers: rules for adjusting
Ideal trousers are their perfect fit, capable of hiding figure flaws and correcting them somewhere. But hand-sewn trousers aren't always perfect. To do this, refer to the adjustment rules.
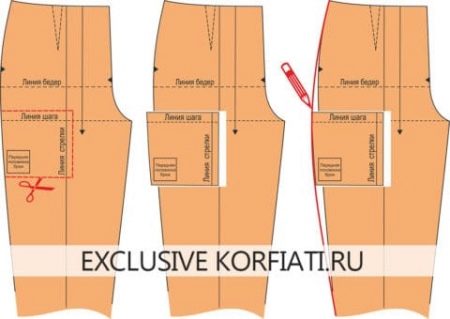
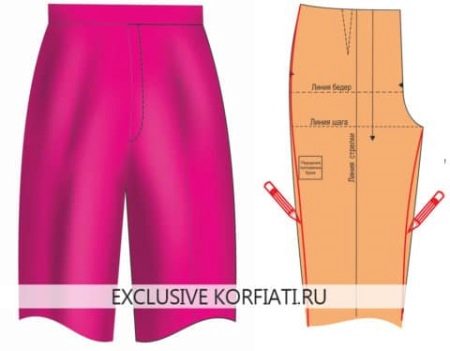
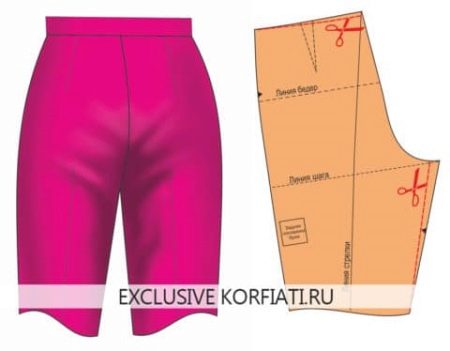
Usually problems arise with the area of the thighs. For example, if the girl has full hips, then it contributes to the formation of wrinkles. To get rid of the creases, you can do a little work on the pattern. In front of the trousers, you need to make two segments 10-15 centimeters above the step border by 2-3 cm and 10 cm below. Next, compare the result. Cut according to the marks. Place the resulting part in the left area by 1-3 centimeters and mark this border of the side. The same must be done with the back section.
With thin legs an image of baggy is created. This will be avoided by removing excess volume. It is necessary to measure OH from above and compare the resulting figure with the value on the pattern. Next, calculate the difference between the two numbers, and postpone 1/4 of the calculated value along the side and step areas of the rear and front and thereby shorten the width of the leg in the upper leg girth area.
With insufficient volume of the buttocks a large accumulation of material is formed. To correct it, it is necessary to reduce the waistline by the required amount and decrease the LH at the back area.
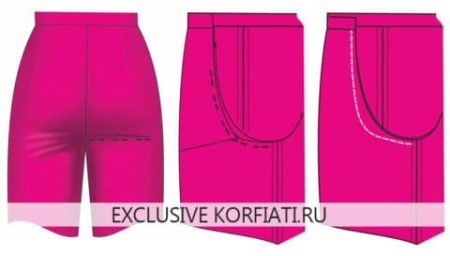
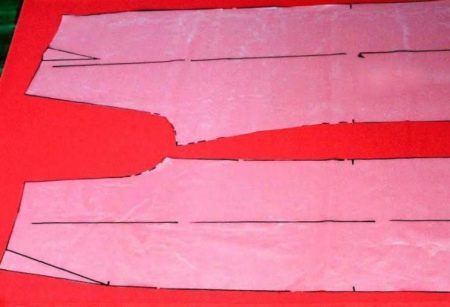
To get rid of the folds under the buttocks, you need to work with ready-made trousers:
- On the finished product, you need to stab the excess fabric into one fold on one of the legs from the side seam to the middle one. This fold must be removed.
- Next, open the middle seam in the area from the step line to the waist.
- Next, connect the two legs with the outer parts.
- When comparing, the excess on a split leg should be pushed up along the middle seam.
- The new border should be moved to the other half of the leg at the bottom.
- Next, grind the middle seam along the new line, and cut off the excess in the allowance. And remove the excess in length in the belt area.
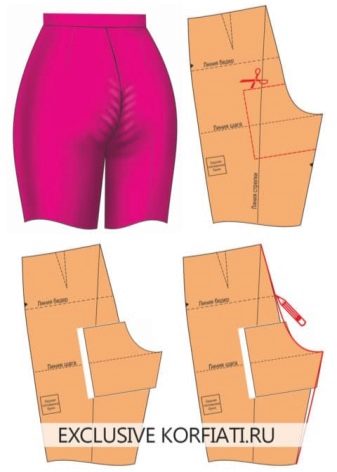
In the opposite situation - protruding gluteal zone, folds and creases are formed in its lower part. To correct this problem, measure 11 cm from the step line to the upper and lower sides on the back of the pants and draw 2 parallel 12-15 centimeters. Then combine their ends. Cut the pattern according to the resulting features. Shift the cropped to the right by literally 1-3 cm and create sections for the middle seam of the back and the step.
Modeling Basics
Low waist
Modeling makes it possible to create the perfect pants, taking into account all the special figures. All models are formed on the basis of the standard trouser pattern.
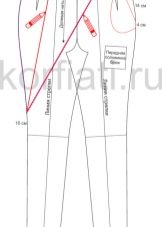
- Before you start modeling the version with a low waist, you need to move 2 cm away from the waist on both sides. After that, it is necessary to make a new lowered border and cut off along it.
- When creating the front part of a narrowed model, first you need to narrow the trousers down to about 14 cm. Focusing on your height, shorten it to the desired measure. Next, you need to determine the area of \ u200b \ u200bthe entrance to the pocket. To do this, measure 4 cm to the right at the waist and 14 cm downward. The resulting undercut must be transferred to the fold. For a zipper, an increase of 3-4 cm in width and 14 cm in length is needed.
- To obtain additional volume in the thighs and the second fold, cut the pattern along the line of the arrow and move it 4 cm apart.
- To create the rear of the trousers, you need to narrow it by 15 cm and reduce it. The back leg reaches 1–2 cm in width.


With smell
The creation of the trousers requires the shaping of the back lobe:
- Therefore, you should measure 5 cm down from the waist and make an understated segment.
- Draw the yoke from the already updated waist contour. Its parts should be cut off, cut along the grooves and glued together. Its top and bottom should be rounded.
- Tightening the legs at the bottom and at the knee also depends on personal desires.
- When modeling the front part, the waistline should be reduced by 5-6 cm. Then, narrow it at the knee and at the bottom. Draw the lines of two seams: side and step. Then translate in front of the tracing paper two times. Fold the two halves along the middle line of the front.
- To continue modeling, set aside 5 cm from the lateral line to the left, and 14 cm down.
- To create a smell, you need to break the front along the waist in half. From the knee area, retreat 10 cm up and combine the created marks with a line. From the resulting, create a strip of smell.
- All details of red and lilac color must be re-captured on tracing paper. Flip the red triangle along the left area. The lilac detail must be combined with a red triangle. Along the side line and waist, round all straight lines and corners.
- Additionally, arrange two parts of the belt 5 cm in width and in length, respectively, the length of the upper part of the trousers.

For pregnant
For the production of pants for pregnant women in front of the lateral border from the waist you need:
- Move 16 cm down and 1 cm to the left.
- Upward you need to postpone a segment of 4-5 cm.
- Along the middle line of the front, you need to measure down 22 cm and to the right side continue the waist by 5 cm. Connect all marks straight, and then bend them along the pattern.
- From marks 5 and 6, you need to move up about 6-8 cm. Here, make a new waist with a belt.
- On the hem of the belt, add 3 cm upwards.
- You should also prepare a stitched belt for the back of your pants. Its width corresponds to 6 cm and a length of 3 cm.

For full
The production of trousers for overweight begins with a front pattern:
- On the vertical segment, postpone the height of the seat (points 1-2), VK (1-3), DB (3-4), create the desired length (1-5), half-girth of the hips + 3 cm (5-6) and the line of the hips ( 3-7), the width of the front half (7-8), half-girth of the hips + 1.5 cm (8-9).
- At marks 2, 3, 4, 7, make a segment. Make a perpendicular to the area of the thighs from mark 8. In contact with BC and waist, mark 8a and 10.
- From mark 12, make a straight line through 11. When crossing the knee and waist marks, 13 and 14 are placed.
- Measure from 12 to the upper area 4-8 cm and mark 15a and 16a. Combine marks 7 and 15a, 9 and 16a. Against this background, do 3a, 17, 18, 19.
- Measure 0.5 cm from 8 in the right direction. Measure half of segment 8a-17 from 8a upwards and thus 8b will be obtained. Combine the resulting mark with 17.
- The mark 21 is formed from 10 by depositing 1/4 OT + an increase in dart and free fit. If you move 1.5 cm straight to the waist in the upper edge, then 22 is formed.
- In the knee line from the ends, measure 1 cm to the inner side - marks 23, 24. mark the sections of the side and step cut.
- The undercut should be built at a depth of 10 cm and a mortar of 1.5 cm. Finally, finish creating the waist.
When converting the back side, you need to copy the front half and add corrections:
- Measure the area of the back fold from mark 11 by 1-2 cm. From 25, make the width of the rear half - 0.5 cm. Mark 27 is formed by depositing 3-5 cm from point 3a. Close marks 26 and 27.
- The hip and waist line should be increased. Make the width of the back leg from 28 to contact with the thighs.
- 31, 32, 33, 33a, 34, 34a are made by drawing lines of side and step cuts two cm from the cuts of the front.
- The path from 32 through 29 to the waist creates a mark 35. Connect 35 with 36 and set aside 1 cm to the left.This is how 37. From this point measure 1/4 of the waist circumference + 3-4 cm darts + 0.5 cm of the increase for free fit ...Point 38 is marked here.
- It is necessary to move the side cut lines of the front side to a part of the side cut of the rear half.
- The undercut is built with a length of 13-15 cm. At the end, you need to complete the waist area with the middle cut of the back section of the trousers.
How to sew with your own hands?
Many girls with apprehension take up sewing trousers, considering this product difficult. One thing that is difficult is possible. You need to start with measurements. To make your pants fit perfectly, you need to take your measurements correctly. Measurements must be taken from a naked body. Press the measuring tape tightly to the body.
By your own standards, you can start building a pattern. When creating a pattern, you use your own measurements and values that were obtained using calculations according to your own standards.
After the base of the pattern is ready, you can start modeling. To do this, you need to choose a model of pants or trousers and, using ready-made samples presented in magazines and the Internet, create your own style.
Then you need to choose a fabric. All materials with elastane are suitable for trousers. You can also use wool, satin and linen.
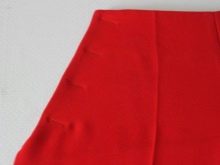
It is advised to iron the fabric before sewing.
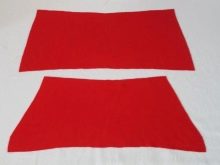
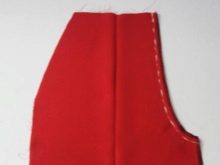
It remains to cut out the details and sew.