How to charge a hoverboard?
A hoverboard is a very useful form of personal electric transport. Before buying it, you need to study the rules for driving, assembling, cleaning and washing the device. It is also imperative to take into account the manufacturer's requirements for charging the battery.
Fundamental rules
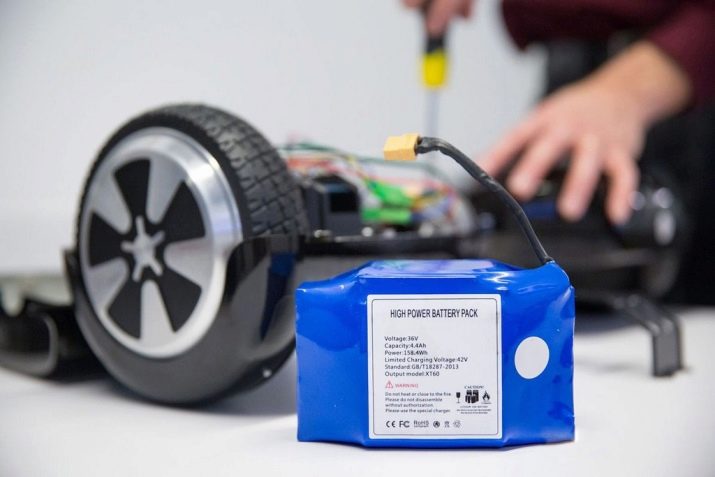
100% of modern hoverboards are equipped with lithium-ion batteries. Therefore, there is no need to fear the memory effect. You can safely charge the device as needed. The key rule of handling is the inadmissibility of a complete discharge of the battery. However, it is impossible to predict exactly when this moment will come.
Depletion of charge is determined by:
- the quality of the road surface;
- weather conditions;
- the initial capacity of the battery and a number of other circumstances.

How long does it take to charge?
It is important to understand how long the hoverboard should charge. There are two main aspects here: that the charge is replenished efficiently, and that it is not overloaded. Some modern lithium-ion batteries charge in about 90-120 minutes. It is necessary to immediately trace how long this process lasts, exactly how many minutes it takes.
The required number of charging hours is prescribed in the technical conditions and in the instructions.
If it takes a very long time to fill the battery, it is very likely that the battery is damaged or has reached the end of its life. In both cases, it will have to be replaced. Even a very large and fast hoverboard takes 3-4.5 hours to charge. If this figure is exceeded (for example, keeping the device connected to the network overnight), the consequences can be unpredictable.At the same time, the battery wears out and may become unusable altogether; some models have an even shorter total charging time.
How to charge correctly?
First time
Actions when charging a new hoverboard are prescribed in the instructions and accompanying documents. But the general requirements remain the same regardless of the specific model. As with other similar devices, battery calibration is required in hoverboards. The weather conditions are taken into account. When the scooter is brought into a warm room from the street in late autumn or winter, it will inevitably be covered with a layer of condensable liquid.
Both during the first experience and later you cannot charge the hoverboard until it is completely dry. Do not hope that a simple wiping of its surface will solve the problem. Any drop of water that gets inside the device is dangerous to the battery. Therefore, no matter how the owner is in a hurry to test his device as soon as possible, he will definitely have to wait at least 1.5-2 hours. Calibration is carried out as follows:
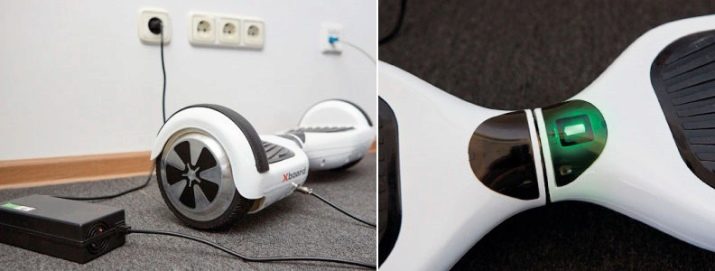
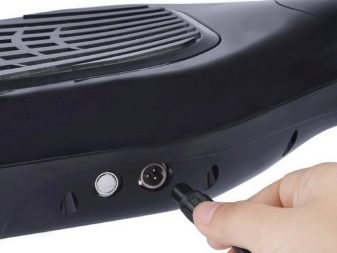
- connect the gyro scooter turned off by the button to the home network of 220 V;
- the battery is expected to be filled with current to the limit;
- they are also discharged to the limit (it is advisable to ride indoors, so as not to wait again for the end of acclimatization);
- charge the device to the limit (thereby achieving optimal battery capacity and at the same time significantly extending its service life).
Subsequent times
From the very beginning, it should be borne in mind that in everyday skiing, unlike calibration, a deep depletion of the charge is unacceptable. It is imperative to watch so that it does not fall below 10% of the limit level... Even if this happens, you should immediately put the gyro board to charge. Yes, the battery life will still drain a little, but at least quick and clear help will allow her to ride this battery for some more time.
It is especially important to keep an eye on the charge level in cold weather. The colder the air (especially against a background of high humidity or strong wind), the more tense the battery works.... But the need to connect a discharged gyro scooter to the network as soon as possible does not mean that this can be done thoughtlessly. Even the most cautious riders often encounter a blockage of the scooter's network socket. Before connecting your personal transport to the network, all dust, dirt, and especially liquid water or pieces of ice (snow) must be removed from there.

Recommendation: it is worth purchasing or making your own rubber plug so that this problem is solved initially.
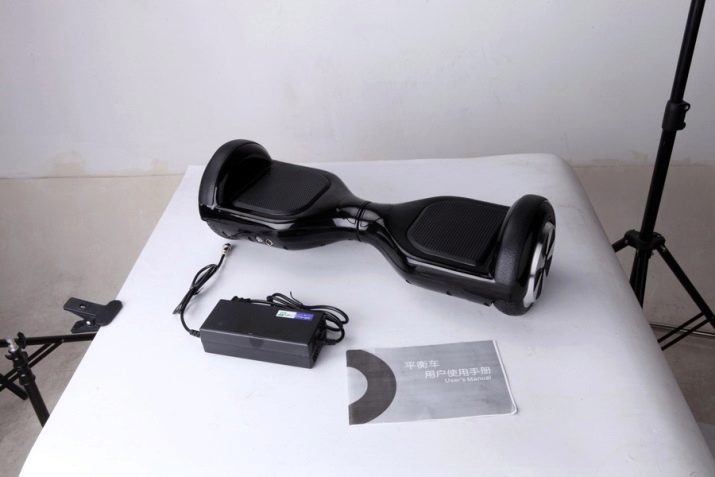
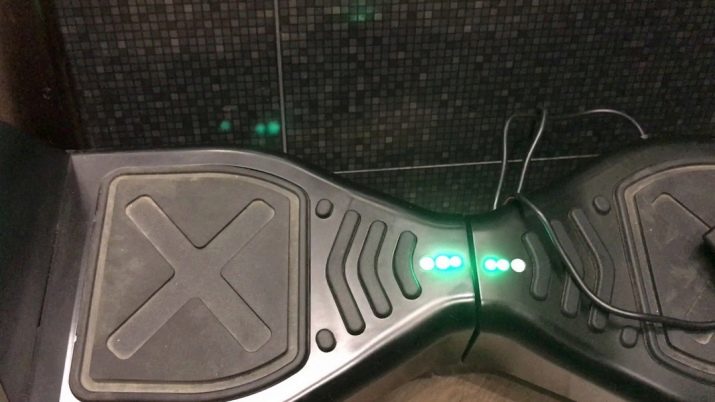
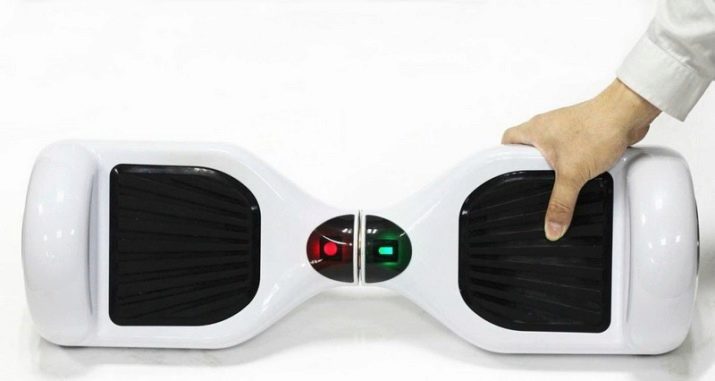
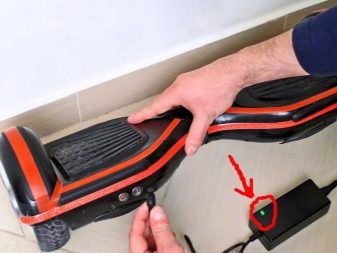
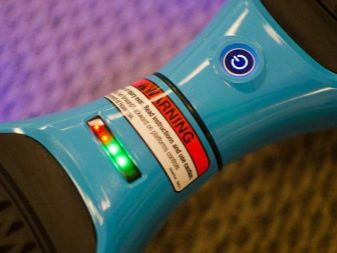
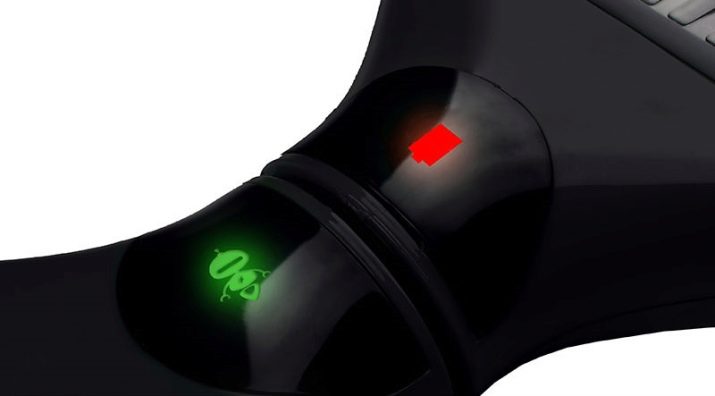
When the charger is plugged into an outlet, the power supply starts to glow with a green light. Next, the plug is inserted into the connector on the hoverboard. The light turns red instead of green - this just marks the beginning of the charging process. When the battery is full of current, proceed in the reverse order. First, remove the charger from the socket, and only then disconnect it from the vehicle.
You should, of course, double-check whether the battery is actually charged. This will avoid many unpleasant surprises in the future. But overexposure in the connected state is also unacceptable: you will have to look at the indicator at least once every 5-10 minutes. When the charge is full, the indicator turns green.
Of course, charging should take place at normal room temperature and minimum humidity.
Often they are interested in whether it is possible to charge the hoverboard while it is on. There shouldn't be any problems from such an attempt. But, if at this moment a power surge occurs, the electronic components are likely to fail. In theory, the use of voltage stabilizers and uninterruptible power supplies could be the solution. But you shouldn't risk it anyway.
The problem may be something else: when the hoverboard is turned on, it will spend a little charge.Therefore, it will be much calmer if the device is turned off and fully charged. This will save additional time. But it is better to refuse to buy all kinds of gadgets, the suppliers of which promise the ability to quickly charge the hoverboard.
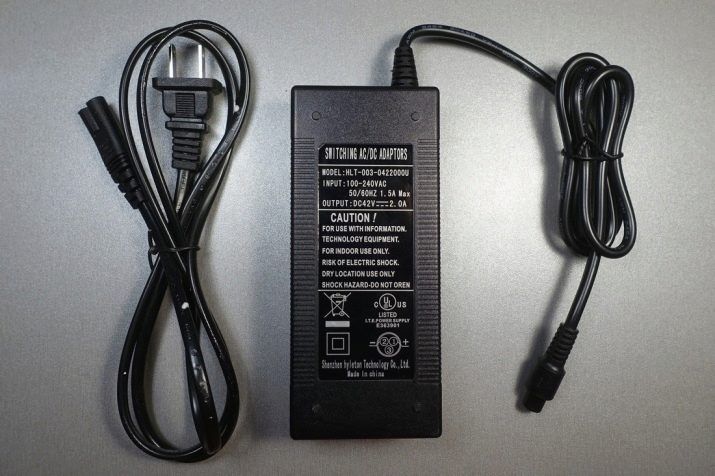
It will be completely safe only to use branded chargers designed for a specific model.
The battery cannot be charged:
- from which an incomprehensible smell emanates;
- the body of which is swollen;
- which is at least slightly melted;
- which began to discharge very quickly.

Before charging the hoverboard, it is imperative to check that the power supply parameters comply with the manufacturer's requirements. Any manipulations of this kind not only harm the safety of the device. They threaten to receive electric shocks, fires and even explosions. And even if this does not happen, the battery can be instantly destroyed. There is no need to talk about the deprivation of the guarantee - this is obvious.
It should be borne in mind, however, that it is not always possible to completely avoid problems. And during the daily operation of the gyro scooter, situations arise when you have to charge it when it is deeply discharged. The reasons for this are very diverse - being very busy, tired, inattentive or careless. But the consequences are the same - sometimes the battery stops charging and the indicator on the charger does not light up.

In such cases, it is advised to keep the charging plugged in for about 2 hours. If the process does not start after this, it can be assumed that either the battery is out of order, or the charger is damaged. In these cases, you must contact the service center. In the first 14 days after purchase, you can demand a replacement or monetary compensation. But after the end of the warranty period, you can do the following:
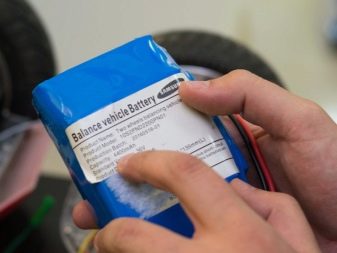
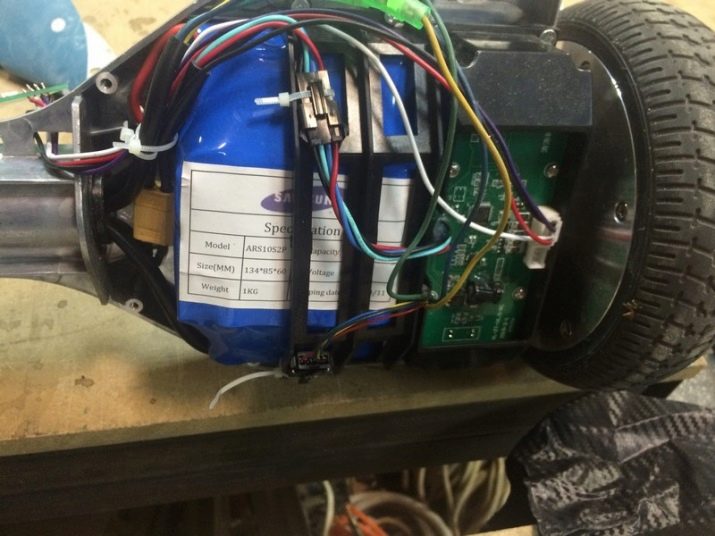
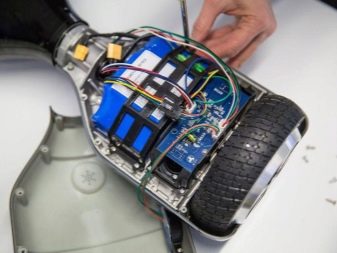
- open the case;
- remove the BMS plug from the connector;
- short-circuit the black and red wires there;
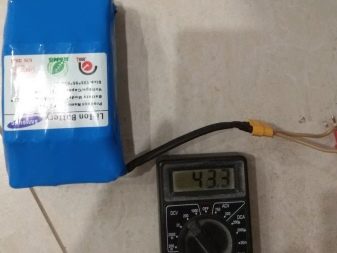
- ring the battery blocks with the tester;
- if the value is less than 3.2, the battery is recharged to 4;
- return the BMS plug to its place;
- put the battery back on charge.


If this does not help, you will either have to contact a professional to restore the battery or buy a new battery. Sometimes, however, they make a new battery themselves. The case and BMS are taken from the old device. Do not charge the hoverboard if water, snow or ice gets inside.
It is unacceptable to hold the device near an open flame, strong heat sources or heating devices while charging.
When a standard charger fails, it is necessary to change it only to a full branded analogue. All kinds of "similarities", regardless of the price, cannot be categorically used. It is also necessary to remember about the battery life. The nominal number of charging and discharging cycles is 500-600 for the entire period of operation. But when recharging is performed every time the charge drops by 10-12% of the maximum, you can double this amount.
It should be understood that the recommended number of cycles is only a guideline. Usually, the battery can be used even longer. However, this will inevitably reduce the travel time with a full charge, and the charge itself will be replenished more slowly. Therefore, it is inappropriate to exceed the recommended number of charge-discharge cycles by more than 3 times, even with the most careful handling. And each deep discharge only reduces this indicator.
How do I know when my battery is fully charged?
The information already presented shows how important it is to understand that the battery of the hoverboard is fully charged. Almost all models produced now have a special indicator. Some modifications are designed for the use of special mobile applications. True, so far only Jack Scooter, Wmotion, Smart Balance. Having a hoverboard of one of these brands, you can quickly monitor battery charging via your smartphone.

Special programs are equally compatible with Android and iOs platforms... But even if it is impossible for some reason to use this software, there is a way out. Any, the simplest phone, now has a timer option. You can also monitor the charging time (according to the instructions):
- using timers of computers and laptops;
- when using chargers with the corresponding function;
- when using an alarm clock or a special signal in a wristwatch.

For information on how to properly charge the hoverboard, see the next video.


