Making paper pom poms
Paper pom poms are increasingly being used at parties, weddings and many other celebrations. To create beautiful decorative items, you do not need to spend a lot of time and effort - it is enough to acquire a certain amount of basic tools and carefully follow the given guide.
Peculiarities
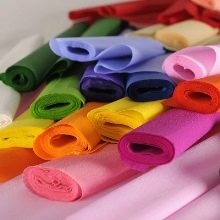
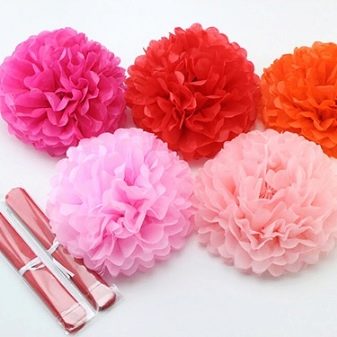
Paper pom poms are unique decorative items that can be used to create a cozy, festive and spectacular atmosphere. Unlike many other solutions, such products can be made at home. The hallmarks of paper pom poms are simple assembly and lack of any specialized skills. These balloons can be used in a variety of situations: from weddings and birthdays to themed parties and creating beautiful backgrounds for photos.
Contrary to popular belief, paper pom poms are quite durable and can be reused. The main thing is to follow certain guidelines and step-by-step instructions for creating them.
How to do it yourself?
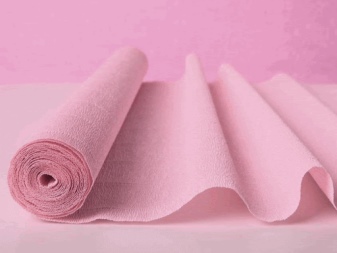
The first thing to do before using these or those guides for creating beautiful paper pom poms is to decide on the material. Such products can be quickly and efficiently assembled from napkins, corrugated paper and silence. In some cases, it is possible to use craft material, the distinctive advantage of which is its high strength.
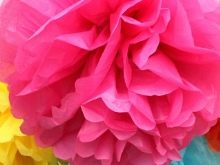
Also, many needlewomen make pompons from colored crepe paper, which is much thinner than corrugated paper, but at the same time has a more delicate and crinkled structure. As for the silence, it is characterized by the most smooth and silky surface, which slightly gives off a gloss. The distinctive advantages of this material are also lightness and thinness.
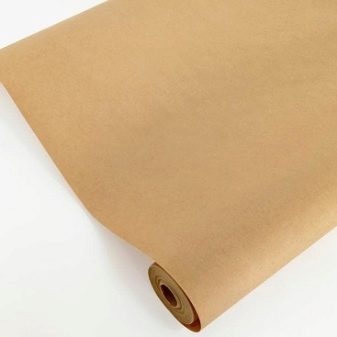
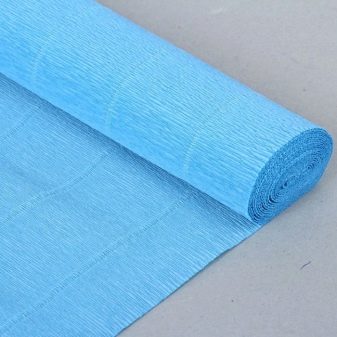
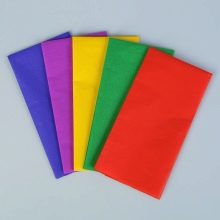
In order for a paper product to effectively hold its shape and be characterized by a knocked-down structure, it should be made of corrugated or creped material. This decor is distinguished by smooth edges, straightened on the sides. Pompons from the listed types of paper turn out to be quite heavy, therefore, a hinged or fixing structure should be carefully considered. An equally popular production material is tissue paper, which is also called wrapping paper or tissue paper. In addition to a delicate decorative structure and low weight, such raw materials are distinguished by a wide variety of color shades.
Usually sold in rolls. To create a high-quality and effective paper pompom, it is important to follow the step-by-step instructions below. In addition to basic actions, the user should know how to properly fluff up and straighten the paper ball. This will better reveal the visual characteristics of the finished product and increase its strength. Before you start making decorative balls, you should purchase silence, corrugated and crepe paper.
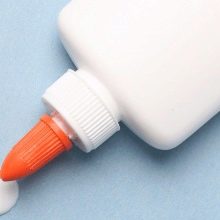
It is also necessary to prepare any scissors with pointed ends, PVA glue and thin fishing line or wire to connect the resulting balls into a composition.
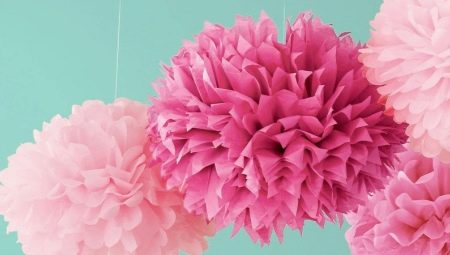
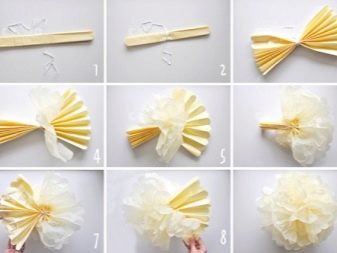
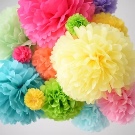
Big pom poms
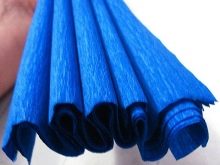
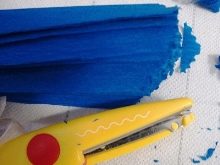
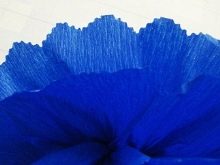
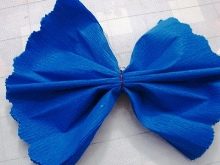
In the process of making bulky pom-poms, you should be careful to ensure that the edges of the paper are trimmed smoothly and neatly. Experts recommend doing these steps using specialized templates that allow you to trim unnecessary edges, giving them a pointed or rounded shape. The first thing to do to create large pom poms is to cut a sheet of corrugated paper into small 30x40 or 50x60 cm pieces. One paper sphere will need 8 such blanks. Further, each sheet is neatly folded according to the principle of a fan, where the width of the bend is no more than 2 cm.As a result, 8 separate accordions should be obtained.
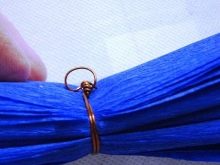
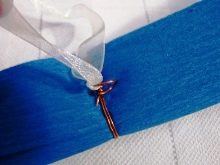
The next step is to carefully align the edges of the blanks. To do this, all products are folded in half and connected to each other using ordinary metal wire. Fixation occurs exclusively in the place of the fold, otherwise the pompom will be distinguished by irregularities and lack of splendor. Through the resulting bend in the accordion, a braid, fishing line or thin thread is pulled, from which a strong loop is formed. For this element, the paper product will be suspended, attached to the wall or combined with other similar balls into one overall composition.

Next, the edges of the paper should be carefully trimmed using a triangle or a specialized semicircle. In the latter case, the paper ball will be distinguished by slightly rounded petals, while there are no sharp tips. This option is perfect for decorating rooms: for a wedding or a girl's birthday.
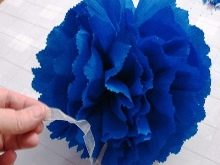
The final step is to gently and thoroughly fluff all layers of the corrugated paper. At this stage, it is especially important to raise each fan from the central part, which makes it possible to form the most voluminous and dimensional ball.
If the petals go down rather quickly and do not want to stand straight, they can be fixed with PVA glue, which is applied to several petals.
Distribute the adhesive with caution - too much glue negatively affects the airiness and lightness of the paper ball. You should also pay attention to the absence of stains from PVA on the tips of the fan petals.
If it is necessary to achieve an even larger size, the pom-poms can be effectively connected together. Although common glue is often used for this, experts strongly recommend using metal wire or invisible fishing line, which is attached to the base of each ball. For large and lush pom-poms, only corrugated paper should be chosen. If used in silence, paper products will often crumble or lose their volumetric appearance.

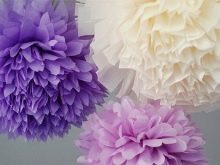
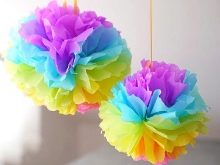
Small pom poms
Distinctive features of small pom-poms are versatility and good decorative characteristics. Such products can be used to decorate small gift wraps, cutlery, as well as make large and lush compositions from them.
It is recommended to create small paper pom-poms from silence - a light and delicate material that has high "fluffy" characteristics. To make such products, you should use a step-by-step assembly workshop.
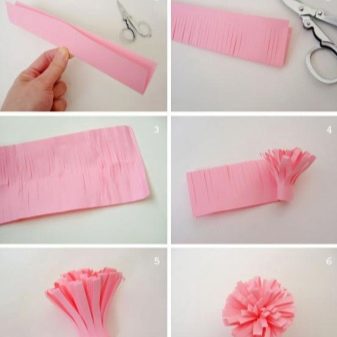
The first thing to do is to prepare the tools and materials. For small pom-poms, take from 8 to 10 sheets of tissue, scissors, thin wire or strong thread, as well as a satin ribbon for decorating and hanging the finished ball. Next, you need to do the following.
- Fold all sheets in an even pile. For a larger volume, add another 3-5 sheets. It should be borne in mind that the more material is taken, the more difficult the main work will be.
- Gently curl the paper, cut it in half along the marked edge. If the cut is sloppy or has certain cracks, the pompom will often crumble.
- Wrap the resulting material in small steps. In this case, the user should form a kind of fan. For a product to be highly resistant and durable, leave 2 to 4 cm of empty space to the end of the paper.
- Fold the paper material in half again. Tie the resulting fan with an invisible thread or wire. In the same place, you should add a colorful tape to which the paper product will cling in the future.
- Arrange the edges of the fan carefully. Depending on your wishes and imagination, this can be done using a rounded, pointed or trapezoidal shape. The latest trend of the season is triangular, sharp edges.
After the above actions have been performed, it is necessary to carefully and gradually separate the individual petals of the paper, while moving from the edges to the central part. You should spread the fan carefully, layer by layer. After 5-7 layers of the future pom-pom are fluffed, it is necessary to carefully turn it over to the other side and divide the same number of petals from the back surface. The last layers are straightened in a lateral position.
If the paper pompom is too large, it can be carefully trimmed with regular scissors with pointed ends. Actions are performed according to the same principle as garden bushes and lawns are made out.
Additionally, the product can be pulled up in the central part using a thread or one-color ribbon.
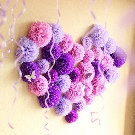
Small paper pom-poms look spectacular in beautiful and neat compositions. They can also be designed in the form of a small snake. To do this, create 6-10 pieces according to the above instructions and tie them to a short thread, while leaving 5-10 cm between the pieces. In addition to the classic master class, small paper products can be made in the form of a hemisphere. Distinctive features of such a product are increased stability and unique appearance.
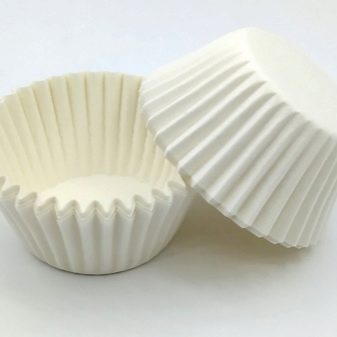
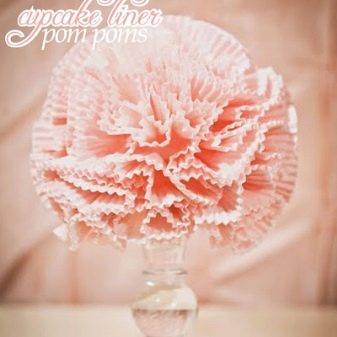
Unlike the above method, you can use regular napkins for this method, but experts advise taking paper cupcake molds. This material has original corrugated edges and a more stable construction.
The step-by-step process for collecting small pom poms using pastry molds is shown below.
- Create petals for the paper product. To do this, take one muffin pan and fold it in such a way that you get a pointed 45 ° angle at the exit. Do the same with the rest of the forms.
- Collect the petals into a single structure. In this case, you should alternately glue each edge of the petal to the other so that the sharp corners neatly and evenly converge at the same point. If the edges overlap, you will have to start over. For better fixation, it is recommended to use high-quality PVA glue.
- Add to the resulting design several shapes folded in half... This step will increase the decorative characteristics of the future pompom and improve the stability indicator.
After the above steps have been completed, the paper balls should be connected together using a regular needle or an invisible thread. Alternatively, a metal wire structure can be used.
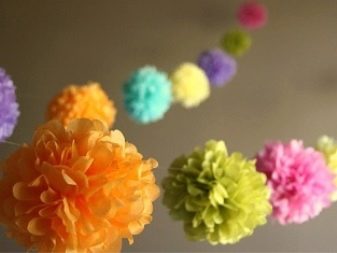
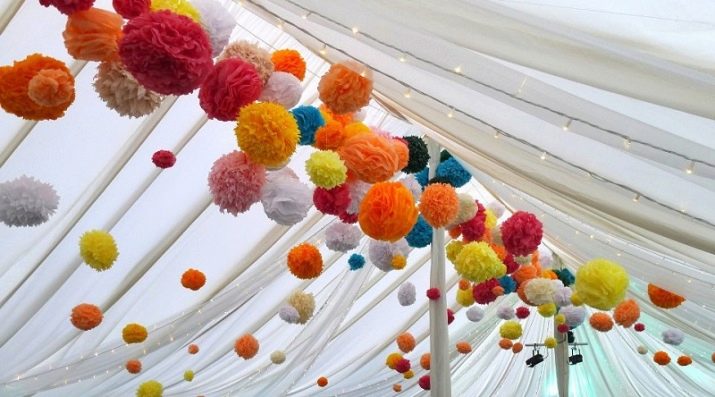
Garland of pompons
The paper pom-pom garland is a unique product that is especially popular both at birthday parties or corporate parties, and as an irreplaceable wedding element. In the latter case, the garland is often attached to the car, effectively developing in the wind. To create it, you should make 12-15 small pom-poms and carefully connect them together. It is recommended to take a single-color braided thread or an invisible fishing line as the main fastening element - depending on your wishes and imagination.
When fastening pom-poms, it is important to leave a small space between them - about 5–8 cm. To create a special festive mood, small LED lamps are placed inside the pom-poms. It is better to equip such a product with a battery-powered backlight system.
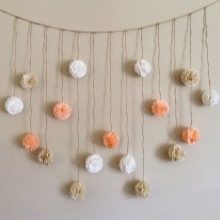
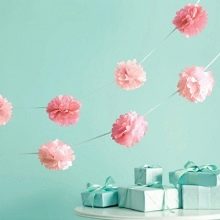
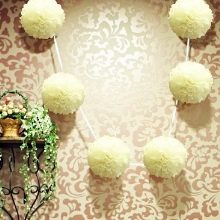
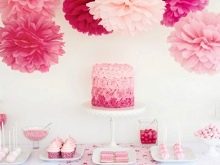
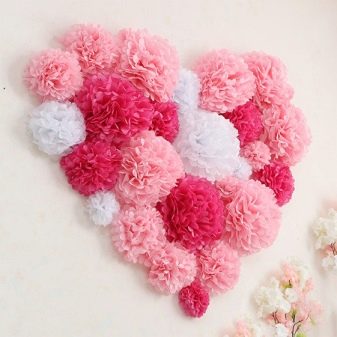
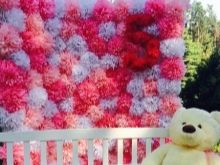
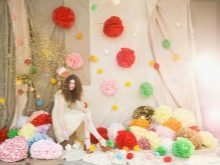
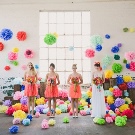
Photo zone made of pompons
An area for photographs made of paper pom-poms is an equally important component of almost any celebration. Recently, there has been a high demand for such products, which is why users often order beautiful balls for decorating photo zones. You can make a beautiful background for photos yourself. To do this, follow these steps.
- Make 20-50 large pom-poms. The number of paper products can vary up or down, depending on the area of the canvas and the future shape.
- Prepare a chipboard or MDF panel. There should be no lamination on the wooden sheet. Otherwise, fixing the pom-poms will be somewhat difficult.
- Lay the paper products one by one from top to bottom. It is recommended to attach pom-poms to a wooden structure using construction staples or double-sided tape.
If you plan to create a beautiful drawing or pattern, it is better to initially draw a contour base on a wooden sheet and only after that lay the pom-poms. Placing paper products by eye often leads to an undesirable result - the above steps will have to be repeated from the beginning.
Where can you use it?
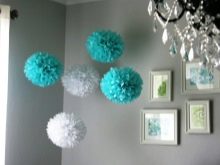
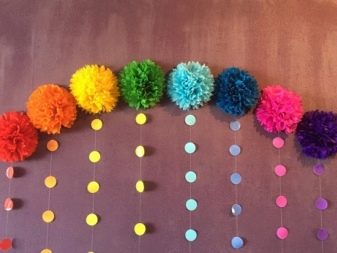
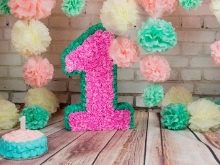
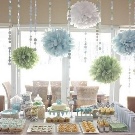
Pompons made of corrugated paper or napkins are inexpensive products that are widely used for interior decoration, party decoration and many other events. Unlike other similar solutions, such balls are quite easy to use, do not require specific maintenance and can be made with your own hands. Distinctive features of paper balls are the variety and variability of decorative design. Such products can be fixed to the ceiling, placed on the wall in the form of a beautiful composition, and also be used as a complementary element for cheerleading.
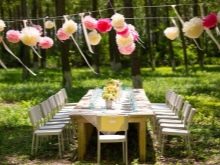
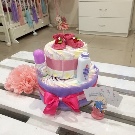
Paper decor is most often used to decorate a hall for a wedding celebration. In this case, the pom-poms are attached to a fishing line or thin thread and attached to the ceiling structure, placed on the festive table and added to the car as an indispensable element. In addition to weddings, products are actively used to decorate the house when the family is expecting a child from the hospital. If ordinary balloons often burst and give the baby some discomfort, then paper pom-poms are devoid of this drawback. In such a situation, experts recommend actively combining different shades of products.


With the help of balloons made by yourself, you can also supplement the hall where the child's birthday will be celebrated. Homemade decor will look much more spectacular and cute if you decorate it with small images of your favorite cartoon characters. If an adult's birthday is being celebrated, you should limit yourself to minimalistic pom-poms in warm and pleasant shades. Such balloons also often become an important part of various themed parties.
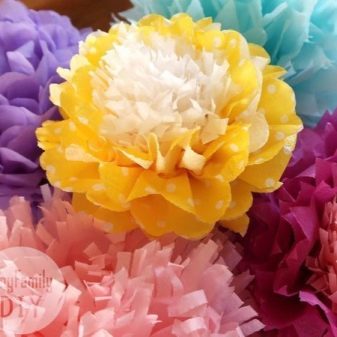
A wide variety of color palettes allows you to choose the element that will become indispensable in this case. For example, blue, bluish, turquoise, and white would be appropriate for a nautical party, while green and brown balloons would be appropriate for Earth Bottom. To make a photo on a social network more memorable and beautiful, it is often taken against the background of multi-colored pom-poms that hang over the main composition.
For the best effect, paper products are often arranged in a small photo area.
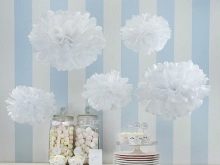

In addition to the classic fishing line and thin thread, beautiful ribbons are often used to decorate rooms, the shade of which is selected in accordance with the color of the pompom itself. Paper products also go well in bulk compositions. The volumetric balls can also be mounted on chairs, chandeliers and other objects in the room. It is customary to decorate small gift wrappers with medium-sized products, and small pom-poms are great as an addition to lush and voluminous designs.
Decorating a room with homemade paper balls is the choice of every person. Distinctive visual characteristics, simple manufacture and lack of specialized care allow these products to be used in a wide variety of situations.

For information on how to make a paper pom-pom from paper in silence, see the next video.


