How to make a yarn pompom?
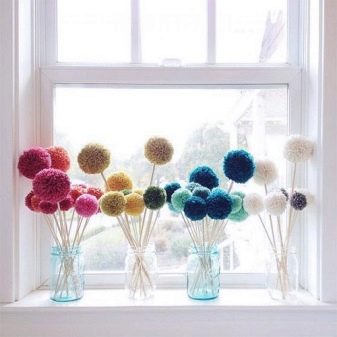
It is customary to decorate knitted things with pom-poms (hats, booties, scarves, children's sweaters). But lately, one-piece things for the interior have been made of them (rugs, poufs, blankets, pillows and even toys), so it is important for every needlewoman to learn how to make pom-poms with her own hands.
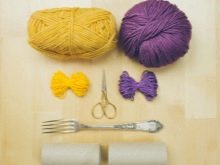
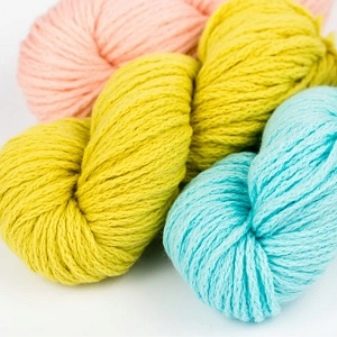
To do this, you can use the remnants of various yarns - this will allow you to spend the balls lying in the baskets at home at the needlewomen and create a unique thing. There are several ways to create yarn pom-poms - classic, using a fork, on fingers and on a chair.
The classic way
For the classic method, you need a base made of thick cardboard or plastic and sharp scissors. If there is a ready-made base, then this method is the easiest and most convenient. Pompons are made from yarn (you can use leftovers or whole skeins).
Bulky yarns (woolen and synthetic) work best. If you are making a pom-pom for a hat or scarf, then it is better to make it from the threads that were used for knitting. Or use thread of the same quality but in a different color.
The basis for work is done by hand, it is very easy and will take no more than 5 minutes. Step by step instructions for creating it.
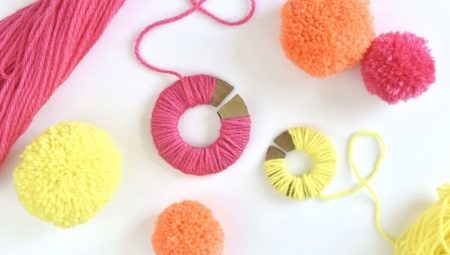
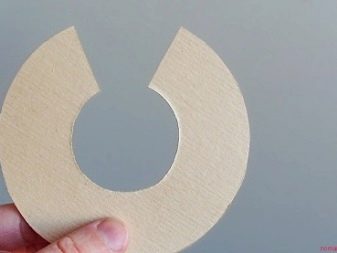
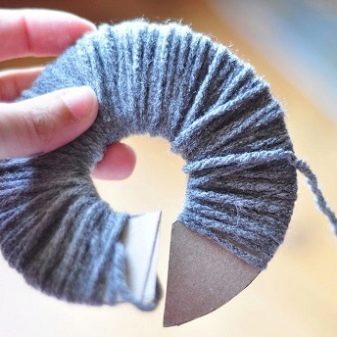
- Draw a circle on the cardboard. The diameter depends on the desired size of the pompom.
- Now draw another circle inside the center. The wider the width between the circles, the more magnificent the pompom will be. The result should be a donut.
- Cut two identical pieces. It turned out to be two rings.
- Make a small notch in both bases. The result will be a horseshoe-like shape.So it will be convenient to remove the base from the pom-pom blank.
You can start making pom-poms. Using a ready-made base, making a pompom will turn out very quickly. They will all be even and the same size.
After 1-2 pom-poms made, everything will work out without much effort.
Step-by-step master class.
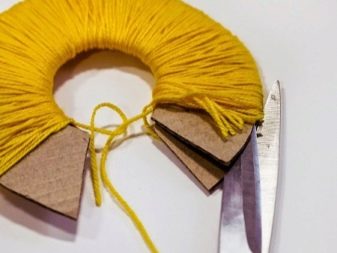
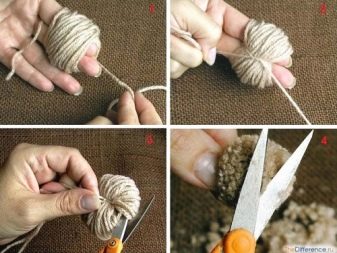
- Align both templates and start winding yarn around them. You need to rewind tightly, with a uniform tension. It is convenient to use a thick needle for winding.
- When there is enough thread, you need to cut the yarn between the two warps along the outer edge.
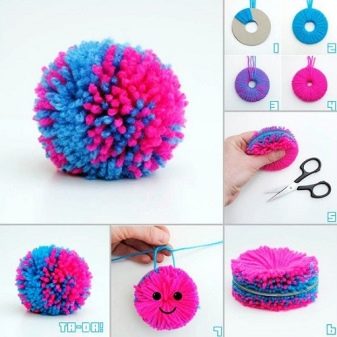
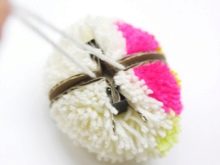
- Now, between the bases, stretch the end of the yarn, tighten well and tie. You need to tighten it as tightly as possible so that the finished product does not fall apart.
- Remove the bases (spread the edges slightly away from the slot and pull them out). Gently fluff the resulting product, trim a little, removing the protruding threads.
If desired, you can make several bases of different sizes. Sign the dimensions of all blanks for convenience. To make the foundations last longer, tape them over with tape on all sides. If thick cardboard is not available, thin plastic (such as a plastic lid) can be used.
In shops for needlewomen, you can find ready-made bases of various sizes. They may look different and the width of the slot may vary. Sometimes there are even semicircles or in the form of a slingshot.
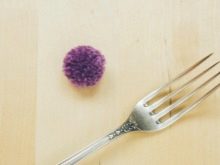
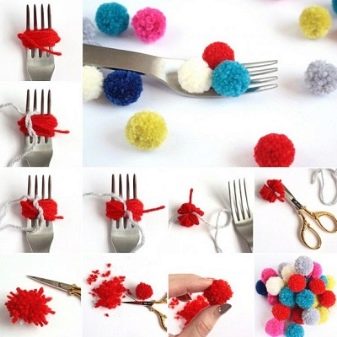
Making with a fork
For this method, even the base does not need to be made; an ordinary fork is required. The size of the future pompom will depend on its size. Naturally, huge products will not work. It is also better not to do it from a thick thread. Fork pompons are most suitable for decorating scarves, booties and pillows. They come out small and very cute. Choose a thin, but fluffy yarn, then the products will keep their shape well.
A pom-pom on a fork in a few steps. Wind the yarn around a fork (the more yarn, the fuller the finished pompom will be). Leave a small ponytail at the beginning.
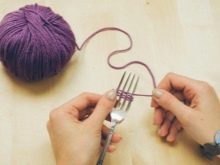
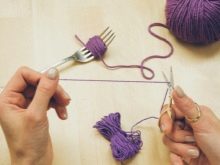
Wrap the other end of the thread tightly between the middle teeth of the fork. Try to do it as tightly as possible.
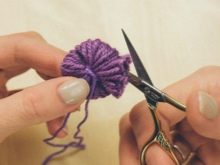
Take the two ends and make a knot. Remove the “cocoon” from the fork, cut all the loops on the sides and fluff up the pompom. Trim all the ends and shape the pompom.

In the same way, you can make a pom-pom on two fingers. The width at which you place your fingers will determine the size of the finished pompom.
- Wrap the yarn around your fingers, tighten the resulting "cocoon" tightly and tie a knot.
- Remove the workpiece from your fingers, cut along the edges.
- Fluff gently and shape.
Using this method, it is unlikely that you will be able to create several pom-poms of the same size, it is not always possible to keep your fingers the same. It is better to make small products when you need to keep your fingers together.
If you need to make a large pom-pom, then you should use four fingers, then you need to fix the workpiece between the middle and ring fingers.

How to do with a chair?
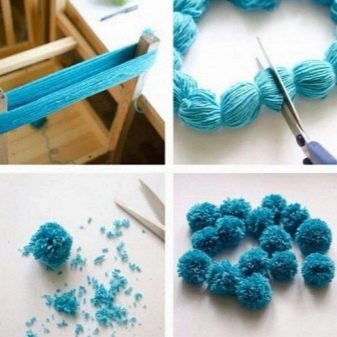
A chair can be used to make one very large pompom or many small ones at a time. To do this, turn the chair over and wrap two legs next to each other with yarn. The size of the chair will depend on the size of the pompom (or their number), you can take, for example, a highchair. Wrap enough yarn around the legs, tie in the middle, and carefully lift it off the chair. Cut the threads at the sides, fluff and shape. This will make one big pompom.
If you need to make a lot of small pom-poms, then the “cocoon” of yarn needs to be tied tightly in several places, you should get the same lengths of segments. Cut the yarn in the middle of each piece, fluff the blanks and trim off the excess. In this case, you get many identical pompons at once. For this method, you can wind the thread on all four legs at once, then the number of pompons will increase.You need to wind a lot of threads, then the result will be more beautiful and magnificent.
Creation of pom-poms of different types
To create fluffy pom-poms of different sizes, use special tools (bases) of different sizes. You can buy them in the store or make your own. It is best to use a fork or fingers to make tiny booties. And for a blanket or a craft made of plush yarn, the classic method with a suitable base size is suitable. Each needlewoman uses a method that is convenient for her.

Multicolored
It is often required to make a two-color or multi-colored pompom. If you do not need to create a specific drawing (pattern) on the product, then you can use any convenient method. In case you need to create a pattern on the pompom, then it will be correct to use the scheme and the classic manufacturing method, but with a slight difference.
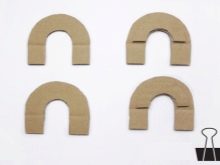
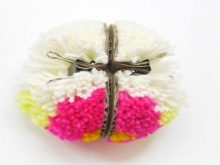
You need 4 bases in the form of a horseshoe (rainbow), they need to be folded 2 together. The threads need to be wound starting from the center and moving to the edges.
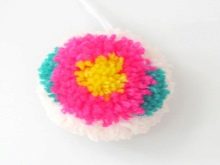
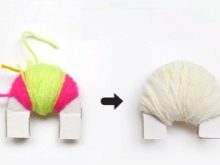
Focus on the outline of the drawing, visually divide it in half, and imagine each half on two bases.
- First take the color in the center and wrap it around the base.
- Wrap the next color over the first and move a little to the edges. Continue doing this with the next colors. Leave the ends of the warp loose when winding the yarn.
- Repeat the same with the second piece.
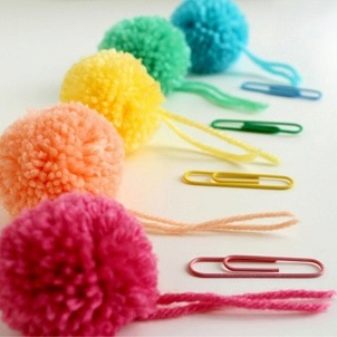
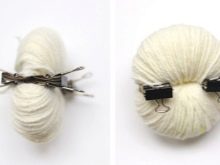
- Align both blanks, straighten the free ends and fasten them with paper clips or paper clips.
The rest of the steps are the same as in the classic way. As a result, you should get a pom-pom with a pattern.
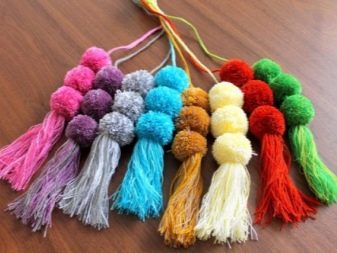
In the form of a brush
To make a brush pompom, use a rectangular shape. Wrap it in yarn. Secure the workpiece with a thread on one side, and cut the yarn on the other. Carefully remove the workpiece from the base. Wrap the workpiece a little in the upper part, stepping back 1-2 cm from the edge.
Trim the ends of the brush on the other side with scissors. Tassels are often used to decorate the corners of the blanket and pillows or curtains (bottom edge or tie-backs). For this, it is better to use floss or iris threads. The brushes are graceful and delicate. Brushes made of threads with an amber or gradient effect look interesting.
Large
For large pom-poms, use the classic method with a large-diameter base. The yarn should be fluffy and thick (plush yarn can be used). This will take some skill, and if you are unsure of your skills it is worth practicing on a smaller size first. If you need a very large pompom, then use a highchair, the yarn will take about 7-9 meters.
Small
Small (tiny) pom-poms are comfortable to make on a fork or fingers. If you use enough yarn, they will be very fluffy and cute. If you need a large number of pom-poms of the same color, use the chair method. Just calculate the bonding points well so that the segments turn out to be the same.
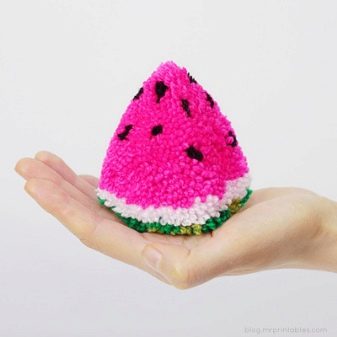
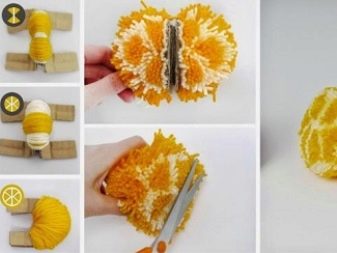
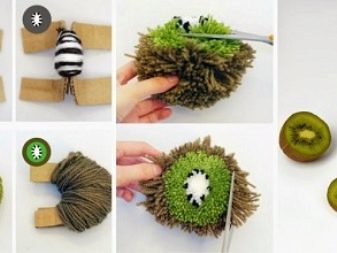
How to make in the form of flowers and fruits
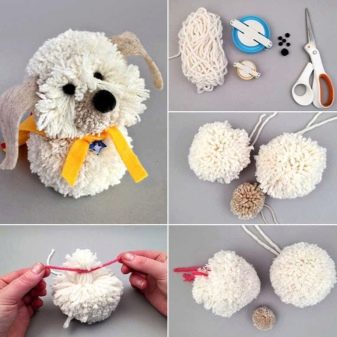
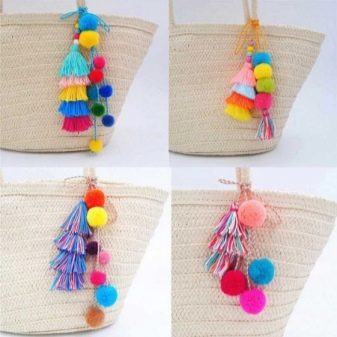
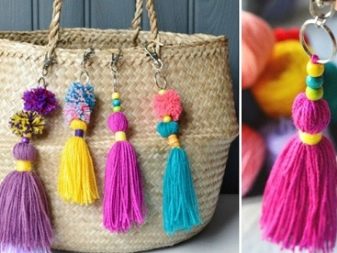
From pompons, you can create the most unusual beautiful things: rugs for a nursery and a bath, decorative pillows, toys and even clothes. But all this requires traditional round pom-poms. Skillful needlewomen, on the other hand, can make a work of art from a pompom - a multi-colored flower or fruit. This will require a certain skill and experience. Such unusual pom-poms can be used as a brooch or keychain. They are made from knitted or plain yarn. It all depends on the taste of the needlewoman and the desired result.
First you need to make a diagram of the required pattern and select the threads of the desired colors. Now make the pom-pom using the 4 horseshoe-shaped bases. You will get a round blank with the desired pattern. Now carefully give it the required shape, gradually cutting off the excess, or leave it as it is.
In this way, you can create strawberries, kiwi, lemon, flowers and much more, for which there is enough imagination.
Useful Tips
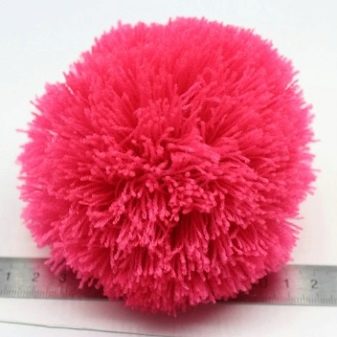
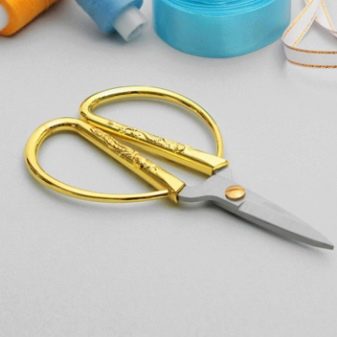
To make the pompom lush and keep its shape well, use a dense thread that does not stretch too much, but at the same time has a porous structure. Wrap the yarn with even tension, then the shape of the product will turn out to be even. It will take about 4 meters of yarn to create a lush, medium-sized pom-pom. Use a very sharp pair of scissors, the threads should be cut in one go. If the scissors are blunt, then when cutting the threads on the sides, you may not completely cut through the yarn and pull it, at this moment the entire workpiece will deteriorate. Sharp scissors will make it easier to shape the pompom and cut off any excess.
Tighten the workpiece as tightly as possible and make a strong knot so that when using the pompom it retains its shape for a long time, and the threads do not fall out of it. Especially if you intend to actively wear or wash products with pom-poms. When making pom-poms, the end of the thread can be left longer. It can be used to attach the pom-pom to the main product. Instead of the classic round base, you can use a rectangle or square. Make a small cut in the middle of the base (almost to the center). It is convenient to fasten the beginning of the thread in the slot. Then the process repeats the classic way.
For a rectangular base, you can use invalid bank cards or unnecessary plastic business cards. A "shirt" from a SIM card is also suitable.

For information on how to make a pom-pom from yarn with your own hands, see the next video.


