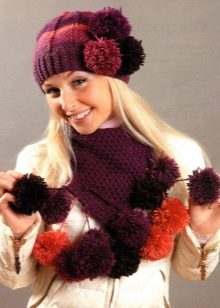
How to make a pom-pom for a hat?
You can make a pom-pom for a hat with your own hands. This will require only consumables and some free time. There are several manufacturing methods, each of which has some nuances. Among the most popular homemade pom-poms are the following options: felt, crocheted from yarn. The choice depends on individual preferences.

Material selection
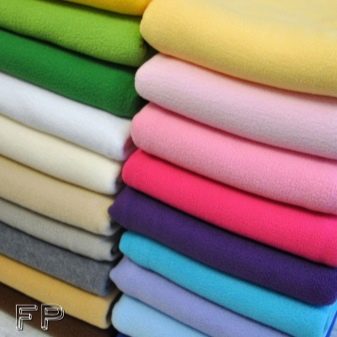
To make a pompom with your own hands, you need to decide on the choice of consumables. It is most convenient to use regular yarn or Alize Puffy. Both artificial and natural threads are suitable. You can make a fleece pom-pom for a children's hat.
When choosing a material, you should pay attention to the color (it can match the shade of the headdress or be contrasting), the thickness of the threads, as well as their quality.
It is important that they do not bloom, otherwise the pompom will not last long.

Made from fleece
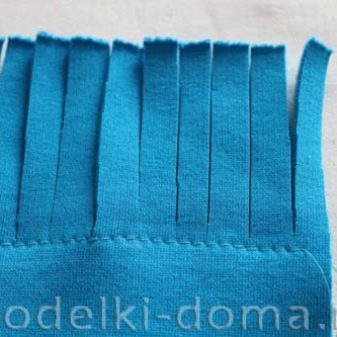
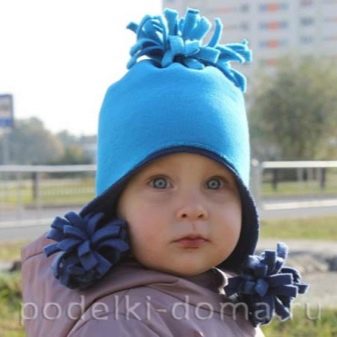
Fleece pom-poms are suitable for children's hats. To make an accessory, you only need the material itself, threads and scissors. The process consists of the following stages.
Cut out a rectangle of 30x10 cm from fleece. Using scissors on one of the long sides, make cuts of 7-8 cm. Roll up the rectangle into a tube, rewind it well with tape at the bottom.
The result is a fun noodle pom-pom.
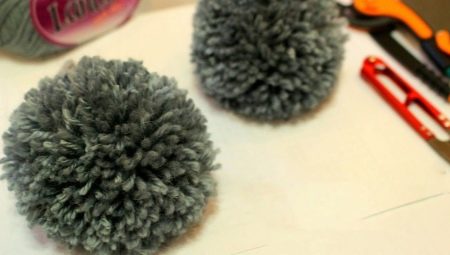
Making from yarn
Pom poms can be made in several ways. Each of them has a different execution technique. The difficulty is about the same. In order to make a yarn pompom, you only need 15-20 minutes of free time.

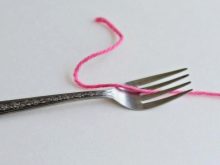
On a fork
This option requires a plug.There are two requirements for a cutlery: it must be clean and durable. So, forks made of aluminum are not suitable for this purpose, since the metal itself is too soft, the teeth can deform.
The process of creating a pompom consists of the following steps.
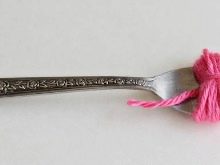
The yarn needs to be wound around the teeth of the fork. Depending on what size the pompom is (large or small), 2 to 4 cloves are used. When there are enough threads, you need to rewind them across and fasten well. Remove from the fork, and cut the resulting loops. Now you need to bandage at the base again.
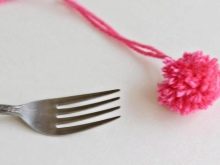
In fact, the pompom is ready. It remains only to trim the protruding threads and sew it to the hat.
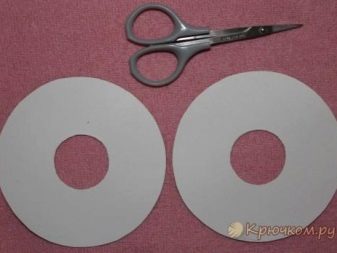
On a cardboard circle
You can make a beautiful pompom on a cardboard circle.
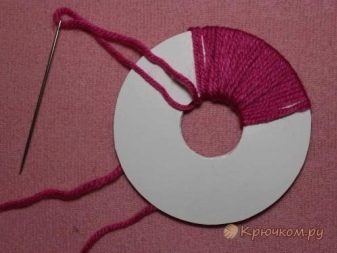
- To do this, you first need to cut directly the workpiece itself: 2 cardboard circles with a hole in the middle. On one side, they should have cuts so that the pompom can be removed.
- Once the cardboard blanks are made, you can proceed directly to creating the pompom itself.
- The yarn should be wound around folded cardboard circles. When everything is wrapped in yarn, you need to make cuts along the edges of the workpiece with scissors.
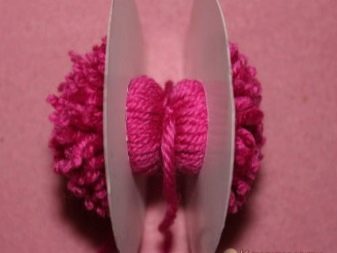
- During the cutting process, the cardboard rings are slightly spread apart. A small space is formed between the circles. When all the threads are cut, you need to stretch a thread between the cardboard boxes, which will tie the yarn cuts. It is advisable to tighten it well.
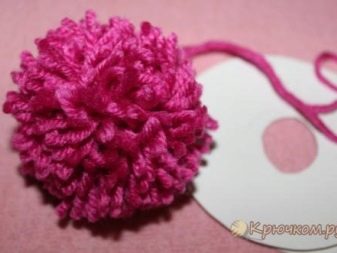
- Pull out the cardboard blanks. Spread out the yarn and trim the protrusions or frayed parts of the thread, cutting them off with scissors so that the product itself looks neat and attractive.
On the back of a chair
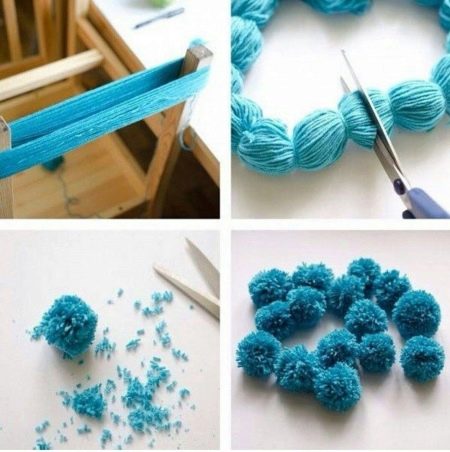
If you want to get a lush pom-pom at the exit, then you need to do it on the back of the chair. The process consists of several stages.
- On the back of the chair, you need to wind the selected yarn as neatly and evenly as possible. When the required amount is wound, it is necessary to rewind in the middle and tie with a thread. Cut the loops with scissors at the folds. Remove existing irregularities.
- If you follow this scheme, then in a few minutes you can make a beautiful and voluminous pompom. If there is no backrest chair, it is recommended to use an upside-down stool.
Important advice! The more threads are wound, the more magnificent the accessory will be.
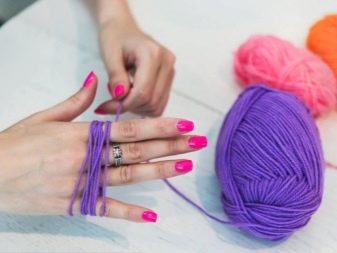
On fingers
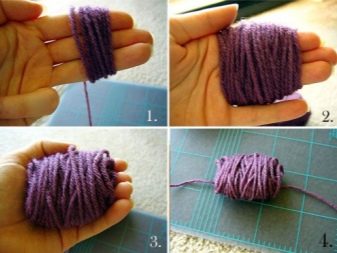
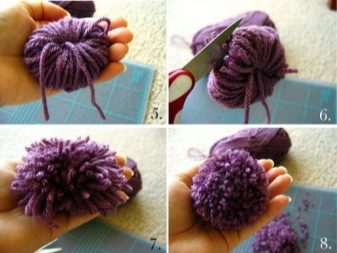
If for some reason it is impossible to use additional devices, you can make a beautiful pompom using the fingers of your free hand. The creation process consists of several stages.
You need to wind the yarn around two or four fingers of your free hand. As soon as the required number of circles is collected, they should be tightly tied with a thread in the middle, taking them off the hand. It is now recommended to cut the two large loops with scissors. Fluff the villi slightly and trim to make them even.
With the correctness and consistency of all actions, the pom-pom will turn out to be very attractive.
How to tie?
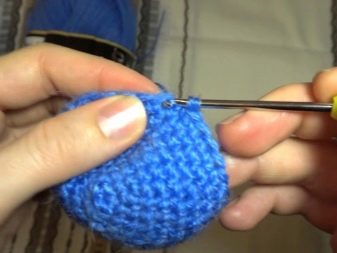
A more difficult option for creating a pom-pom for a hat is knitting. For this purpose, it is recommended to use mainly a crochet hook, since knitting needles will not work to create the desired effect.
- First you need to make 4 air loops and fix them in a ring. Then the rows are knitted with single crochet columns. Increases are gradually being made. As soon as the cup is formed, it is necessary to put a wooden or plastic ball in it. Next, you need to continue knitting, gradually making decreases. The ball must be removed.
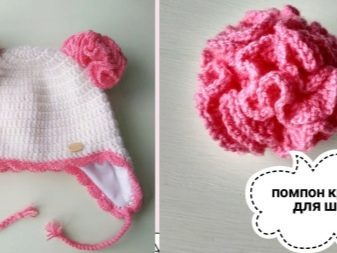
- At the final stage, the threads must be properly fastened, and then the pompom must be sewn to the headdress. It is most suitable for a knitted hat. In order to make the product look more attractive, it is recommended to choose a fleecy yarn.
Of course, this option is only suitable for those who initially know how to handle a crochet and understand the principles of knitting.
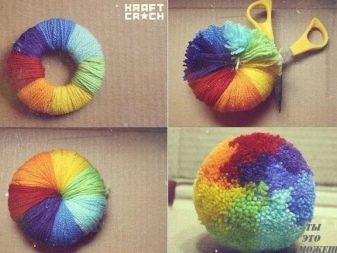
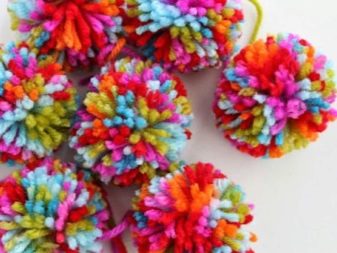
How to make a multi-colored one?
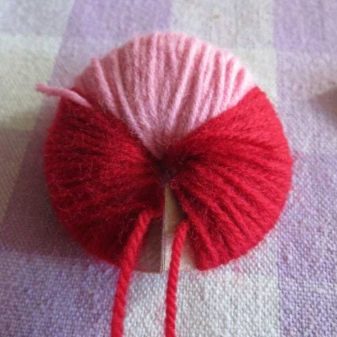
As an original example, you can make a multi-colored pompom.This product is more expensive, since you will have to buy yarn of several shades to create it. They make a multi-colored pom-pom according to the already known principle.
Alternately, yarn of different colors is wound around the selected object or fingers. Once you have enough yarn, you can tie the rings in the middle and then remove them. The loops need to be cut, once again tie the workpiece at the base. Fluff up and align protruding specimens.
The multi-colored pom-pom is ready. It remains only to sew it to the accessory.
Useful Tips
In order for homemade pom-poms to turn out beautiful and of high quality, useful recommendations must be followed.
Only new yarns of good quality are suitable for production. Over time, the structure of the threads deteriorates, and they can simply burst from tension. If you have chosen a stretch yarn, then do not overtighten when winding. If this condition is overlooked, then the pom-pom villi are short and uneven. You need to pull the threads as tightly as possible so that they do not come out in the future when using the headgear. You only need to reel on solid bases.
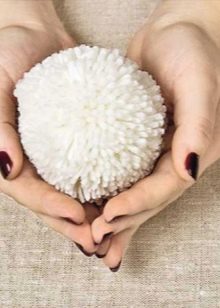
Pompons made of artificial or natural yarn, as well as felt material, can be made with your own hands at home in just a few minutes. If you want to get a fluffier model, then after making the pom-pom, you can treat it with a massage comb. After that, it will be spherical and voluminous.
Compared to purchased pom-poms, this will be a more budgetary item, since it is absolutely not necessary to buy new yarn for this purpose, you can use the leftovers.