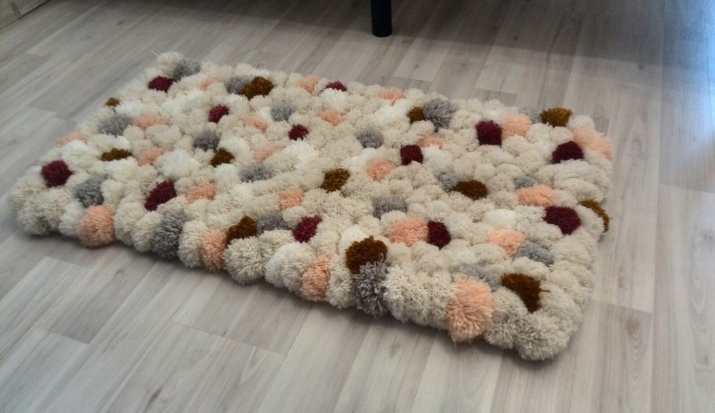
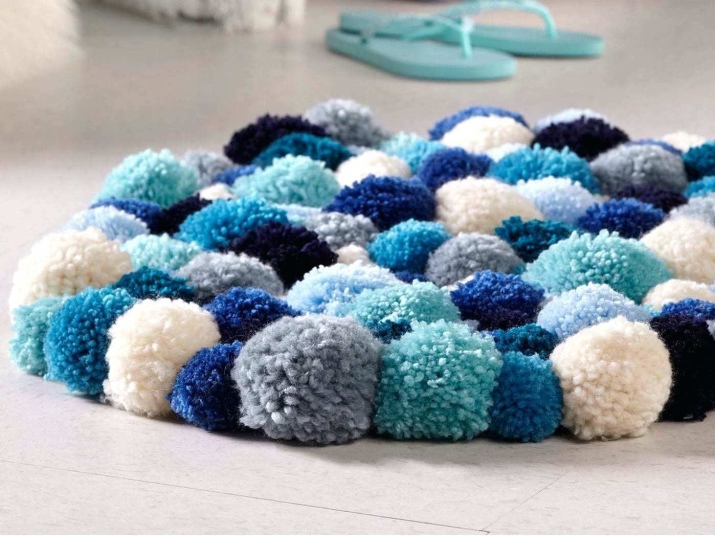
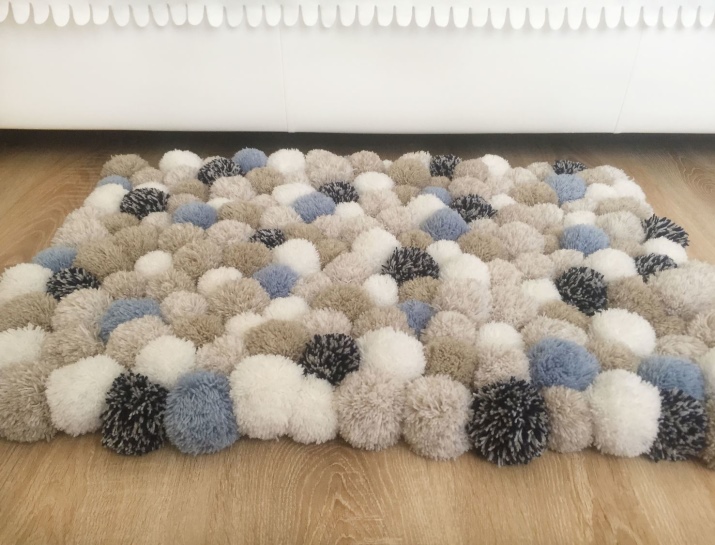
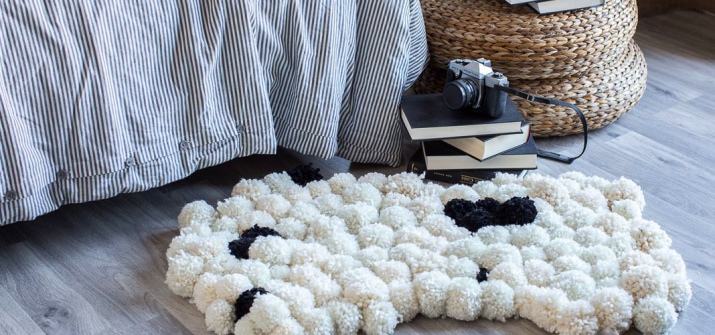
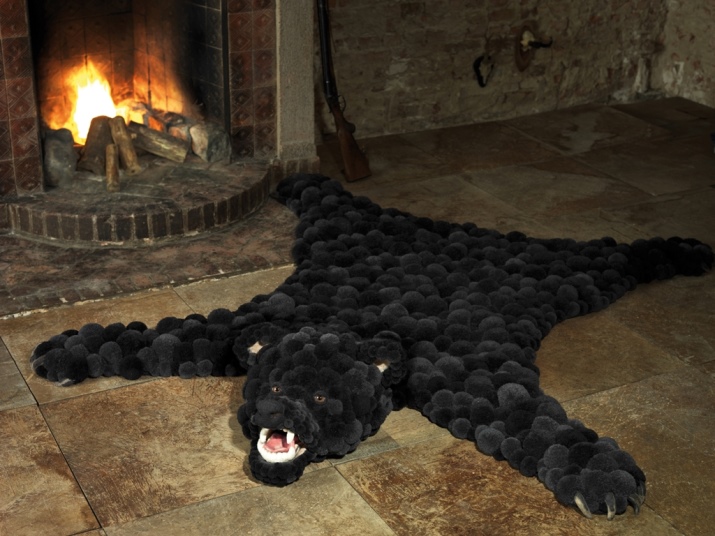
Pom-pom carpets
Large carpets and small rugs help not only decorate the interior, but also make the atmosphere in the house more cozy and soulful. The choice of such a product must be approached responsibly, but if you could not find what you need in stores, you can make a beautiful rug with your own hands. A great option is a carpet made of pompons, which is quite simple to make, but at the same time very beautiful, stylish and warm.
Let's take a closer look at how to make a carpet from pompons, and for which rooms it is suitable, and also we will analyze the features of the materials required for manufacturing, and the process itself in stages.
Peculiarities
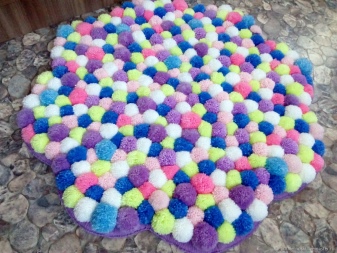
The main advantage of making rugs from pompons is that you are not limited to any particular type or shape and you can easily choose materials that fit the features of your interior.
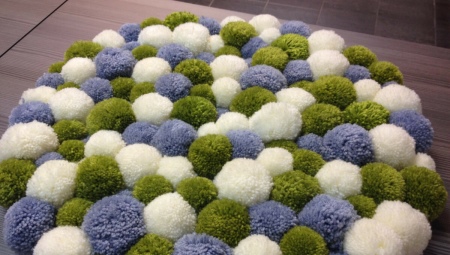
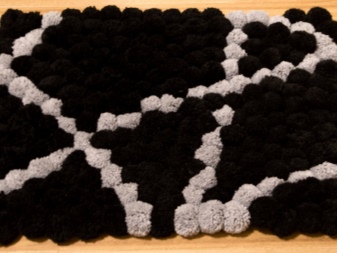
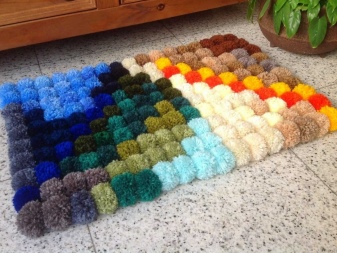
For example, if the interior is decorated with geometric shapes or any non-standard shades, you can make your rug in the appropriate style so that it is a continuation of the design idea.
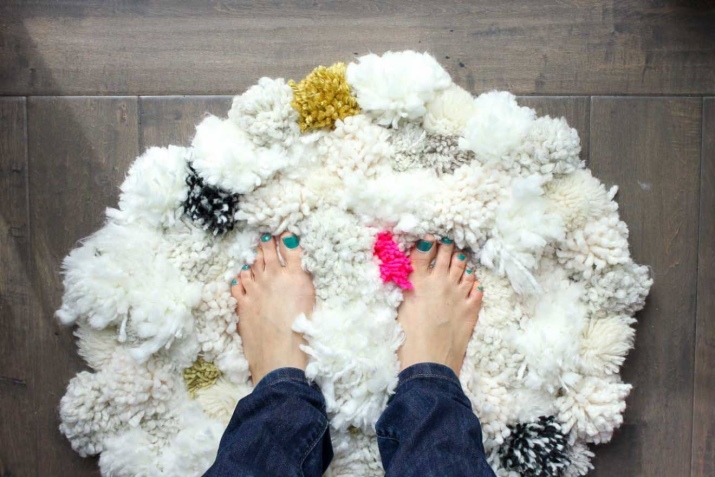
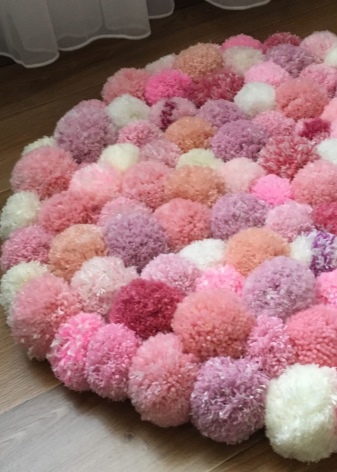
In addition, among the advantages of the rug, it can be noted that it is very warm. Since it consists of fluffy pom-poms of different sizes, which are located not only evenly but also quite tightly on the base, when walking on the mat, a thick layer of wool is created between the floor and the legs, which does not allow you to freeze.
Also, among the features and indisputable advantages of such a product, it can be noted that during the manufacture you choose the material yourself. If there are no health indications, and you want to save as much as possible, more budget threads will do, and for a high-quality hypoallergenic product, you need to purchase the appropriate material with a high price tag.
Besides, it should be noted that there are options for making pompons for rugs from scrap materials. For example, old knitwear, loose-knit woolen yarn, and a variety of synthetic fabrics will do.
Of course, such a rug will not have a uniform color scheme and, possibly, will be knocked out of the overall interior, however, such a manufacturing method is also acceptable.
What room are they suitable for?
There are many different options for placing pom-pom rugs, we recommend that you familiarize yourself with each of them.
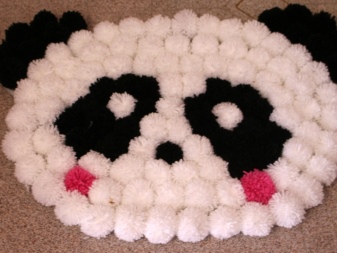
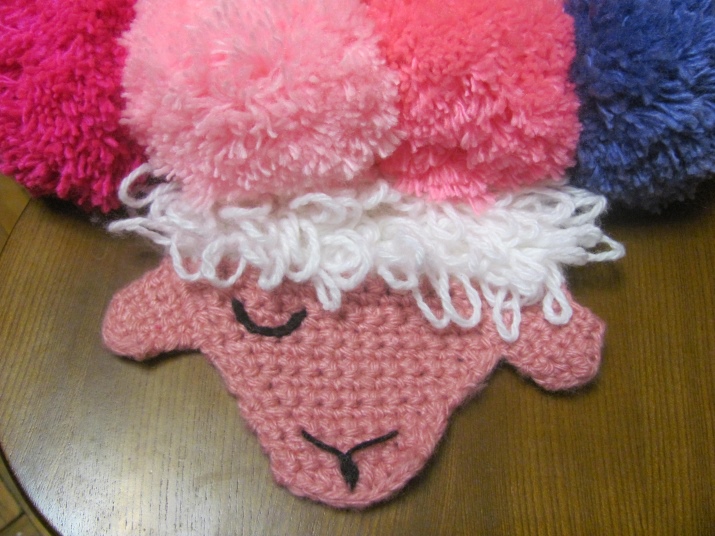
- Children's room - a great option for placing such a rug. You can make a product in the form of a flower, an image of a cartoon character or an animal - your child will definitely be delighted. In addition, you can also involve your baby in the manufacturing process, and joint creativity will benefit him.
- Bathroom may become one of the premises in which this rug can be used. But there are a couple of nuances regarding the manufacturing process - because of the high humidity for the bathroom, it is better to use a rubberized base.
Also, the product must be dried regularly to avoid the appearance of an unpleasant odor.
- Large carpet of pom-poms can be placed in the living room near the sofa. The shape of the product does not play a special role, the main thing is that it blends harmoniously with the interior. Plus, it’s much more pleasant to slide your feet off the couch onto the soft carpet rather than onto the cold floor.
- In the bedroom such a product can well be used as a bedside rug.
- One of the options for placing a product made from improvised means is country house and bathhouse... Most often, interior solutions in such rooms do not play a special role, so a rug made of pompons is more likely to become a functional detail than an element of decor.
- Also a warm fluffy rug is great. for balcony and can be used as pet bedding.

What is required?
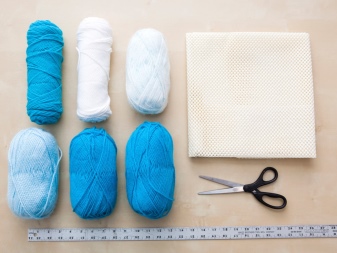
Before you start making the rug, you need to select and prepare all the materials and tools. First, consider the materials that are most suitable for making pompons:
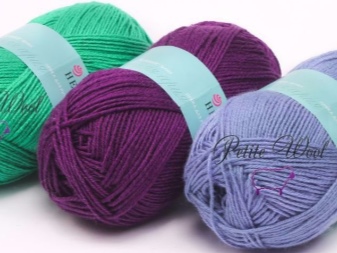
- thick woolen yarn is an ideal material for creating a beautiful rug;
- acrylic threads are also great for forming neat pom-poms;
- cotton yarn, like natural wool, is of high quality and is also hypoallergenic, which is ideal for creating products for children;
- synthetic dense threads are also often used, but due to the low quality of the material, it is not always pleasant to the touch;
- also in some cases, pompons for rugs are made of polyethylene, but it is worth considering the specifics of the material - it rustles and it is unpleasant to walk on it barefoot, therefore this option is mainly used in suburban conditions.
It is also necessary to choose a suitable material for the base. There are several options:
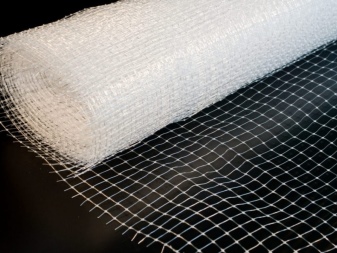
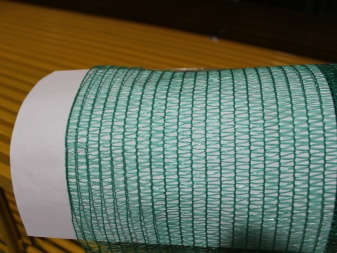
- construction mesh is quite suitable for fixing volumetric pom-poms, but it is necessary to choose an option with small holes;
- the tapestry has the necessary holes, thanks to which you can reliably fix the fluffy balls;
- a net for covering greenhouses is also suitable, but it should be borne in mind that this material is quite rough, therefore, it may be difficult to give the rug the desired shape;
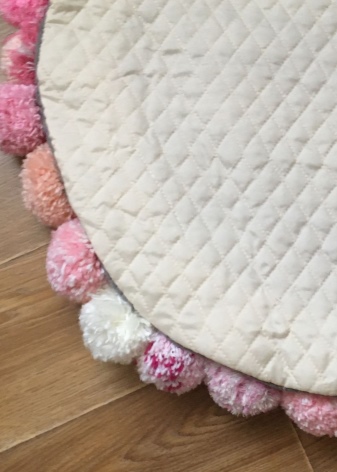
- the most suitable base for sewing on or tying pom-poms is a carpet canvas, a rug on such a base will serve you for many years;
- for a product in the bathroom, you can use a ready-made foam PVC rug, choose the option with holes, and you can easily fix the pom-poms on it.
In addition to all the materials listed, you also need to acquire the appropriate tools. To make a carpet from pom-poms, you will need:
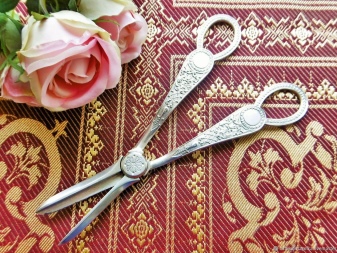
- scissors of large and small sizes, large scissors are needed for working with the base and trimming pompons, and small ones for smaller parts;
- a pen or pencil can be useful for drawings;
- thick paper and cardboard are needed to make a special ring, with which you can easily make a pompom of the required size;
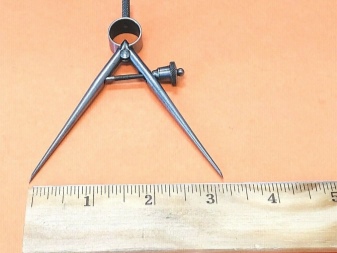
- to create a template for such a ring, you will need a compass or two round objects of different shapes, which will serve as stencils;
- a simple crochet hook is needed so that you can easily pull the thread through the base for subsequent fixation;
- if you decide to sew on pom-poms, and not fix them in any other way, we recommend getting a needle with a wide eye, such a needle is also called gypsy;
- in addition to all of the above, silicone based glue may also be useful.
How to do it?
The process of making a rug with your own hands may seem quite complicated, but this is only at first glance. If you study all the stages step by step, you will see that even a child is able to cope with this matter.
Consider a detailed master class on creating rugs from pompons for beginners.
Preparation
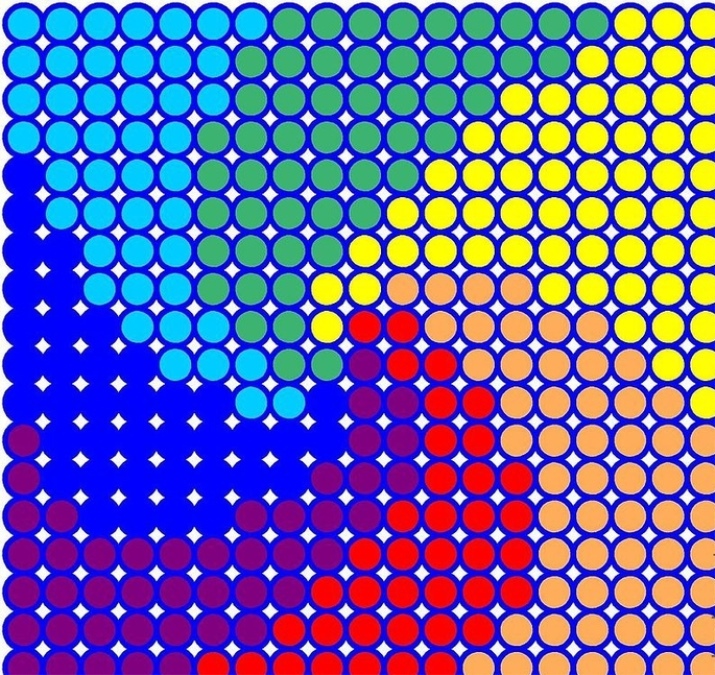
Any activity must be approached wisely and prepared in advance. For example, decide in advance on the scheme of the future rug, draw it on a piece of paper and designate the color scheme that will be used to create the rug.
If this will be any image, it is necessary to remember when creating a circuit that it must be symmetrical.
It is better to prepare the threads of the required colors with a margin, because in case of a shortage, you may not find the desired shade in the store.
Also, based on the type of the chosen scheme, you need to determine whether any other elements will be used, in addition to the pom-poms and the base. For example, some animal rugs have a crocheted head or paws. In such cases, the details must be prepared in advance and fixed on the basis of the future rug.
Besides, it is necessary to calculate the number of pompons for the product shape you have chosen. To do this, you need to make several pieces in order to compare their size with the dimensions of the base and, based on the data obtained, calculate how many pompons you need.
The foundation
After all the preparatory activities are completed, you can proceed to work with the main details of the future product. First of all, we need to give the base the intended shape. As previously mentioned, this can be a geometric figure or the outline of an animal's body.
You can prepare a stencil from paper in advance, or schematically apply a drawing directly to the material itself, after which the figure must be carefully cut out and the edges processed. If you have to work with a mesh, then the markup should be applied in such a way that all the cells remain intact, and there are no protruding cut-off parts that you can injure during work and subsequent operation.
It is also recommended to process the edges of the base with thick threads of a suitable color scheme.
It is best to use the crochet technique and, threading the threads through the holes in the material, carefully close all the edges around the perimeter of the future product.
Making pompons
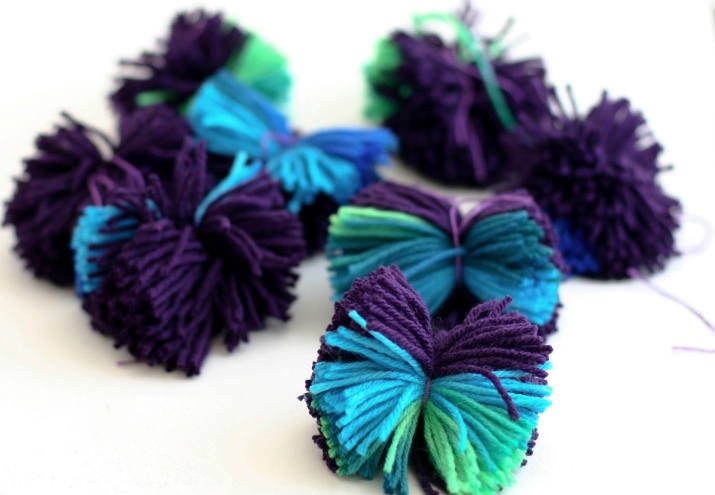
The next step is to start making pompons. There are several ways, each of which has its own characteristics and advantages. Let's take a closer look at the most common of them.
The first option for making pompons is with an ordinary fork:
- decide what size you want to get a pompom, and wind the threads on the appropriate number of teeth;
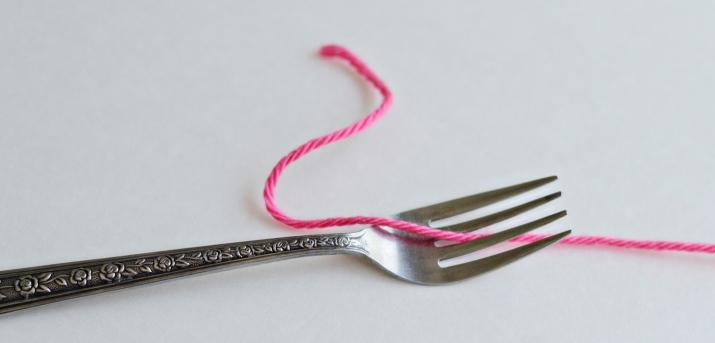
- from the skein, you need to cut a small thread and pull the yarn wound on a fork with it, you need to drag it in the middle so that the pompom turns out to be uniform and beautiful;
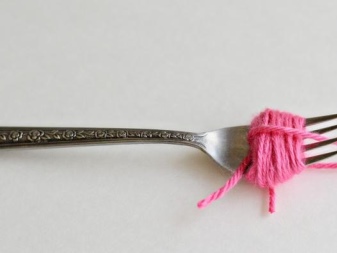
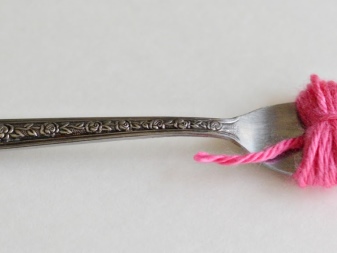
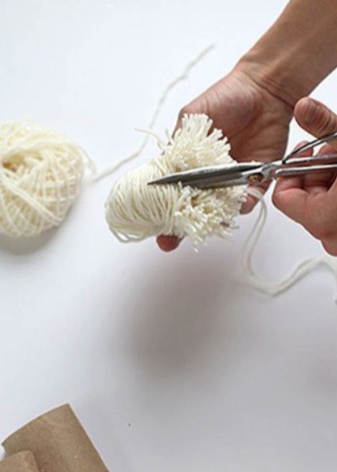
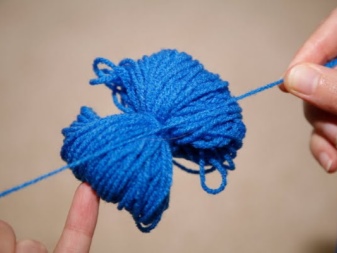
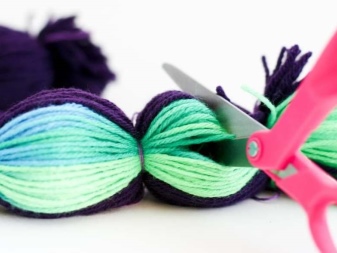
- then remove the resulting workpiece from the fork, on the sides of the waist there are two loops that need to be cut in half;

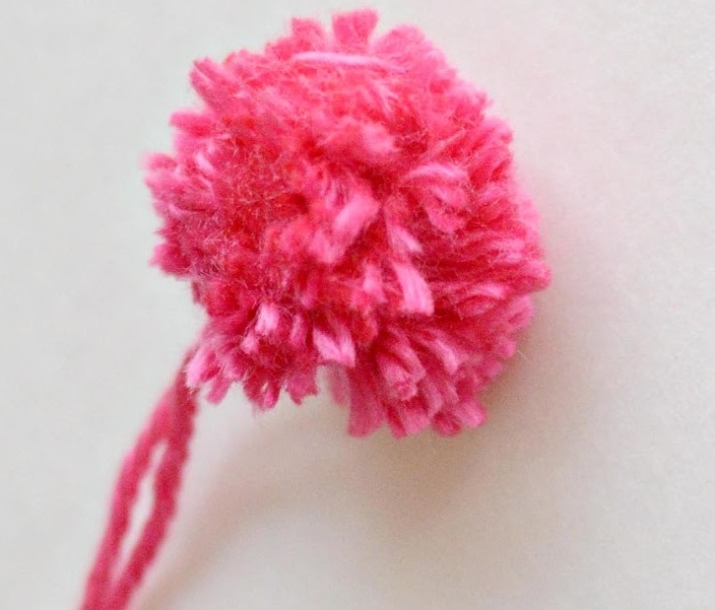
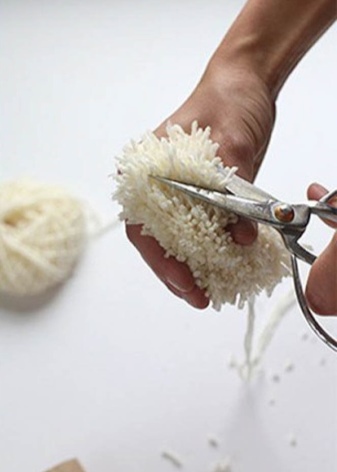
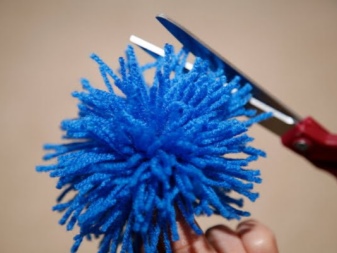
- then it remains only to fluff up the pompom and use scissors to correct its shape.
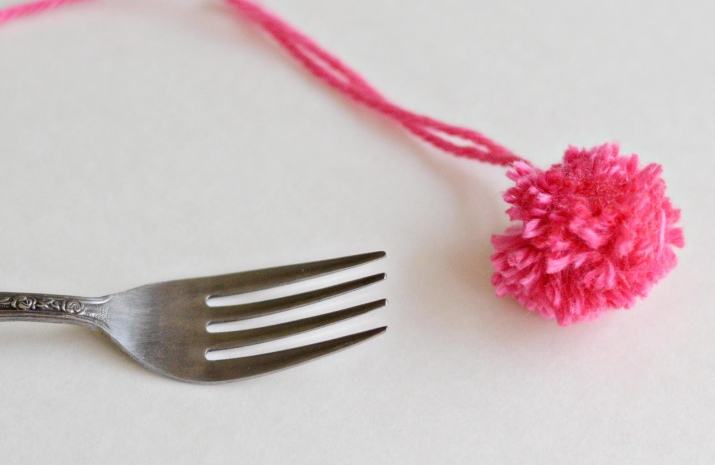
Since pompons with this method of manufacturing are quite small, respectively, a considerable amount of them will be needed to make a large rug, and the process of preparing the parts can take a lot of time.
It is more expedient to use them as a decorative addition to larger elements.
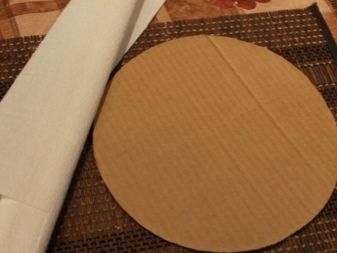
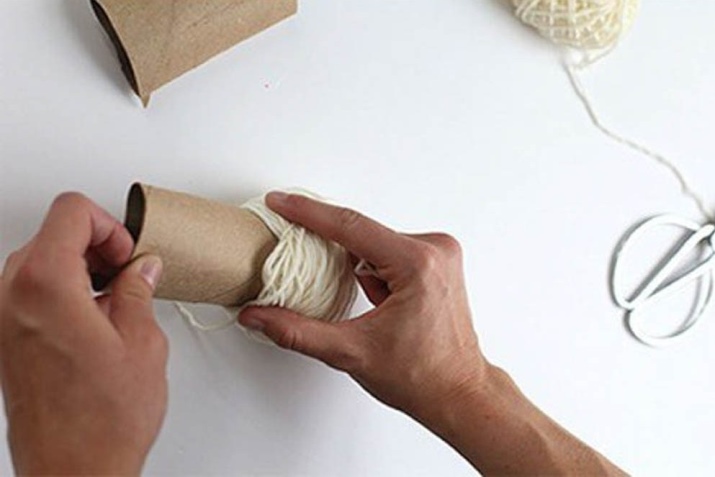
The next method is to make pom-poms using cardboard cylinders.
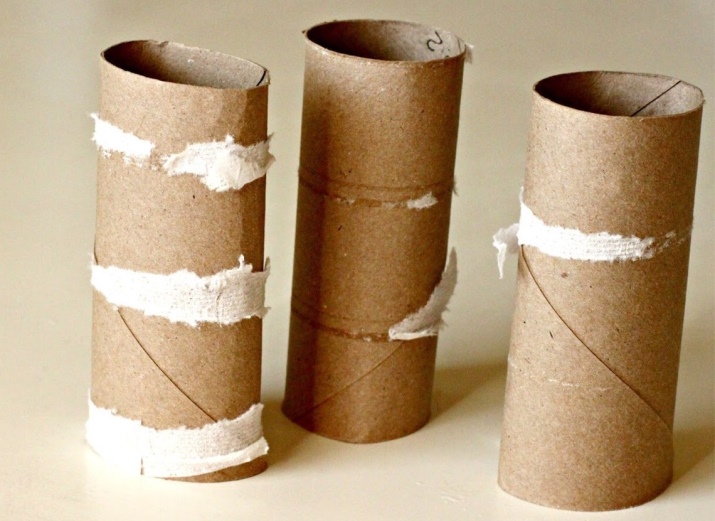
- For this method, it is not necessary to buy or make additional parts, you can easily use rolls from toilet paper and paper towels.
- We need two cardboard cylinders, which we need to flatten slightly, and then fix the free end of the yarn between them.
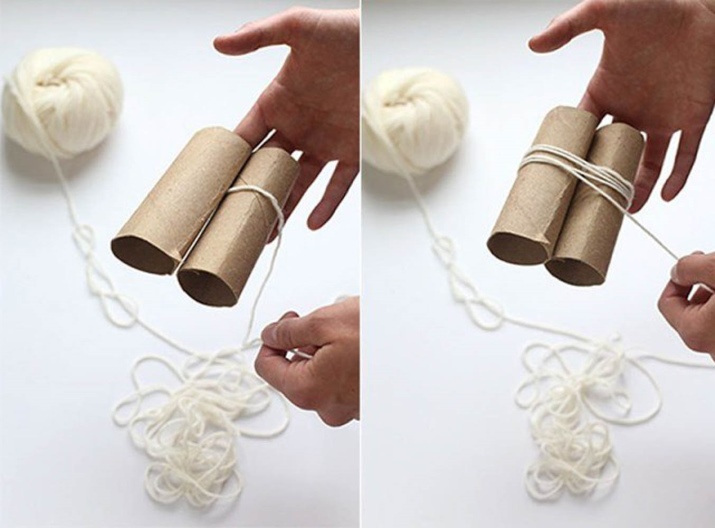
- Further, pulling and evenly distributing, we wind the yarn on a structure of two cardboard elements. Adjust the amount of wound yarn yourself, depending on how fluffy you want the pompom to be.
- Next, thread the thread between the cylinders and pull together the wound yarn in the middle.
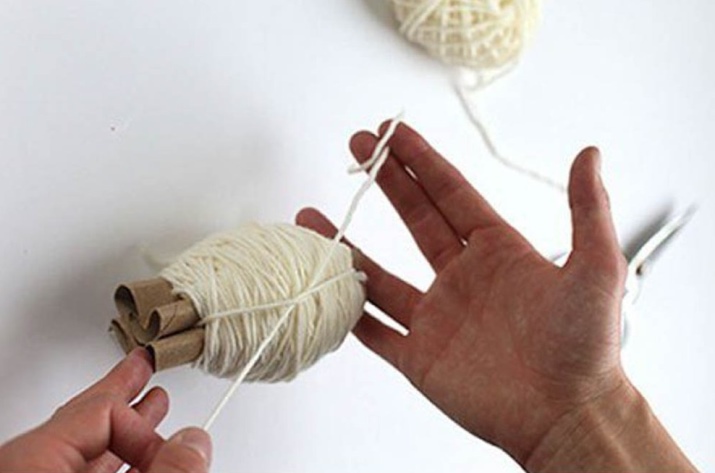
- We cut the loops of the yarn and give the pompom the desired shape.
This method is quite suitable for making voluminous fluffy pom-poms.
The third manufacturing option does not require the use of any additional funds. The manufacturing process is as follows:
- yarn needs to be wound on 4 fingers of the hand, the winding should be tight enough so that the structure of the pompom is dense and uniform;
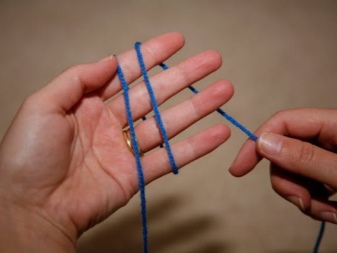
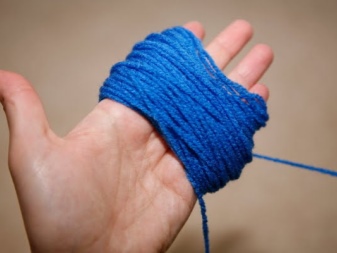
- then thread a thread in the middle between the fingers and also tie the wound yarn;
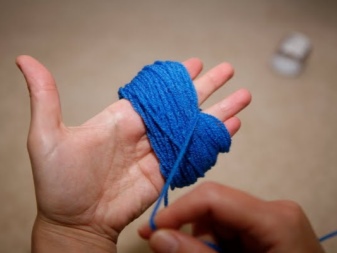
- further, the sequence of actions does not differ from the previous methods - you also need to cut the loops and form a beautiful fluffy ball.

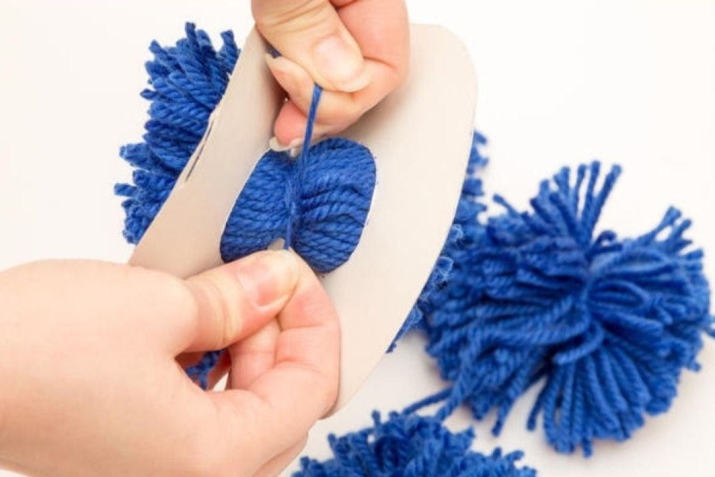
The next method of making pompons using cardboard blanks allows you to create the most even and neat details for the future rug. You need to act as follows:
- from cardboard you need to cut two circles with an empty middle, like bagels, and put them together;
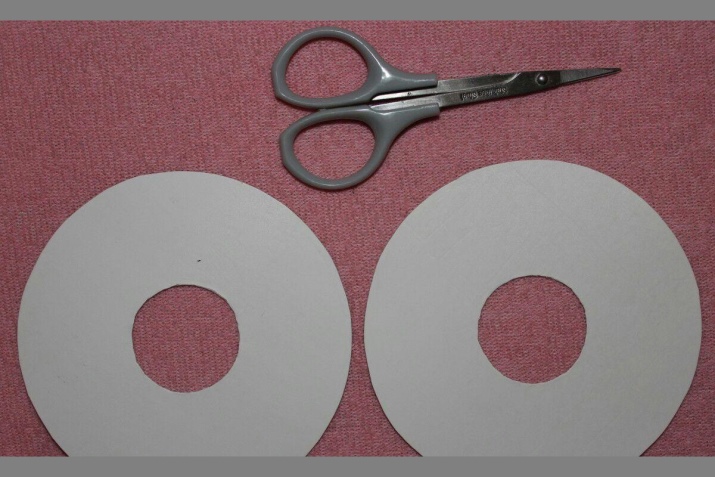
- we wind yarn around circles, evenly distributing the threads;
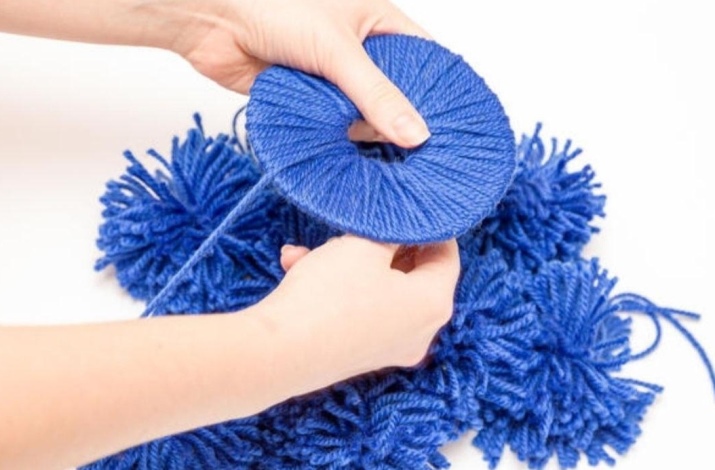
- a distinctive feature of this method is that you first need to cut the threads along the outer edge of the circles, and then drag them along the inner area with a thread;
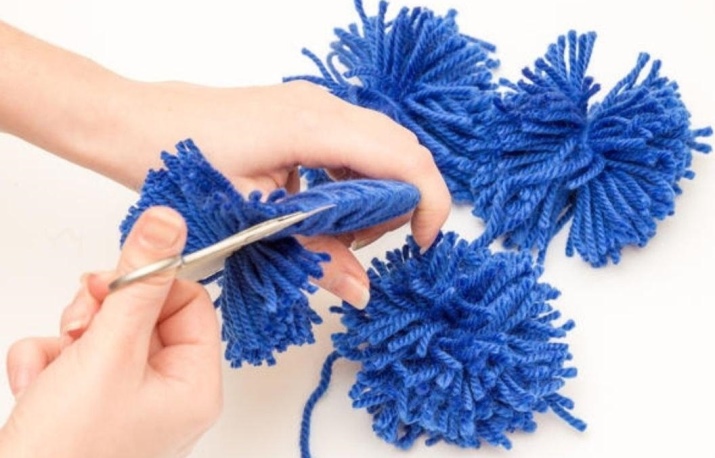
- then it remains only to form balls and trim the edges with scissors.
There is also an option that allows you to make several pom-poms at once, which significantly saves you time and shortens the process of creating a rug. To do this, you must adhere to a certain sequence of actions.
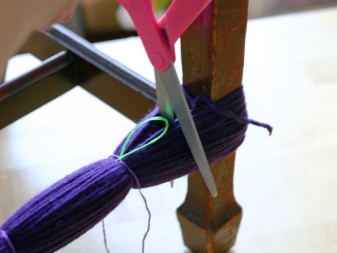
- You need to take the most ordinary chair or stool with four legs, turn it over with the seat down and fix it on the surface of the table or sofa.
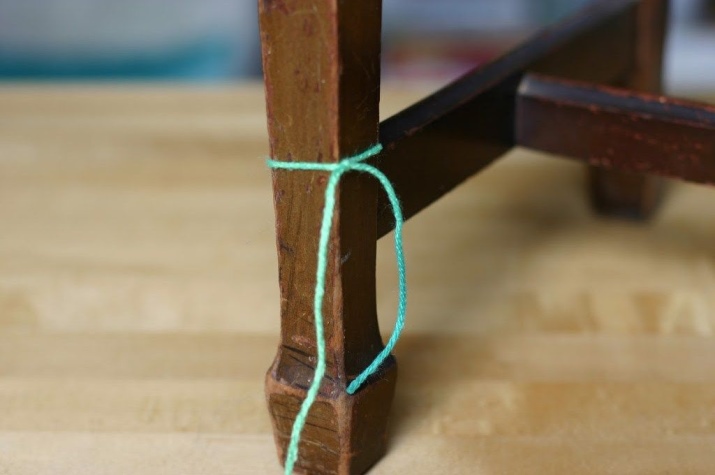
- The threads are wound between two adjacent legs. You adjust the winding density in accordance with the size of the pom-poms that you want to get in the end.
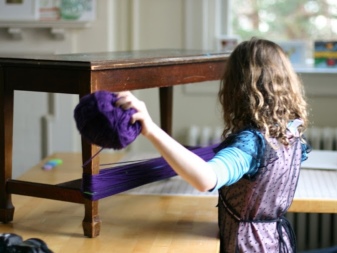
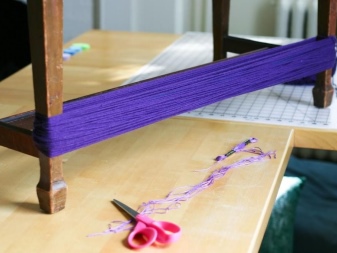
- Next, using a measuring tape, you need to determine the places where the wound yarn will be pulled over. Then you need to carry out the hauling.
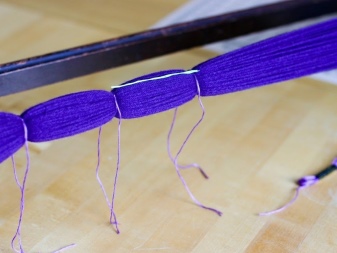
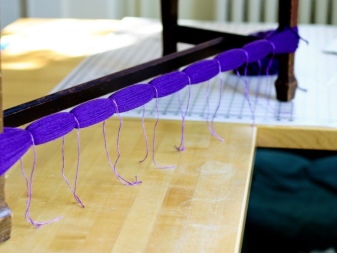
- Then we outline the places where the cuts will be made, and remove the product from the chair legs. Using scissors, cut the threads in the designated places, fluff up the pom-poms and trim the ends.
Thus, you can choose any available and suitable method for making pom-poms. After all the main parts are ready, you can proceed to the next stage of manufacturing.
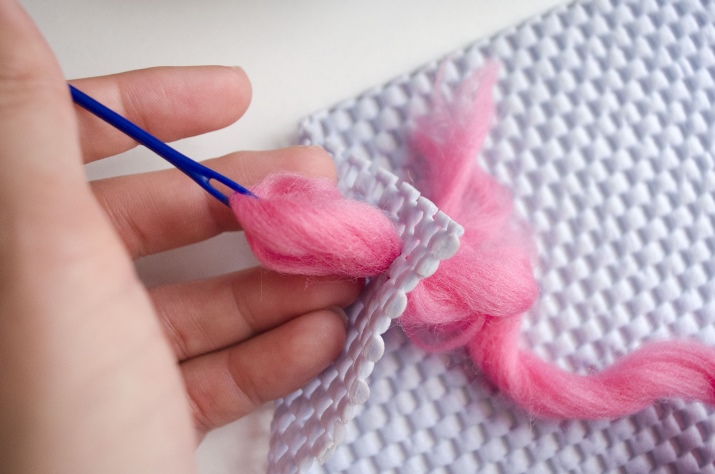
Assembly
The final stage is the assembly of the rug. Depending on which base you have chosen for your rug, you need to sew or tie the pom-poms, placing them as close and tight as possible to each other.
If you are tying pom poms, the ends must be trimmed, and for reliability, you can glue the knots with silicone glue.
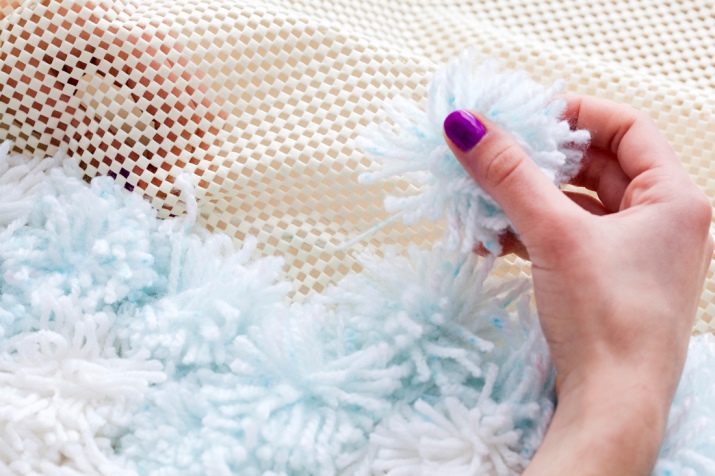
Also, when assembling the rug, you need to adhere to the drawn up scheme so that the pattern or ornament turns out the way you intended it.
Mesh-based rugs can be additionally sheathed with fabric on the reverse side to make their appearance as neat as possible, and the product itself lasts much longer.
How to make a carpet from pompons with your own hands, see below.


