Loop stitches in the sewing machine: causes and remedies
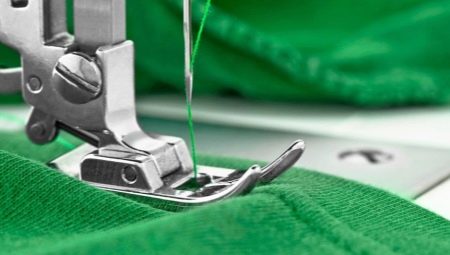
In the process of working with the sewing machine, it happens that the lower thread of the seam begins to twist. The most common cause of this problem is an insufficiently tensioned thread. The stitching is made uneven in the bottom row, which, as it might seem, is due to the lower thread, but do not be mistaken. The cause of the looping is precisely the upper thread, and if you pull it according to all the rules, the undesirable phenomenon should disappear.


It's just that it's not always easy to solve the problem, and the action taken may not give positive results. Let's find out why the sewing machine sews with loops, what is the root cause of this effect and how to fix this problem.

Causes
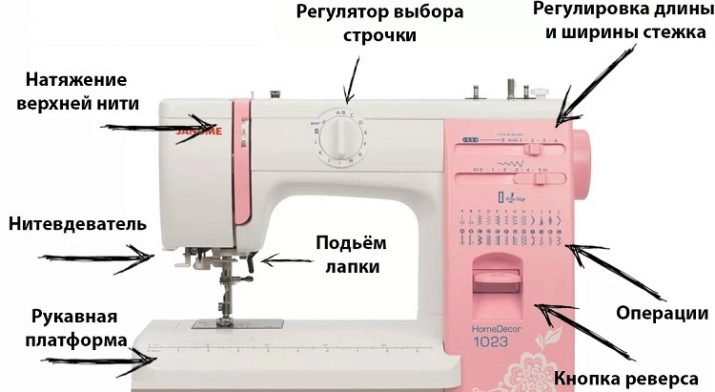
The key point at which the seam begins to loop is improper thread tension. The upper thread often loops, and therefore loops appear at the bottom of the seam. In this situation, you can try to increase the thread tension. If the malfunction disappears, then, from the very beginning, the wrong settings were simply selected. If there have been no changes, a deeper setting is required. Usually, to eliminate the problem, the shuttle course is debugged.
Looping of the lower thread occurs much less often, but adjusting its tension is more problematic. A loop appears when the thread is not completely pulled into the stitch. The reasons for this can be very different. Some of them are elementary and quickly removable, others require thorough intervention.
The most common causes of persistent or intermittent stitching are as follows.
- "Braking" in the process of moving the thread in the stitch. Regular maintenance, timely cleaning of the machine allows you to insure yourself against this trouble. The braking can also be caused by incorrect selection of threads. Poor thread quality is one of the main factors for looping. This happens due to the fact that when sewing, an excess of thread is created, which is not tightened in time, as a result, a loop is formed.
- The hardest part is to uncover the causes of the repetitive looping. This problem can be caused by anything from inaccurate shuttle adjustment to minor seizures on the shuttle. Sometimes it may take a very experienced specialist a long time to find the causes of such a malfunction. It is almost never possible to solve the problem on our own. The danger of episodic looping is its unpredictability. Only now the machine sewed almost flawlessly, and suddenly the seam becomes of poor quality. Tension adjustment is indispensable in this matter, since the reasons are hidden in the device of the machine.
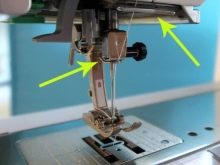
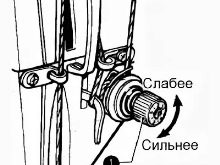
- Reducing the stiffness of the upper thread tensioner spring. During operation, the tensioner spring gradually becomes weaker and is unable to transfer the required force to the thread hold-down washers (plates, clamping discs). This leads to excess thread and, as a result, the appearance of loops. Normal compression / expansion of the spring can be impeded by the pinched axle of the tension adjuster. The thread tension also changes almost constantly as a result of the deformation of the spring coils.
- Tensioner plates not fully clamped or not clamped at all... When the presser foot is raised, the clamping discs are unclenched, as a result of lowering, they are compressed and clamped the thread. In some episodes, squeezing is not performed, the thread is not pulled. The thread starts to run freely, as a result of which the sewing machine sews in loops at the bottom. Basically, such a defect is associated with mechanical wear of the plates, for example, the appearance of rust on their surface, warpedness, and so on. To resolve the issue, the tensioner module is completely disassembled and adjusted.
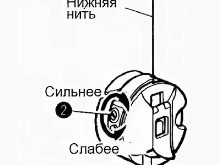
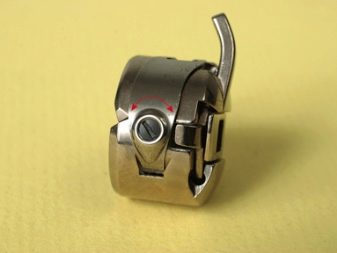
- Incorrect setting of bobbin thread tension. This problem is common and every time it causes the bobbin thread to loop. As a rule, it is associated with the desire to adjust the thread tension yourself. The bobbin thread tension is increased by the screw on the bobbin case. The operation is straightforward, but there is a great risk of overdoing it. As a result, the thread tension becomes excessive.
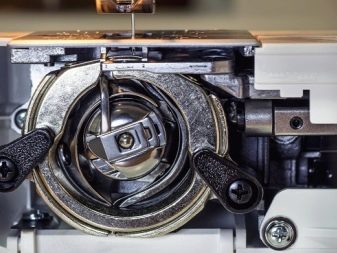
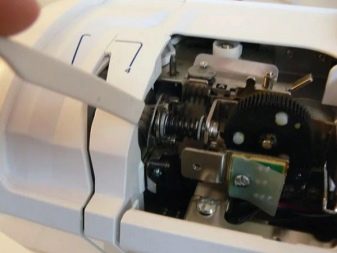
- Seizure and defects on the surface of the shuttle. This problem often appears after a long period of inactivity of the equipment. Roughness, scuffing, irregularities on the surface of the shuttle create obstacles during the movement of the thread, as a result, a loop will appear.
If seizures appear on the bobbin case, you can simply replace it and grind the hook.

Eliminating the problem
As already mentioned, looping occurs, as a rule, due to a weak upper thread tension or too strong a lower thread tension. In order to adjust the tension of the 2 threads, you should make sure that there are no obstacles on their way to the material in the form of scoring, bends, dirt and the like.
When adjusting, do not forget that weak tension is the cause of a weak seam (in this case, there may be no looping), strong tension is the cause of frequent breaks of any of the threads.
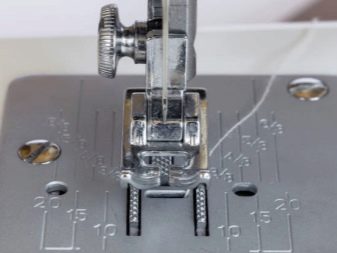
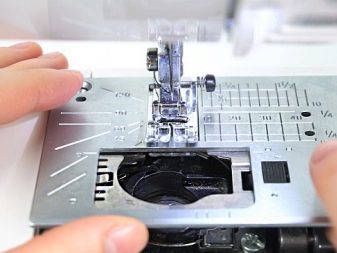
If the problem persists with the thread tension adjusters, you need to look at the presser foot against the plate... To do this, set the needle to its lowest position (so that the comb does not look out of the needle plate). Press on the presser foot with your finger and see if the foot itself dangles. If it is loose, it means that the presser foot does not properly press the fabric against the needle plate during sewing, which prevents both threads from intertwining with each other on the fabric.
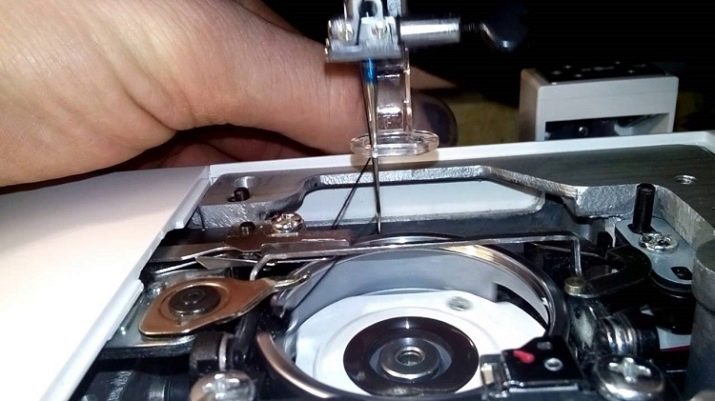
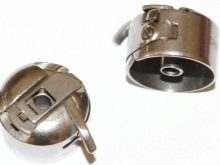
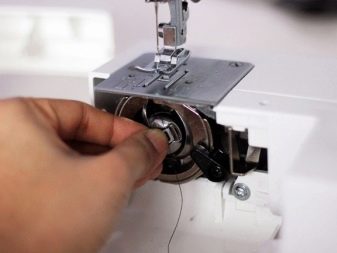
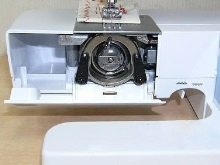
Fixing this crash is very simple. It is necessary to inspect the bobbin case and the bobbin itself. To do this, we insert it with threads into the cap, pull the end of the thread into the slot intended for it and, holding the cap with one hand, slowly stretch the thread with the 2nd hand for 5 centimeters. We carefully monitor whether the bobbin lingers in the cap during the thread pulling. If the bobbin runs smoothly in the cap, place the entire set in the hook (bobbin holder), as in the first time, pull the end of the thread, and carefully monitor the bobbin delays.
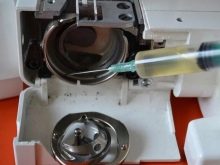
If the thread slows down from time to time, this will cause the loop. In this situation, remove the stitch plate and clean it from below between the comb teeth, as well as the shuttle kit itself. We lubricate everything.
We put the stitch plate in place, twist it and prepare the machine for operation. We take an unusable rag and run it back and forth for 30 seconds so that the excess oil is gone. Then we start adjusting the threads again.

If this did not work either, therefore, the source is deeper and this concerns the setting of the machine - from the compensation spring to malfunctions in the shuttle (this is the simplest) and from the incorrect ratio of the camshaft to the main shaft to the knocked down adjustment of the thread feed mechanism.
In such situations, knowledge of the machine design is necessary, so it is worth contacting a service technician for help.

Preventive measures
Often, problems with the sewing process appear due to improper use of the unit and lack of maintenance. It is necessary to adjust the equipment in strict accordance with the documentation of the machine manufacturer. Very important:
- carry out the correct threading;
- keep tension under supervision;
- choose threads and needles in accordance with the type and thickness of the fabric;
- lubricate the machine in due time and remove contamination;
- keep it in a dry place out of the reach of children.
The threads and needles must be suitable for the material being sewn. It is contraindicated to sew thick fabric (twill, tarpaulin, jeans, etc.) with a thin needle, otherwise the product will be damaged.
The thickness of the needle and thread is indicated in the number marking.
Advice
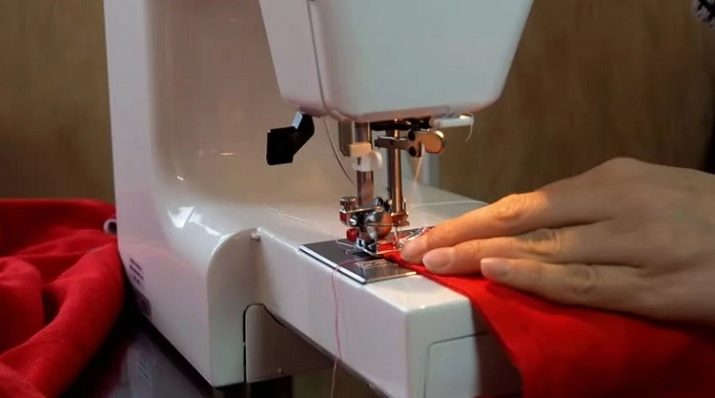
Before starting work, it is necessary to check how easily the mechanisms move, the fastening of the component parts, how easy it is to thread and install the needle. It is forbidden to use rusty, bent and dull needles. First of all, it is advisable to sew the test lines on a small piece of fabric, and then start making the product. The machine is cleaned with a soft brush or napkin.
Tweezers or a needle will allow you to get debris out of hard-to-reach places. Care must be taken to ensure that fluff, thread fragments and dust do not accumulate in the hook and other elements of the machine.... In order to have access to the internal mechanisms, use a screwdriver.
The lubrication interval depends on how often the machine is used. With frequent use, it is advisable to lubricate it with specialized sewing machine oil once a month. When you have to sew infrequently, an ode of lubricant in 6 months is enough. You can buy accessories and oil for your typewriter at specialty stores. The serviceability of sewing equipment depends on proper operation and proper maintenance.
In case of errors in operation, you can eliminate the defect on your own, in case of fundamental malfunctions that require replacement of spare parts, you must contact a specialist.
For how to adjust the stitching on the sewing machine, see the following video.


