How to thread the Singer sewing machine correctly?

Singer sewing machines are perfect for beginners, as they are easy to use. This applies to both new and old machines. A distinctive feature of this brand is the automatic yarn feeder. Here's how to properly thread the Singer sewing machine.
General instruction
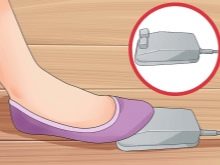
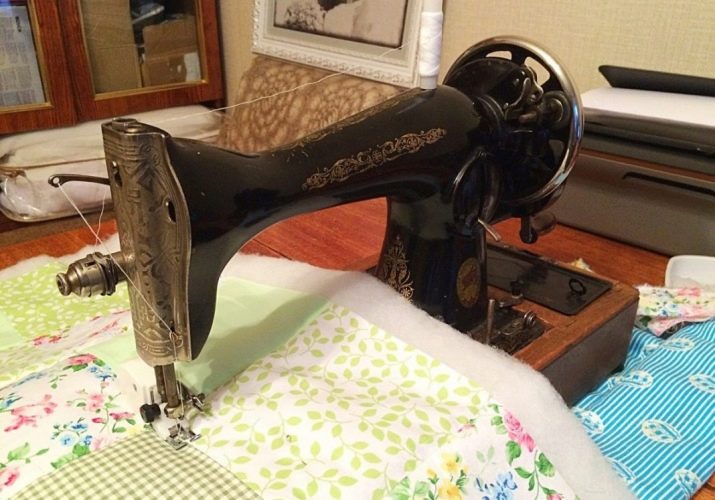
The stitch is an interlacing of two threads - the top and bottom. Therefore, both should be properly tucked in, since each of them affects the quality of the seam.... Most modern sewing machines have a diagram on the body that tells you how to thread the thread correctly. It is more difficult with old-style typewriters, they may differ slightly. If the machine is electric, you only need to thread the thread when the device is turned off to avoid injury to hands and fingers, in case the machine starts sewing.
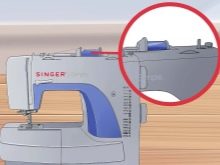
First, the thread is wound onto the bobbin from the main spool. Many models have a special tool to help you do this automatically. There is a thread guide to the left of the spool. The thread is then turned clockwise around the bobbin winder in front of the holder. Next, you need to thread the thread through the hole in the spool itself from the inside out. If there are holes on both sides, then you can pull the thread through.
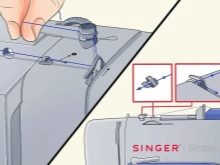
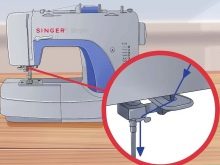
On the right side of the body there is a mechanism for bobbin winding. It is worth placing the spool on it, be sure to fix it. The free end of the thread should stick out from the top of the spool. To turn on the winding mode, you need to take the spool to the right. Next, press the pedal and hold the tail for the first windings of the thread. If everything is done correctly, the thread will start to wind, while the flywheel remains motionless.The needle should not sew. As soon as the required amount of thread has been wound, the winding will turn off automatically.
Then you need to cut the thread and remove the bobbin. For this, the mechanism is moved to the left. The machine will not start sewing until it is in its original position. The protruding free end of the thread should be cut so that it does not interfere.
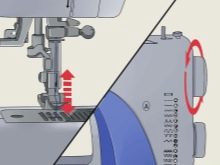
Now you can start drawing the upper thread. To do this, the machine is turned off to avoid injury to hands and fingers. Turning the handwheel towards you by hand, you should raise the needle up, and then the foot.

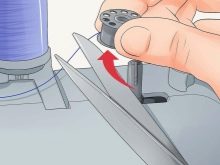
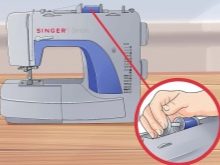
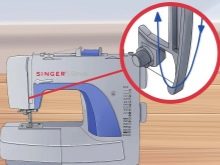
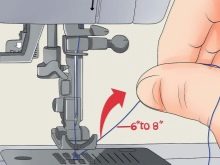
The coil is installed on a special holder and secured with a cap. If the spool is large, the wider side of the cap should be pointed at it, and vice versa. To the left of the spool there are clamps through which you need to pull the thread, the second of them is the pre-tension spring. You can pull the thread through the modular compartment and then up through the thread guide. The thread is then pulled through the lower thread guide. Thread the sewing needle from front to back, stretching it about 10-15 cm.
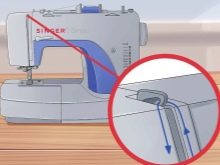
Some Singer machines are equipped with an automatic filling device. You can use it to thread the needle. To do this, you need to click on it so that it goes down as low as possible. It is worth looping the thread around the hook to the left of the needle. Holding the thread in front of the needle, loop it around the second small hook on the right from bottom to top.
Next, you need to return the lever of the device to its original position. This will start the threading process of the needle. It turns out a turn for which you need to pull the thread.
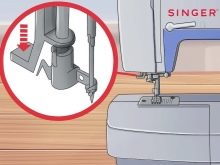
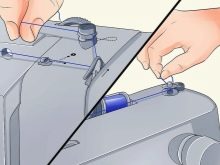
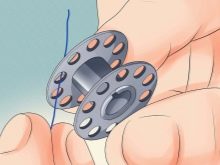
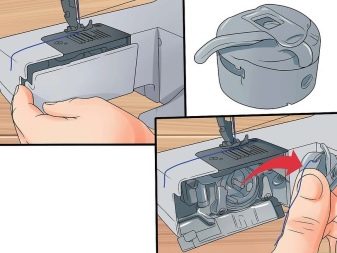
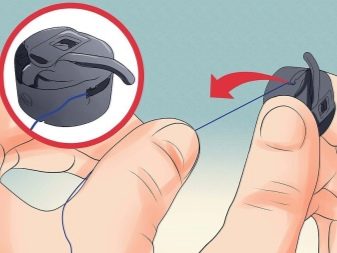
Now you need to insert the bobbin. To do this, remove the cover and remove the bobbin case, just pull on the tip. The spool should be inserted into the cap so that the thread is in a clockwise direction. The tail of the thread should be passed through the slot to the end, the tip should stick out at least 10 cm. Insert the shuttle back into the nest. If the position of the bobbin is horizontal, then the cap is not provided.
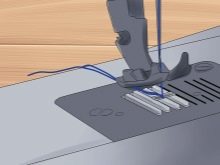
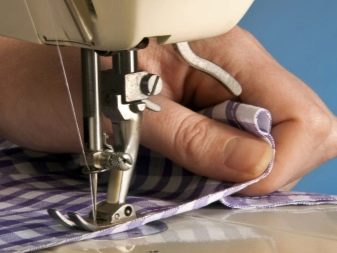
Close the cover. Now the bobbin thread is pulled up. To do this, the handwheel needs to make a full turn so that the needle goes down and up. The upper thread will draw out the loop, which you need to gently pull. Both threads are guided under the foot.
Process differences for old and new machines
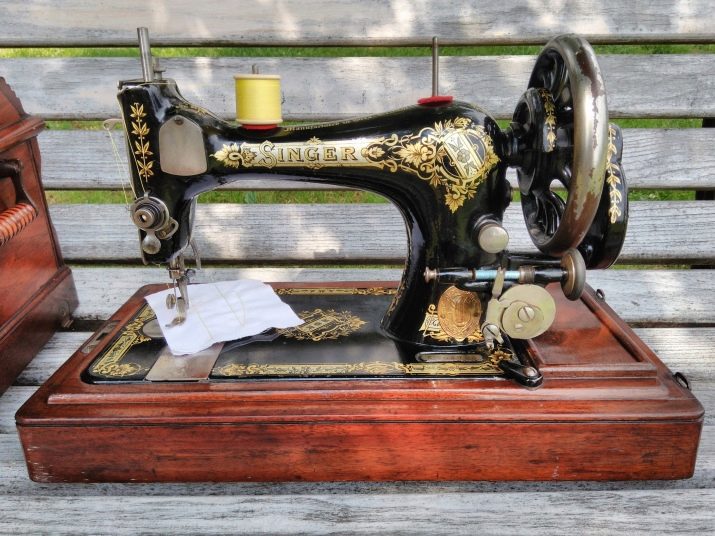
Older Singer models have hand or foot control. The latter are more cumbersome. They are heavy, but reliable, do not depend on electricity and are capable of performing the entire minimum set of functions; moreover, they perfectly stitch thick fabrics or several layers. The American Singer and the Soviet Singer have no special differences.
In general, threading on old models is not much different from modern ones. Unless not everyone has a tensioner, as a result of which the thread is passed through the yarn guide, and then through the eye of the needle. The first step is to select the appropriate needle for the type of fabric and wind the thread around the bobbin. When the thread is threaded, it becomes more difficult to wind around the bobbin. It is recommended to use one coil to avoid discrepancies in color and thickness.
The thread is wound by hand for a long time and unevenly. You can use the reception of experienced seamstresses. The coil is put on a needle or thin stick, which will need to be held.
Then the bobbin is pulled close to the flywheel. During its operation, the bobbin also starts to rotate and winds the thread. This method requires some dexterity, as the coil easily flies off the needle.

The second step is to thread the upper thread. The spool is installed on the core, and the yarn feeder is brought to the uppermost position. The thread is pulled through a recess on the front board on the left, then between the washers (discs) of the tension adjuster.
If the thread is tight between the washers, you can twist them, otherwise the thread will break. It can then be pulled up through the hook of the thread take-up spring, if there is one.Again the thread is pulled up and through the eye of the thread take-up, dropped down through the hooks of the thread guides or crocheted over the needle, depending on the model, and finally passed through the needle.
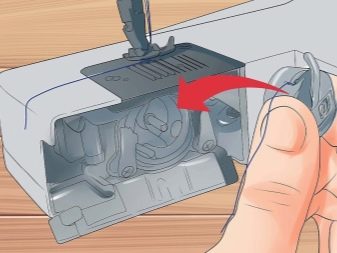
Next, you need to insert the bobbin into the hook. On modern Singer sewing machines, it often has a convenient horizontal position. On older models, the hook is vertical. The bobbin is inserted using a special cap, through the slot of which the thread is pulled. Ideally leave a ponytail about 10 cm.
The needle must be lifted. Now it is worth placing the bobbin in the cap in the slot. The locating pin should line up with the notch on the plate. If there is a click, then it snapped into place, otherwise it is necessary to remove it and carefully reinsert it. While holding the upper thread, you can turn the handwheel towards you one full turn. A loop appears on the upper thread for pulling the bobbin thread. There should be 2 threads coming out of the foot.
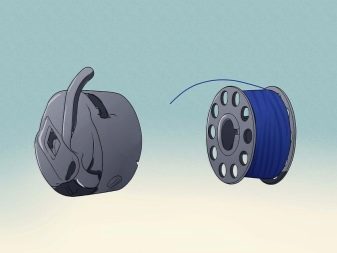
There are also bullet-shaped bobbins in older models. The thread is evenly wound on it from left to right, then the spool is inserted into the bullet with the pointed end. The end of the thread must be pulled through the slot until it stops, around the sharp corner, passed through the spring and pulled up the bullet until it clicks. If the bobbin is in the form of a boat, then there are holes that are responsible for the tension of the thread. The more holes the thread passes through, the stronger the tension will be. The principle of winding and stretching the thread is the same as that of a bullet.
Checking the correct filling
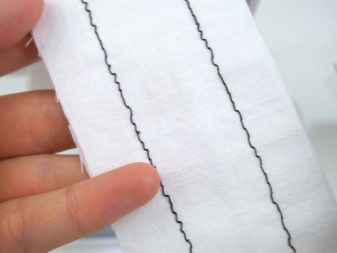
Now you need to check if the thread is threaded correctly. To do this, you need to take a small piece or flap of fabric, fold it in half and sew. The seam should be straight. You can then try stitching more layers, for example folding the flap again.
Fabric should not pucker, stitching should not be interrupted or skipped... Otherwise, this may indicate a breakdown of the machine or the need to adjust the tension. You can also change the stitch pitch. Improper threading will result in a sliding stitching that can ruin the appearance of the fabric.
Possible mistakes
If the stitch starts to loop and rings are formed, the thread is not threaded correctly. There is no tension here or it is very weak. Check if the thread guide is working properly. Poor stitching can also be caused by improper needle placement or fabric mismatch. If the needle does not enter the hook, no loop will form. Here you need to lower the needle.
The seam can be looped due to a malfunction of the tension spring. To check, you need to raise the foot and pull on the thread. Then lower the presser foot and pull again. You need to do this several times. If there is no tension, then the tensioner spring is not working well. Too much tension is also bad. If the fabric is gathering, the point is in the shuttle, you need to adjust the tension and there or simply reduce the stitch pitch. Thin fabrics are more likely to face this problem.
If threads of different colors are used, then they must be of the same thickness or the lower one is slightly thinner, but not vice versa. Otherwise, there will be problems with the stitching. A damaged bobbin or hook can also prevent the threads from flowing freely. Only a repairman will help here.
In general, Singer sewing machines have proven their quality and ease of maintenance over time. Most antique models are in working order for many years or continue to work after being refurbished. Modern models are easy to operate, and even threading is not particularly difficult.
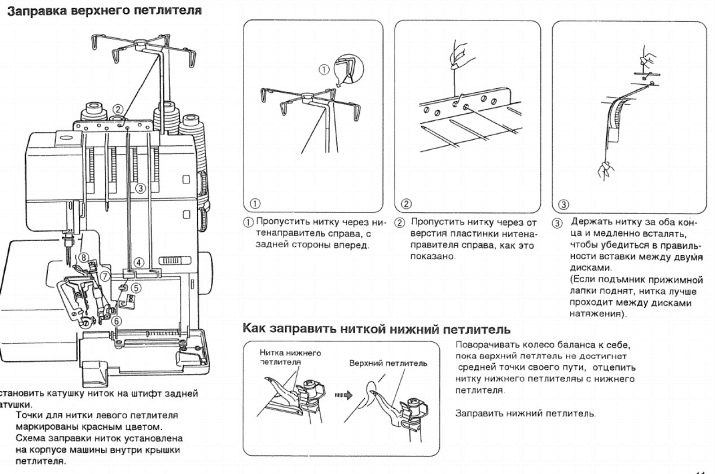
Threading and winding of the Singer 7105 sewing machine is shown below.


