Why does the bobbin thread get confused in the sewing machine and what to do about it?
Uniform and high-quality stitching of seams at any time can be complicated by the appearance of extra knots, irregularities in the stitches, layering them on top of each other with a violation of the smoothness of the stroke.

Bobbin thread loop
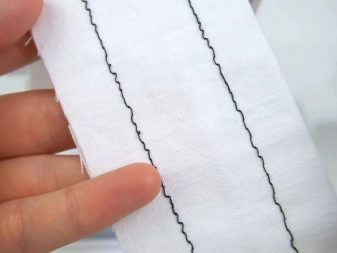
The ideal seam is a stitch in which there are no loops at all, crawling out onto the surface of the fabric from either side. The upper thread is inserted behind the lower thread at the seams of the stitches approximately in the middle of the thickness of the layer (or several layers) of the material. Loops going up indicate looping of the bobbin thread, and vice versa. The reasons why the machine dodges are as follows.
- The thread on the bobbin is wound in bulk. Because of this, its tension fluctuates sharply and chaotically. In this case, the seam turns out to be ideal in some areas, then the upper thread is visible from below, then the lower one - from above. Use the original thread winder. If you work with a single-thread sewing stapler, you can make a bobbin winder based on a small motor powered by a battery or accumulator.
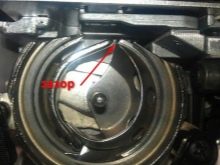
- The thread tension from the bobbin is not sufficient. The slit in the shuttle plate is not positioned correctly. You will need to adjust the shuttle itself. By changing the thread (thickness, material), adjust the hook itself. Check that the thread from the bobbin is unwound with little effort.
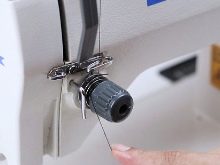
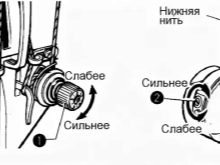
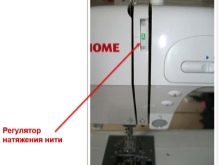
- The upper thread is too tight. Adjust its tension using the adjuster - it is marked with numbers on a circular scale. Set the correct value - it should correspond to the thread itself and the execution of the fabric to be sewn.
- The bobbin is chipped, chipped. The plastic bobbin is deformed. Change it to one that won't let you down for years.You can sharpen the burrs with a file with a fine-abrasive surface or the same sandpaper, remove the burrs with a particularly hard knife (for example, a scalpel). It happens that the damage to the bobbin is so slight that it will not be difficult to smooth it out. If the cap and the bobbin itself are damaged thoroughly - in notches and dents, then replace these components. Bobbins and caps are often sold in a specialized sewing store, which is sure to be found in every more or less large city.
Perhaps, after all these checks and actions, the machine will work again normally, without deviations.
The machine chews the thread from below
The confusion in passing the bobbin thread happens for a variety of reasons.
- Needle thickness, thread and fabric to be sewn do not match... A needle that is too thin will get caught in thick fabric. Too thick thread is forced through the eye of the needle. Excessively thin material for a thick thread and a thin needle will lead to the formation of large holes in which the stitches can fall out, "pull up", the seam will immediately change its evenness and flawlessness.
- The blunt needle tears the fabric. The twisted and uneven thread immediately twists, forming knots already when sewing.
- The rack is not positioned properly (as indicated in the instructions) in the area of the teeth or bridge. The teeth on the rail became dull, she herself suddenly began to shift in the wrong direction. Most often, the latter happens when the needle has already passed through the fabric for the first time, and the shuttle is triggered in response.
- The thread tensioner is defective or incorrectly set.
- The lower part of the sewing foot is broken or defective. The foot itself is excessively weakened and does not grip the fabric tightly, which causes it to slide in different directions.
- The bobbin dangles in the cap, "walks", because of which the thread tension can also change in a "jerky" rhythm. Either the bobbin cap retainer is broken, the bobbin is loose or falls out altogether.
- Friction washer installed incorrectly on the main drive wheel.
- The thread tension does not match the thickness, the stiffness of the material being sewn.
- The bobbin-to-hook bobbin thread suddenly broke. Before that, it can rush around the entire bobbin (for example, if it is wound randomly), and the formation, retraction of the resulting loops of this thread into the fabric stops abruptly.
- Needle plate clearance set incorrectly... In this case, the course of the needle, its passage through the fabric has a deviation from the norm.
- The upper thread itself is not threaded correctly... The sequence specified in the instructions has not been followed.
- When manufacturing, the thread is twisted not to the left, but to the right. The "right" thread is often twisted in the wrong place, which is why the stitches get confused and layered on top of each other, turning into something that remotely resembles a ball of thread.
- Wrong design of bobbins or bobbins, an attempt to use thick and tall bobbins for a sewing conveyor on a simple home machine.
- In the process of sewing, you pull, push the fabric by hand, as if forcing the machine to accelerate and sew faster. It's impossible. Each machine has its own throughput (number of stitches per second, minute) - do not try to "cheat" a well-tuned and debugged mechanism. By practicing pushing and pulling the fabric, you run the risk of tearing the fabric, breaking one or both threads.
Other reasons may be related with wear and tear, the final failure of certain parts of the machine. Replacement of worn out elements will be required. You can do it yourself, by finding the part you need (or several parts) in an online store, or in the market in your city or region, or immediately contact a service center that repairs sewing and knitting equipment.
In electronic typewriters, malfunction can also be triggered by a failure or inadequate operation of the ECU board.
Bobbin thread adjustment
So that the bobbin thread does not get confused, forming a bundle, and does not crawl upward, did not form overlapping knots of stitches, follow a series of steps.
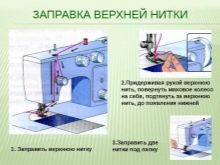
- Check that the upper and lower threads are threaded correctly. If you notice inaccuracies or when there is no time to figure out where what was missed, pull out the upper thread and thread it again, carefully observing the sequence for threading it in. The sequence of threading the upper thread is most often as follows: the upper thread guide - the first part of the canal before the tensioner - the tensioner itself - the second part of the canal up to the second thread guide - the thread reversal on it - the third part of the canal (if any) - the drain loop on the needle bar - the eye of the needle - the slit paws. Then take the thread to the side. Set the tensioner to the desired value using the knob, which is marked with a circular digital scale.
It is useful to use the previously made marks - which thread and which fabric, which needle corresponds to the value on the tensioner regulator.
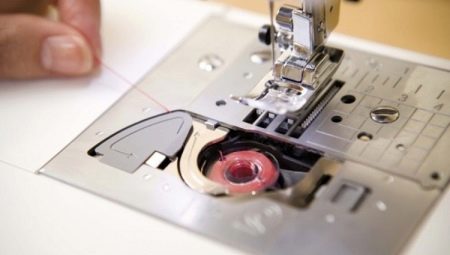
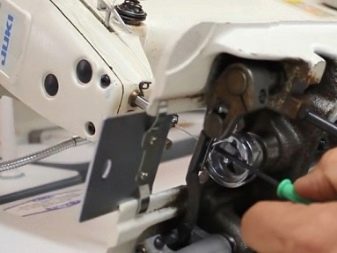
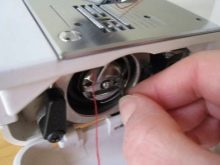
- For the bobbin thread, pull out the bobbin case by lifting the hook plate of the hook compartment.... Check that the thread on the bobbin is wound evenly and neatly, that the thread itself does not run out (the bobbin would be almost empty). Reinsert the bobbin into the cap and turn the tensioner screw with a screwdriver - the thread should wind up with little effort. Make sure you use a smoother, more elastic thread - a coarser one, for example, cotton fiber, would leave "fleece" in the tensioner and clog it over time. Insert and lock the bobbin cover - you will hear a click when it locks. Make sure the bobbin is seated securely and does not dangle in different directions.
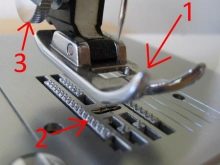
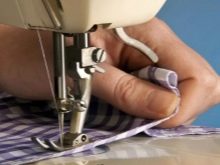
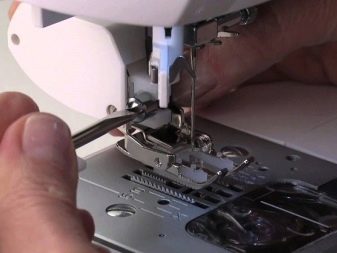
Pass the end of the thread through the gap in the needle plate, bring the end out 10-15 cm, bend it over the notch of the foot and pull it aside along with the end of the upper thread. Now try sewing an orientation seam on the test patch. Its quality (no tangle and no jamming of threads, skipped stitches) will immediately be noticeable.
If all else fails, change the tension of the upper and lower threads until you achieve the best result.


Conclusion
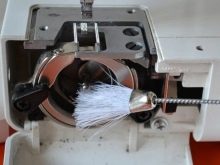
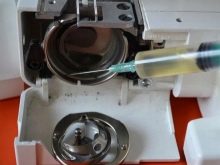
There are times when even the most careful setting and debugging of the machine will not give the desired result - and you have not achieved the quality of the seam, no matter what you do. The only solution is to disassemble, clean and lubricate the sewing machine. Defective (wear, oxidation, breakage) parts should be replaced as soon as possible.
For information on what to do if the bobbin thread winds or loops, see the next video.


Thanks for the great article! A lot of useful information.