Foot sewing machines
In the middle of the 19th century, it was not affordable for everyone to sew a thing to order or to repair it, since the services of tailors were expensive. Fortunately, a foot sewing machine appeared, which made life easier for many housewives. Over time, she began to improve, which helped create real masterpieces.
History
A sewing machine with a foot does not have many functions and stitches to be used in special tailor shops. But for work at home, such a machine was the best option. Working with a foot-operated drive, hands remained free, which made it possible to speed up the sewing process and improve the quality of the product.
It is known that the creator of this model was Isaac Singer... It was he who made it so that the tailors could move the fabric in different directions and create unusual seams. With the advent of the foot drive, the seams became longer, which made work faster.
It was also known that before Singer, there were other creators of foot-operated sewing machines, but they never made it into history. The fact is that for the official approval of the manufacture of machines, it was necessary to pay for a patent, which Isaac's predecessors did not do and became supporters of the creation of new models.
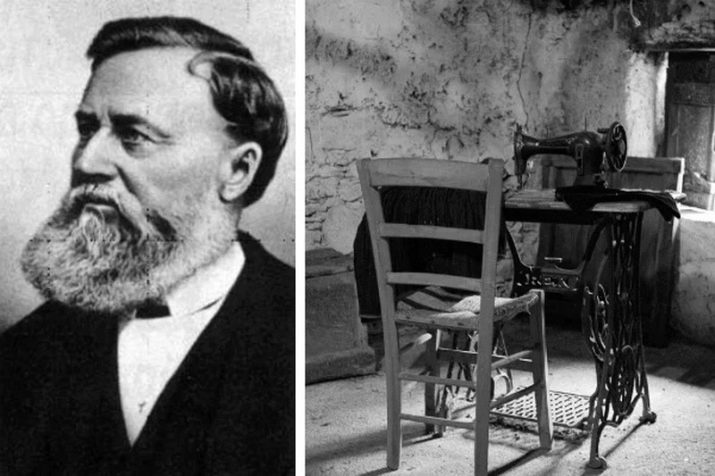
The designer of the machine made the needle move vertically instead of horizontally as in previous models. Then he improved the device with a special foot, which was held by a gear wheel. Due to these mechanisms, the fabric was fixed and moved freely in the direction in which the tailors would direct it.
3 years after the creation of his first model, Singer founded his company, where improved models were already created, with the help of which it was possible to make complex seams and do it much faster. Over time, cars began to be sold in installments, this was done so that not only rich, but also ordinary people could afford them. That is why the company gained immense popularity, and several years after the opening of the first factory, others appeared, moreover, in different countries.

It is worth noting that Isaac did his best: after all, the first mechanical sewing machine with a foot drive appeared in the middle of the 19th century, and some models are still in operation.
User manual
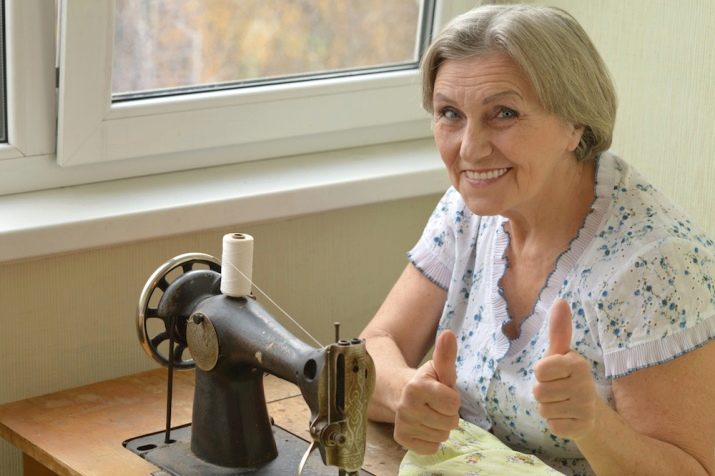
Many housewives still have foot sewing machines, but not everyone knows its instructions for use.
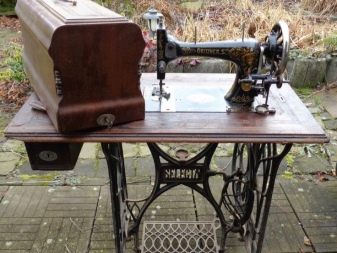
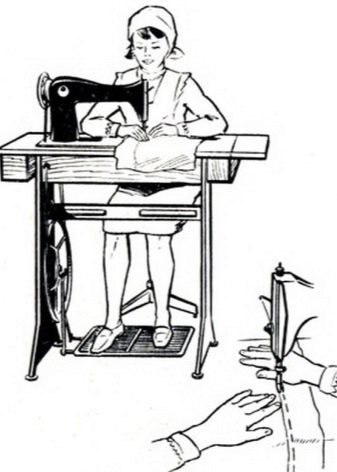
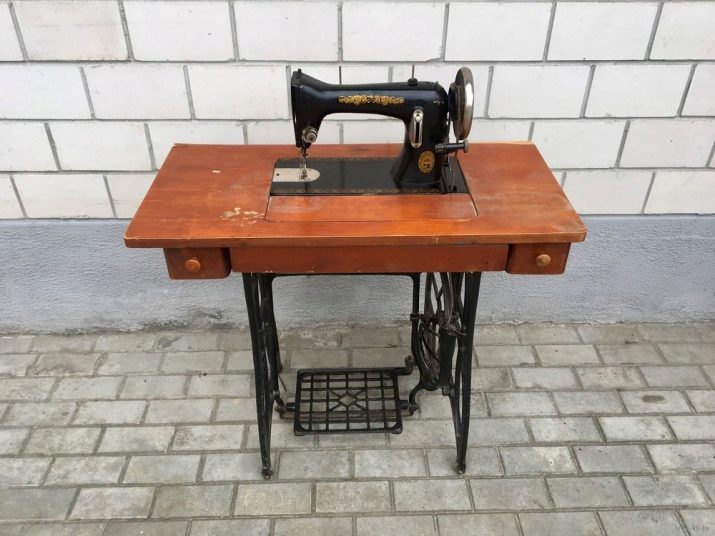
- First, you need to get the machine itself, which is built into the wardrobe table.... To do this, the front valve rises, the machine head is pulled out, and to keep it stable, the valve is lowered.
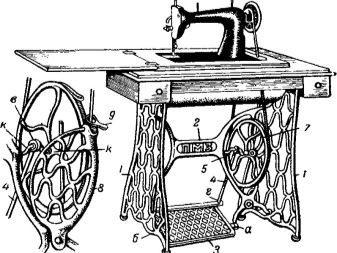
- There is a starter wheel rim that goes with the chute... A round belt is put on it, connecting the flywheel pulley with the starting one. Due to this, rotation occurs.
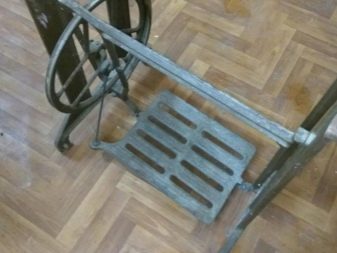
- During operation, constantly press the foot pedals., due to which the oscillatory motion occurs. Thus, the connecting rod and crank begins to rotate, they, in turn, engage the starter wheel.
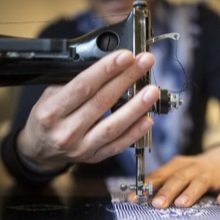
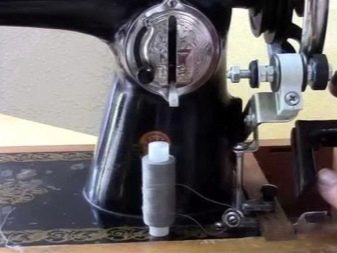
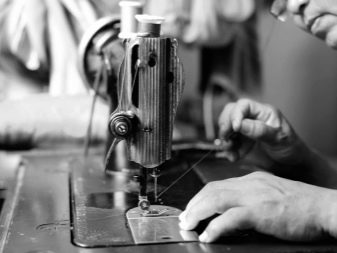
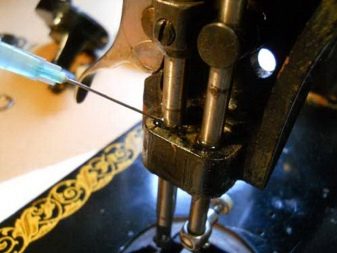
- To thread the thread, you need to rewind it from the spool to the bobbin.... For this, the coil is installed on the upper pin of the machine. Next, thread the upper thread, thread and pull the lower thread. Finally, the upper and lower threads must be passed by the foot.
Working behind such a machine, you should follow the safety rules.
- Constantly monitor the movement of the arms and legs. If the movements are asynchronous, then you can spoil the material.
- After completing the work, the belt must be removed using a special layering, and put it on only before starting sewing. In the process of work, you cannot hold it so as not to get injured.
- When threading a needle, you should watch your feet - they should not be on the pedal.
If you follow all safety rules, then the finished item can be sewn in a short time.
At first, it will be quite difficult for a beginner to work on a foot-operated sewing machine. That's why in order to learn how to control the movement of arms and legs, for a start it is worth learning this idle, that is, just practicing the movements of the pedals.
Repair
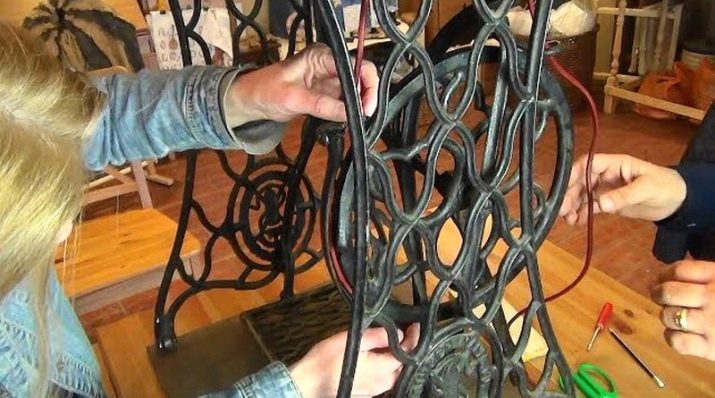
The foot sewing machine is rather bulky, and in the event of a breakdown it is inconvenient to drag it to the workshop. Therefore, those who still use this model should know how to repair it at home.
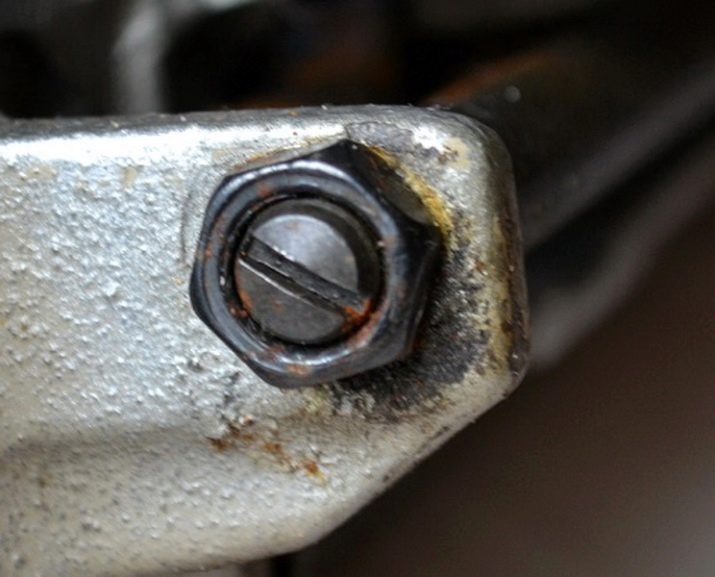
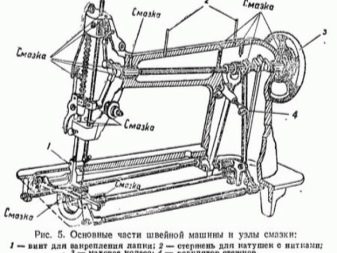
- Loosening the screws... The first step is to loosen the locknuts - an open-end wrench will do. Next, with a regular screwdriver, you can start unscrewing the screws. If the repair has not been done for a long time, then you cannot do without a 6-sided wrench, since the screws, most likely, have stuck well to the bed due to oil and dust. The next step is to thoroughly clean the tapered plane of the screw, lubricate with oil and put in place.
- Adjustment of knots. To get rid of the knocking that comes from the foot drive, you need to firmly clamp the cone. Do not tighten too much, as the problem may reappear. If the knocking persists after tightening the cone, it may be coming from another node in the center of the flywheel where the belt is attached. Disassemble this unit carefully, since there is a bearing on this hinge. If it is intact, then you just need to lubricate it with a special grease by adjusting the gap. Otherwise, the bearing will have to be replaced with a new one.
- Replacing the drive belt. Over the years of operation, the belt wears out, so it breaks quite often. A real belt is made from rawhide, but you can replace it with a regular clothesline or leather belt.If you don't feel like messing around, you can always buy a foot drive belt at a specialty store. If the belt is torn, and the item is not finished, then it can be fastened with a paper clip.
In fact, everything is very simple, so in case of any breakdown, you can always handle it yourself.
Varieties
There are several well-known models of foot operated sewing machines.
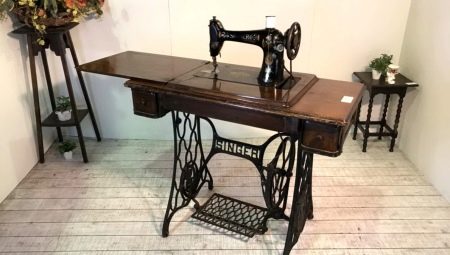
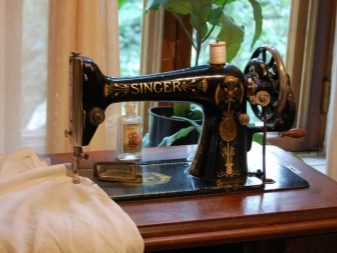
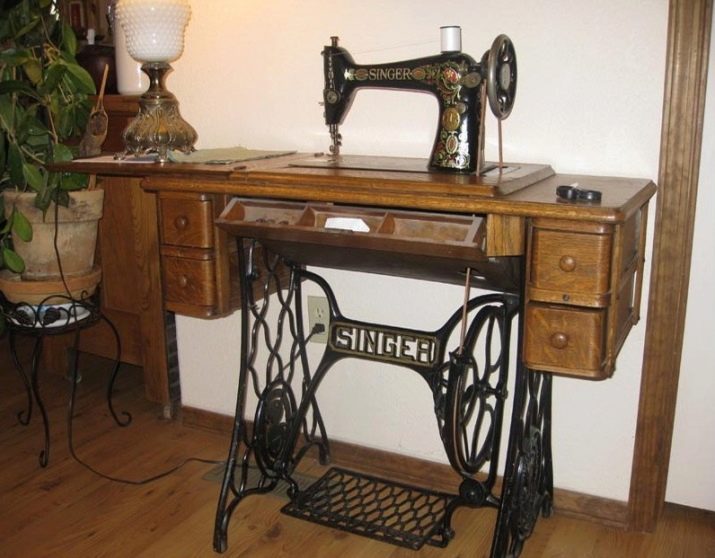
Singer
These antique models were the first to use a foot drive. They say that precious metals were used to make them. By the way, if someone has preserved such copies, then you can check if there is real metal... To do this, you must bring the magnet to the metal frame. If the magnet does not stick, then there really is a precious metal (gold, silver or palladium). The cost of Singer sewing machines is high, but many purchase them to complement the retro style.
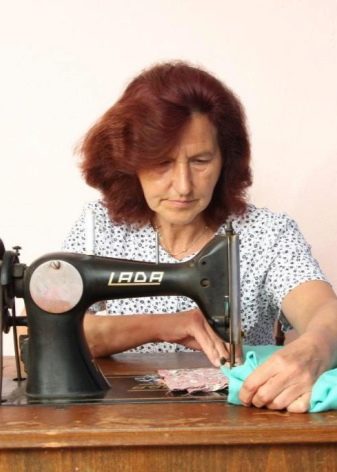
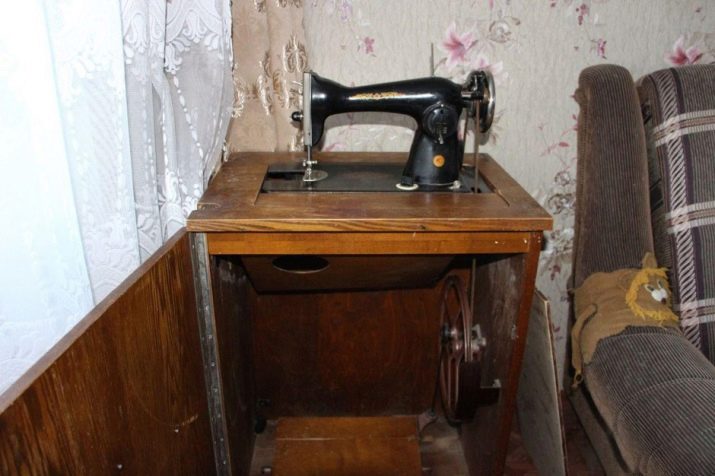
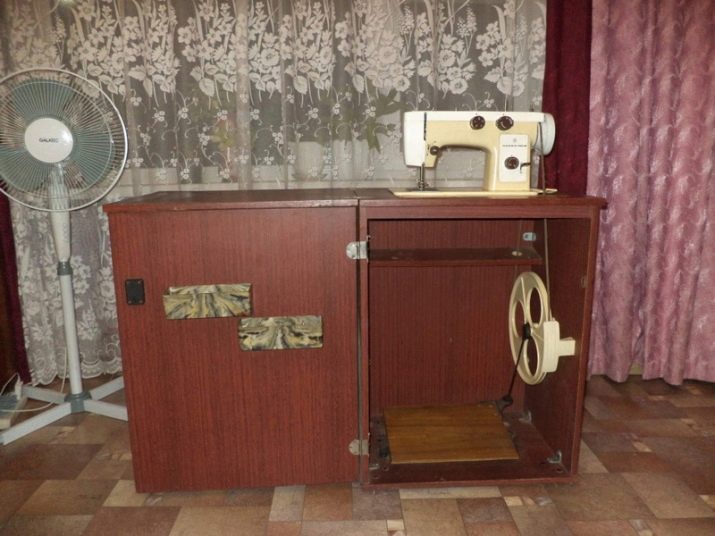
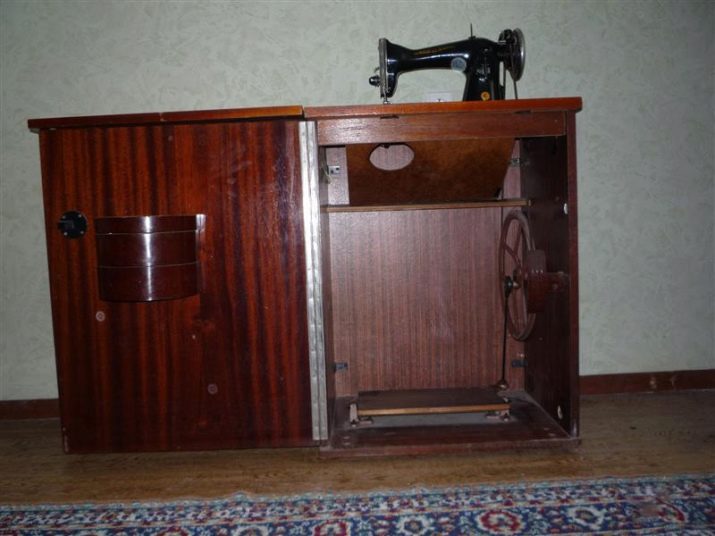
Soviet cars with a curbstone
In the USSR, various versions of machines with a foot-operated drive were manufactured. This model is convenient because in the room, it can be useful as a regular table. And if you need to sew something, then the curbstone can be easily expanded. And also in it you can fold everything you need for sewing.
By the way, a foot machine with a curbstone copes with various types of fabric (linen, wool, synthetics, silk) and performs 2 types of stitches - straight and zigzag.
The sewing machine brand "Seagull". She only sewed straight and zigzag stitches. It was not very popular, because it had its drawbacks - the lack of a special reverse lever.
The famous Soviet model "Podolsk" was the favorite of many seamstresses. In addition to straight and zigzag stitches, decorative stitches could be sewn.
"Orsha"
A feature of the "Orsha" models was centralized lubrication and semi-automatic bobbin thread winding.
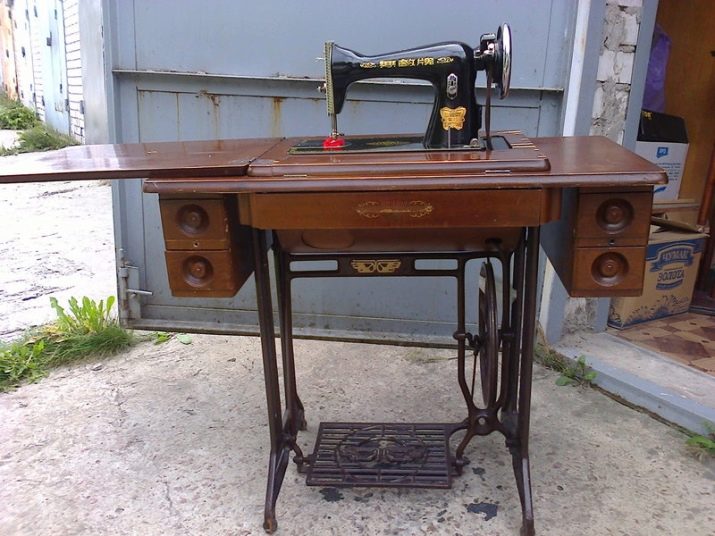
Butterfly
This model is made in China, but it could be purchased in any city in the USSR. This Chinese typewriter looked like a table with two drawers. It was a complete analogue of the first Singer typewriter.
Today, foot-operated sewing machines can only be purchased in antique stores or from someone at home in a second-hand condition. But, despite the fact that the models of sewing machines are being improved every year, complex stitches can also be performed on mechanical machines. The main thing is to be able to pedal correctly and control the movement of arms and legs.
For information on how to learn how to sew on a foot-operated typewriter, see the next video.


